


The high availability (HA) of clusters in production environments should be taken seriously. Kubernetes and AWS EC2 instances are widely used in various production environments. However, running Kubernetes on AWS while ensuring HA can be complex for many users. In this article, we will demonstrate how KubeKey can help you easily deploy Kubernetes on AWS and ensure HA.
To meet the HA service requirements of Kubernetes in AWS, we need to ensure the HA of kube-apiserver. You can use either of the following methods to meet the target:
- Use AWS ELB (recommended).
- Use keepalived+haproxy to implement load balancing for kube-apiserver.
This article uses the AWS ELB service as an example.
Prerequisites for Deployment on AWS
- You need to create a storage system based on NFS, GlusterFS, or Ceph. In consideration of data persistence, we do not recommend OpenEBS for production environments. This article uses OpenEBS to configure LocalPV as the default storage service only for testing.
- All nodes can be accessed over SSH.
- The time of all nodes must be synchronized.
- Red Hat systems contain SELinux by default. If you use a Red Hat system, you need to disable SELinux or set SELinux to the permissive mode.
Hosts
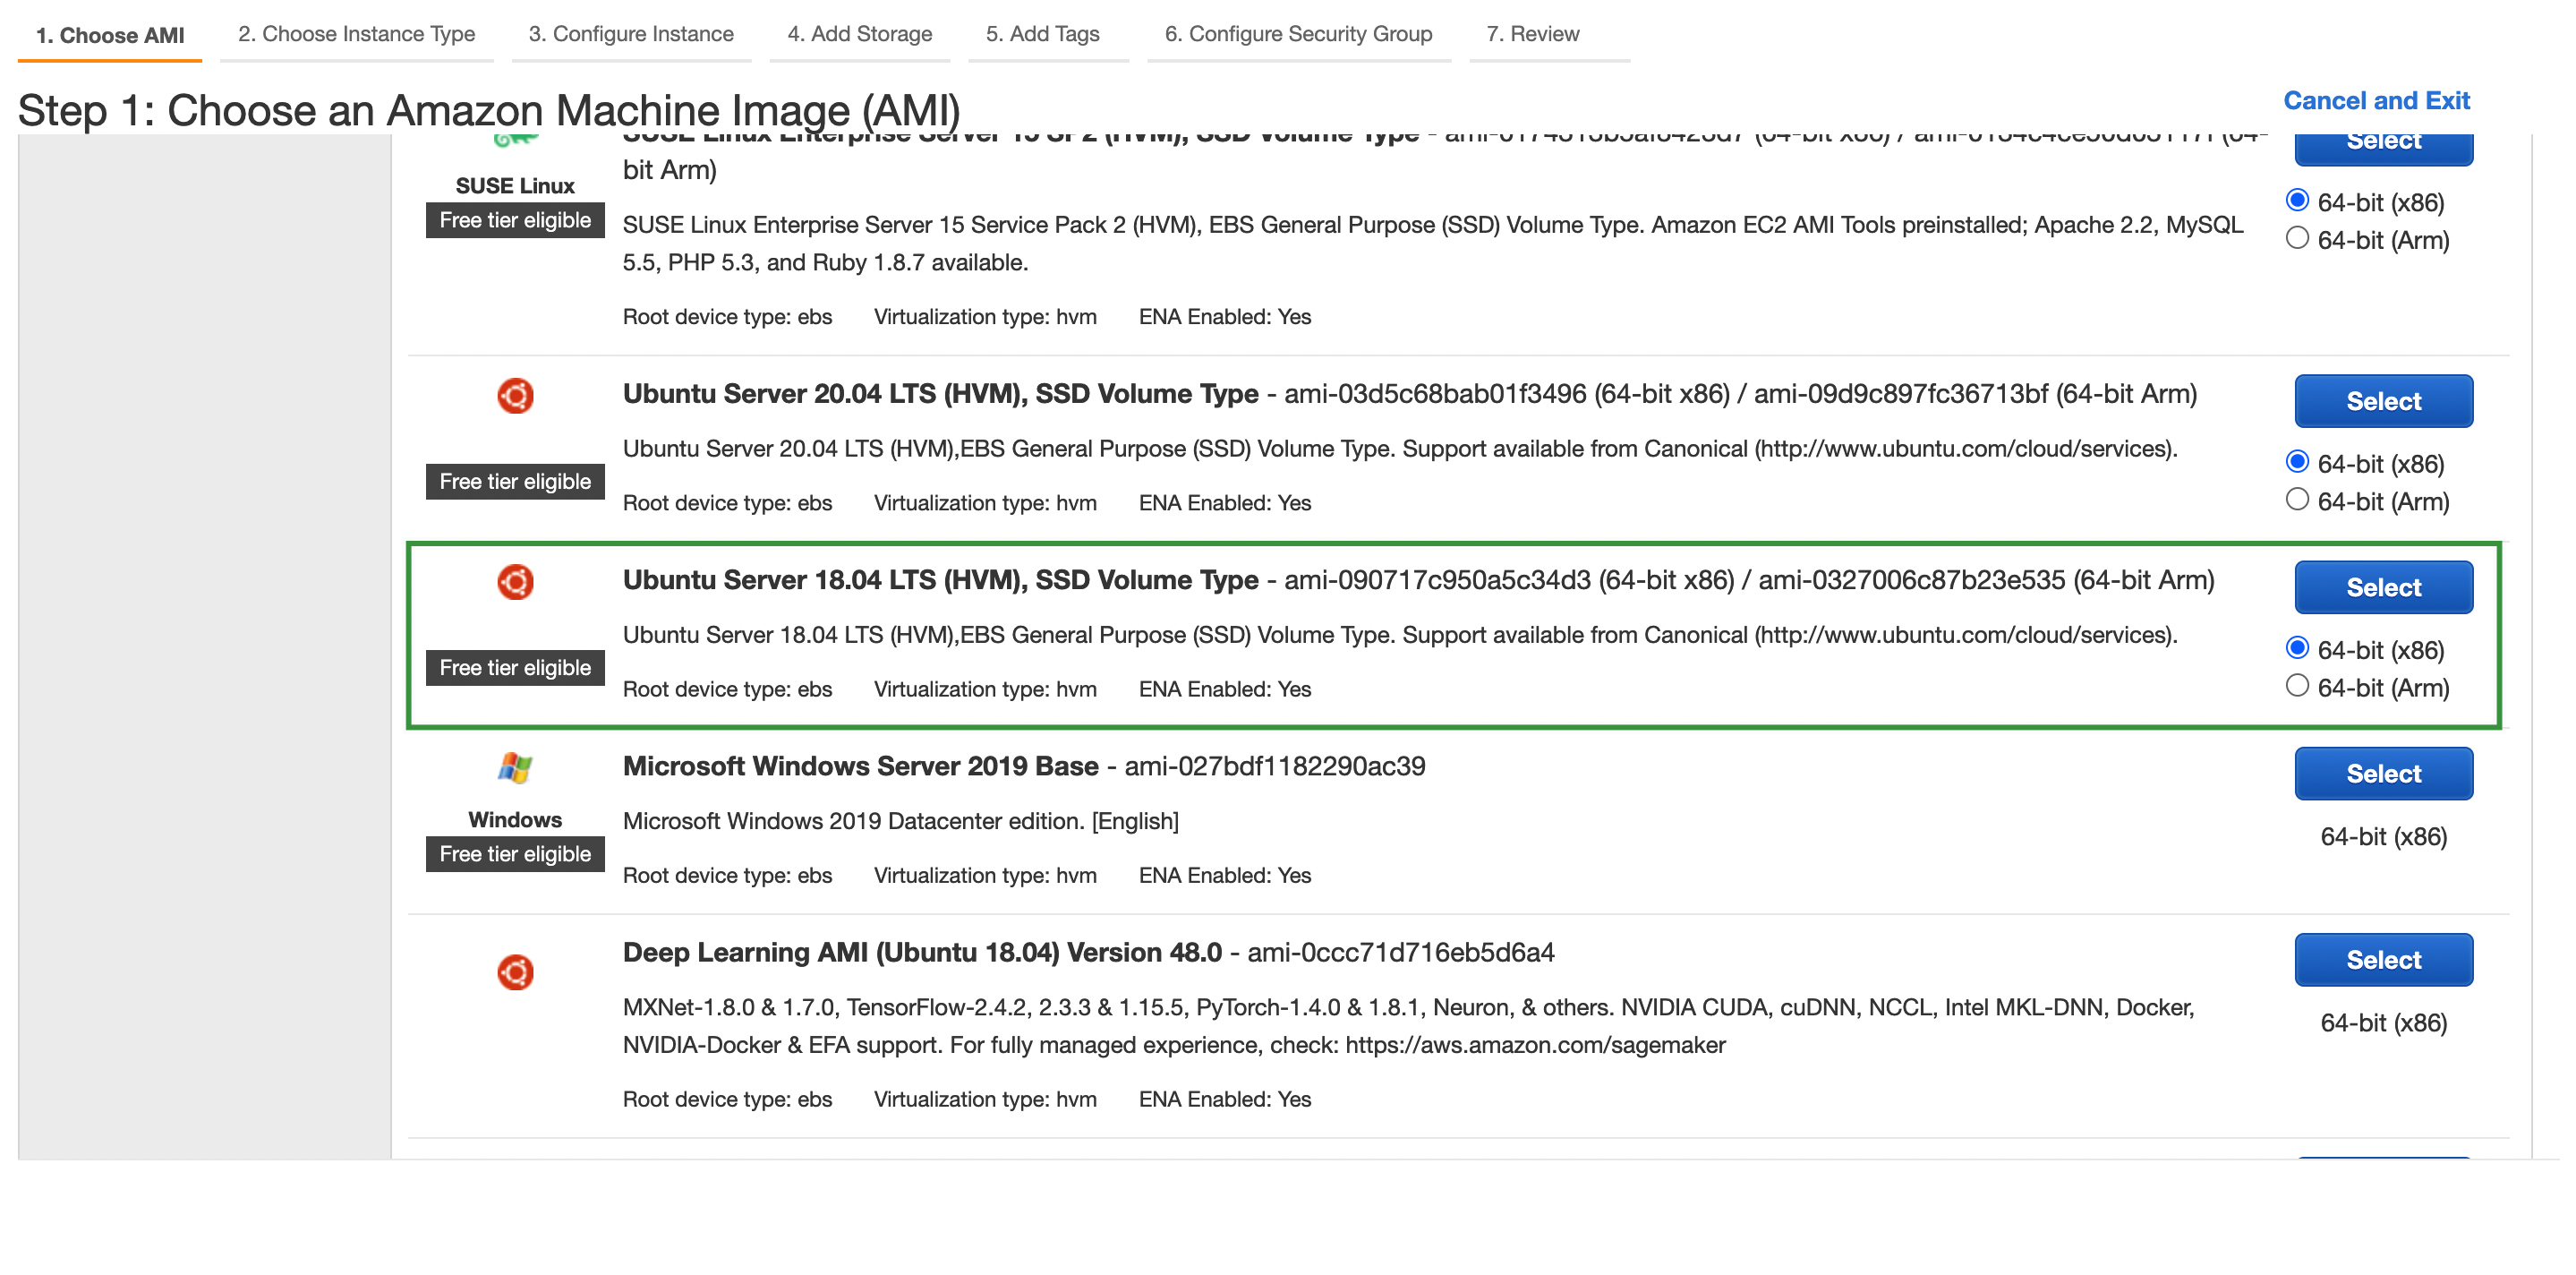
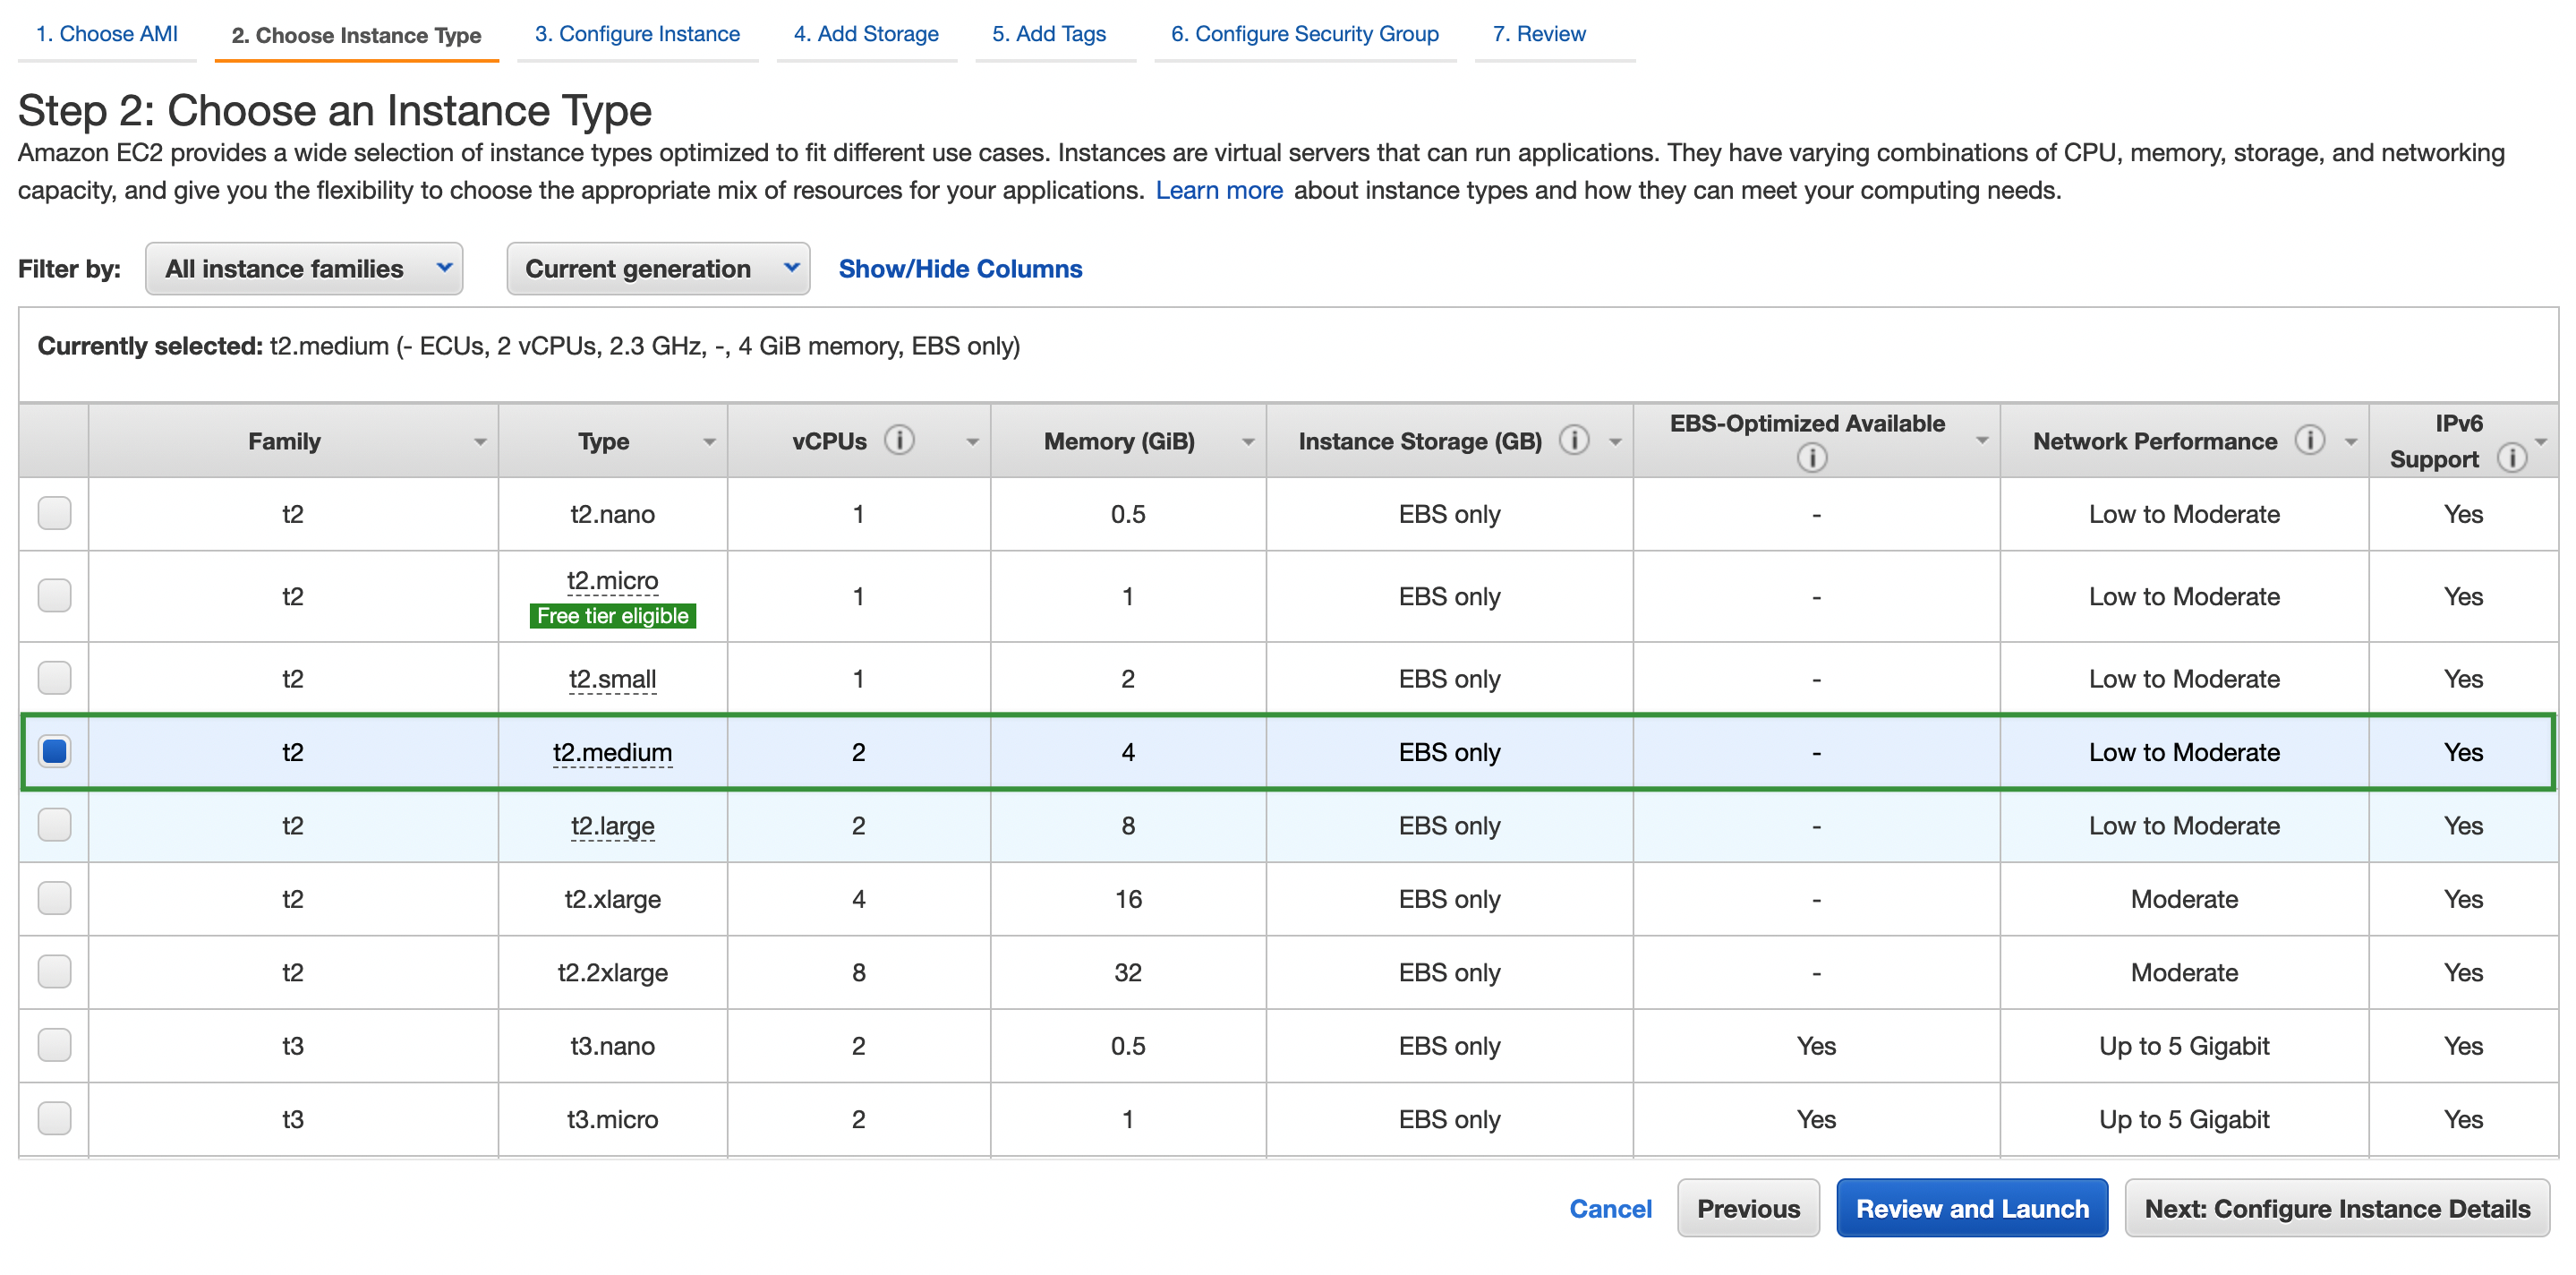
This article uses three AWS EC2 instances running Ubuntu 18.04 Server 64-bit. Each EC2 instance has 2 CPU cores and 4 GB memory.
| Host IP Address | Host Name | Role |
|---|---|---|
| 192.168.1.10 | master1 | master, node, etcd |
| 192.168.1.11 | master2 | master, node, etcd |
| 192.168.1.12 | master3 | master, node, etcd |
Note: The preceding configuration is used only for demonstration. In production environments, you are advised to assign different roles to the nodes and deploy etcd and worker nodes separately to improve stability.
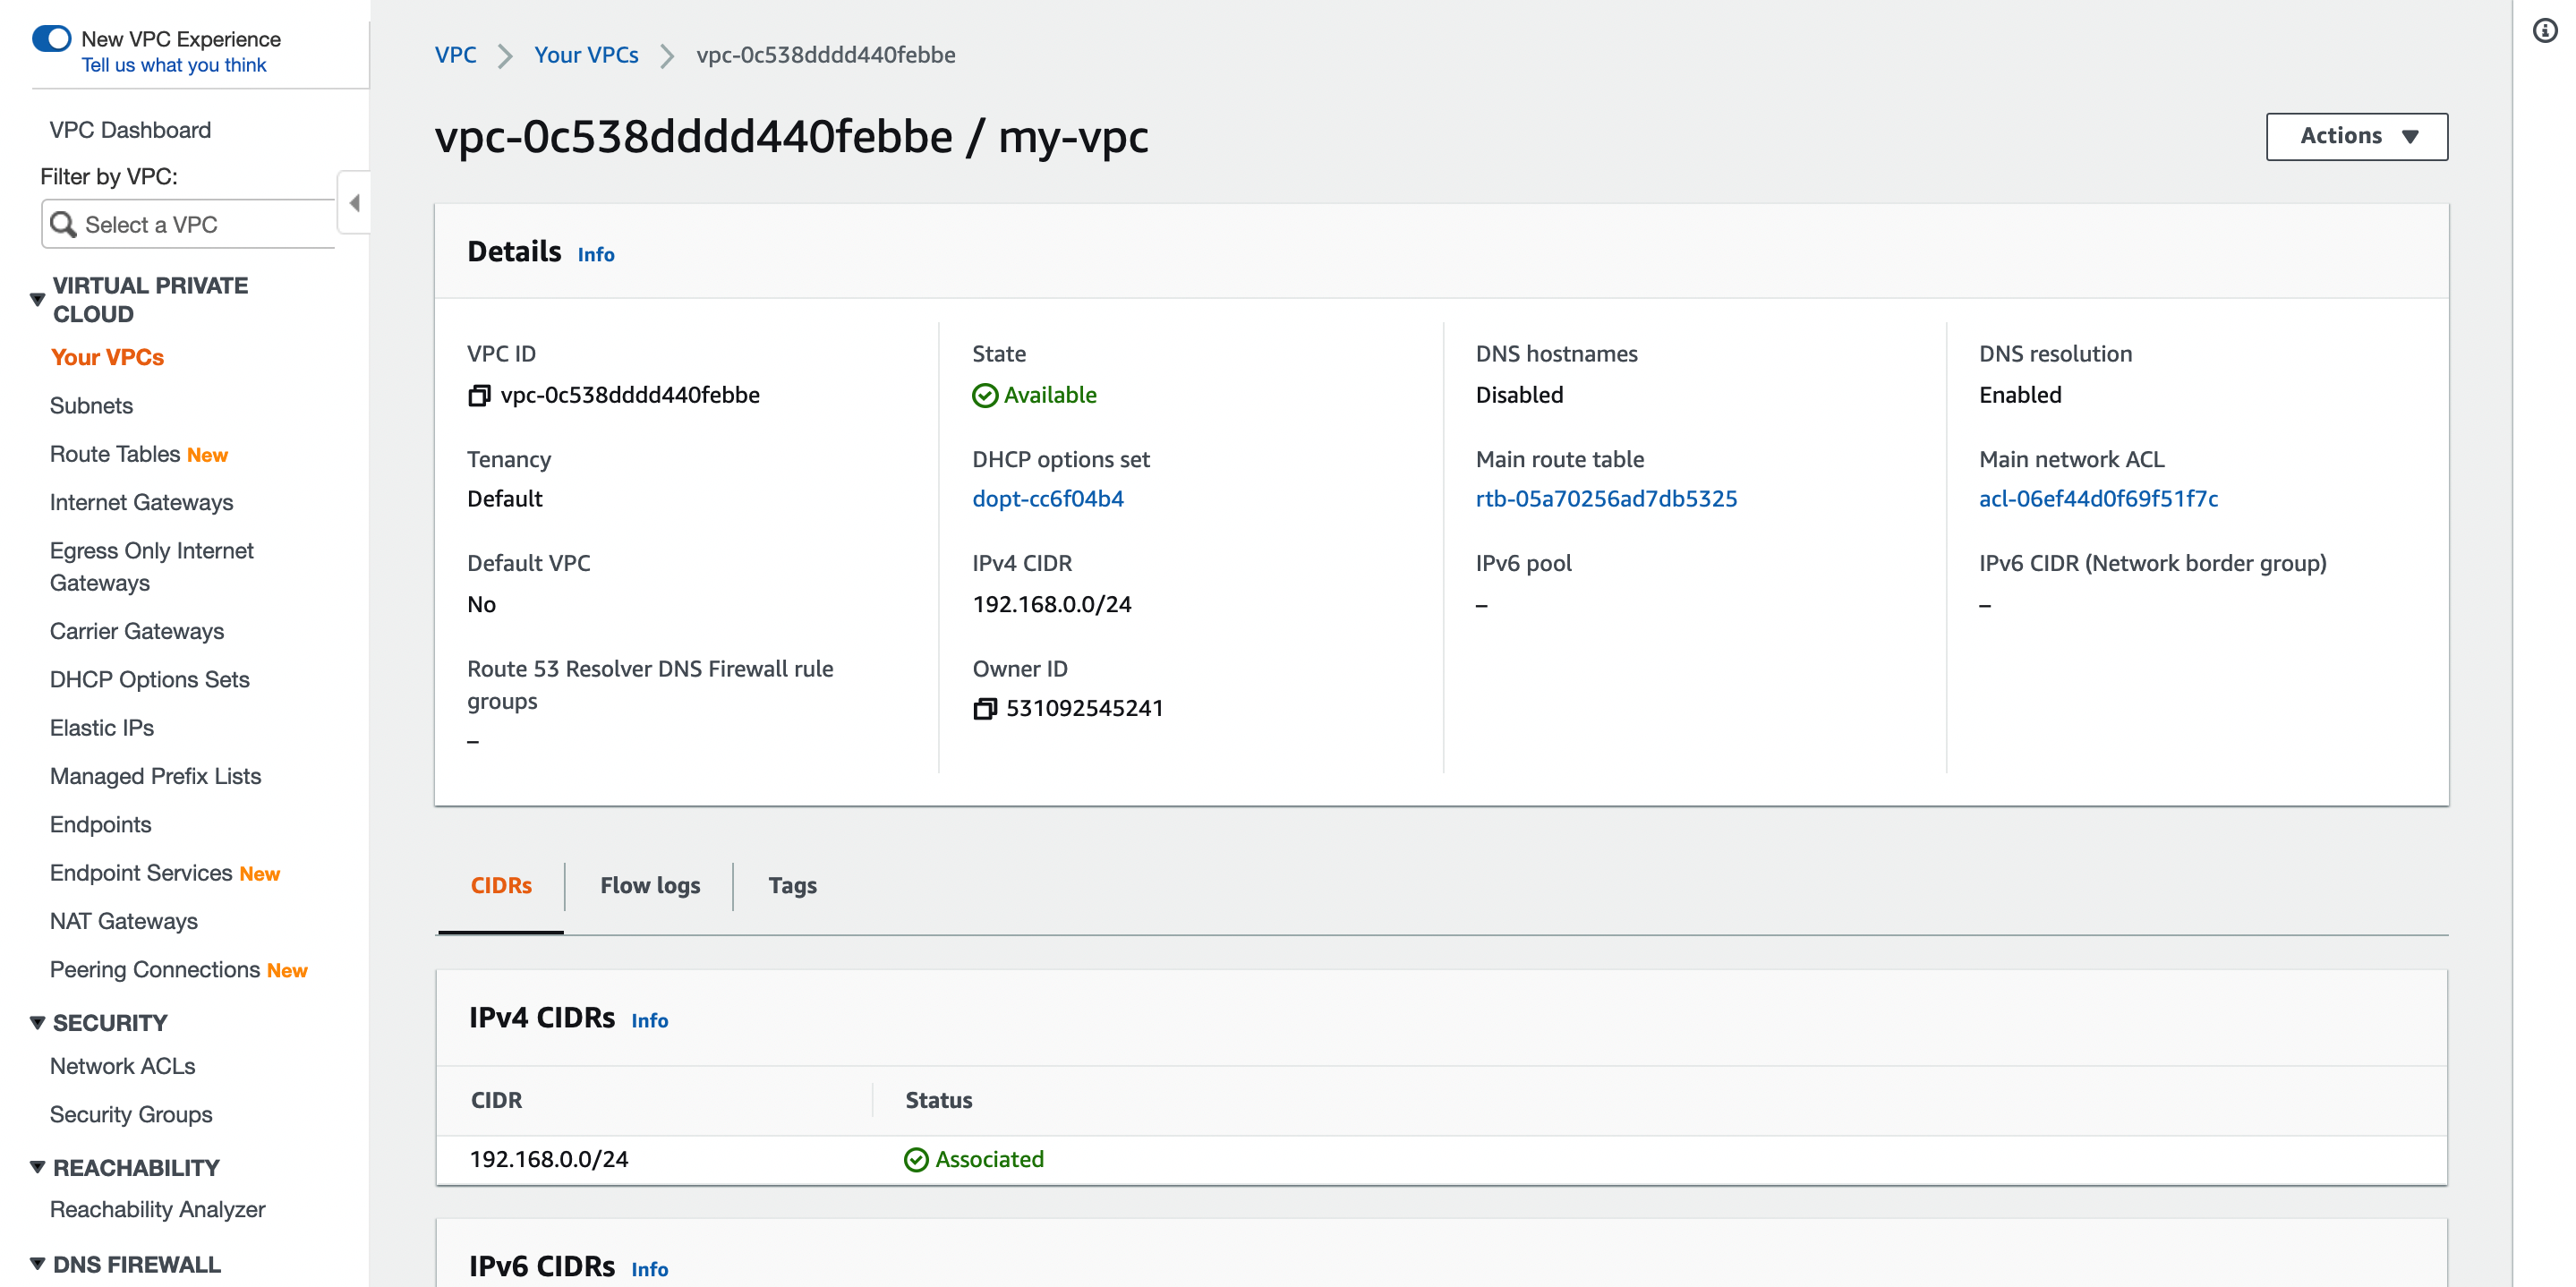
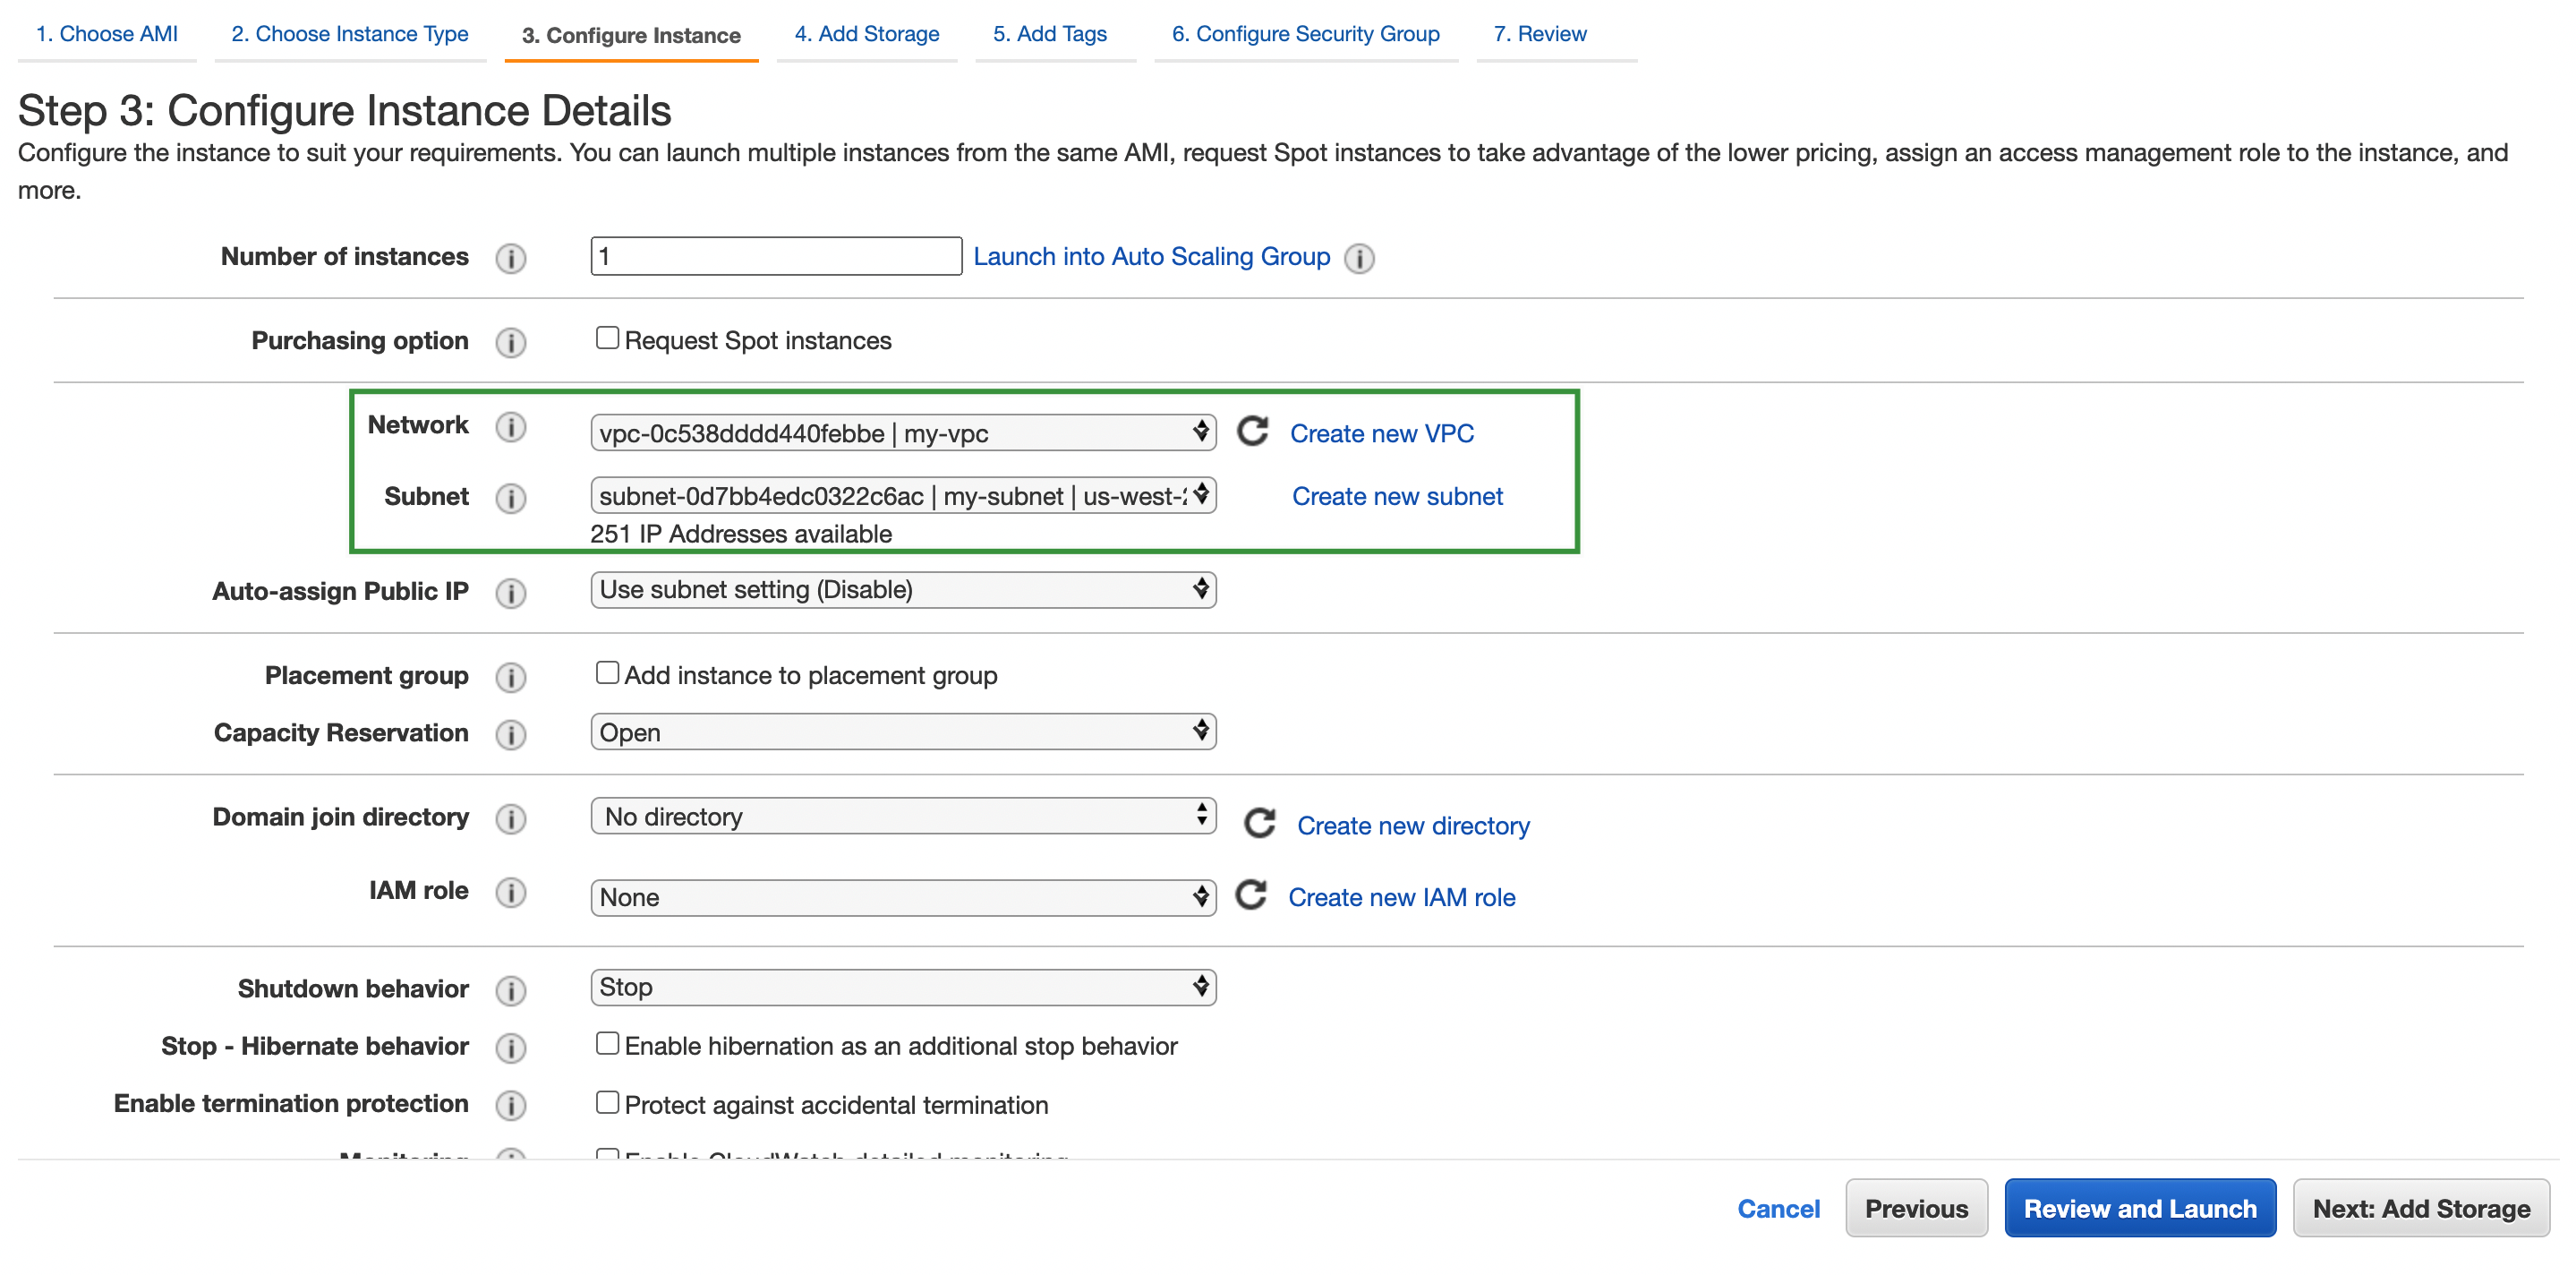
Create a VPC
Log in to the AWS console, go to the VPC dashboard, and use the following settings to create a VPC.
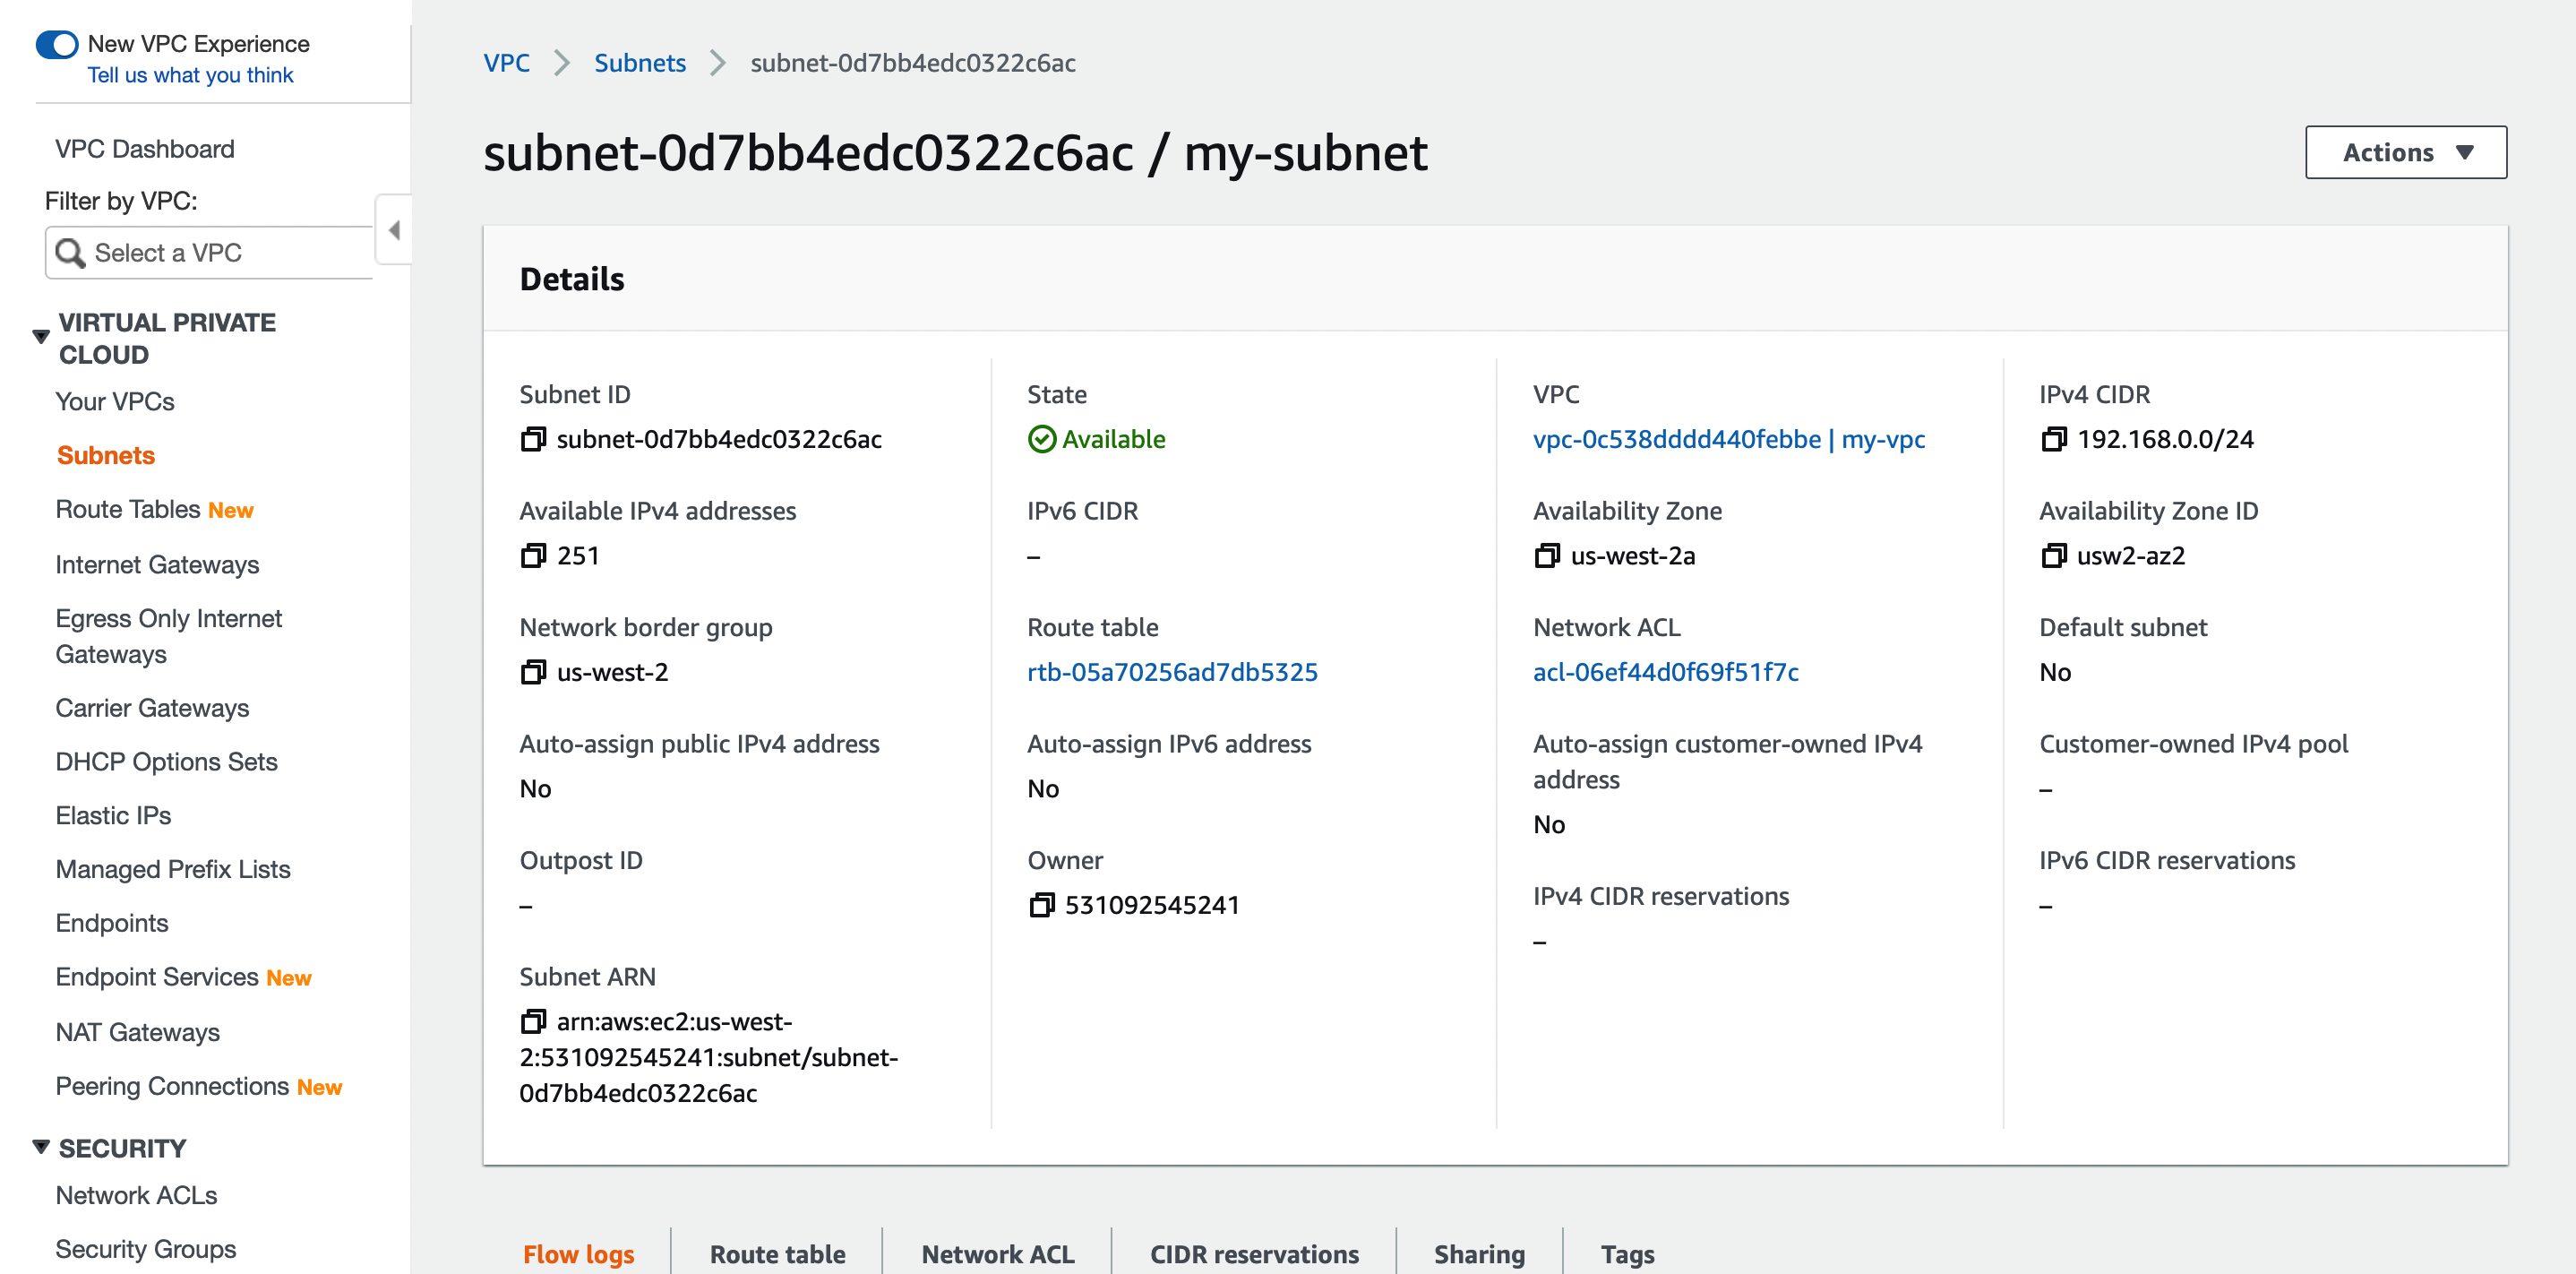
Create a Subnet
Use the following settings to create a subnet for the VPC.
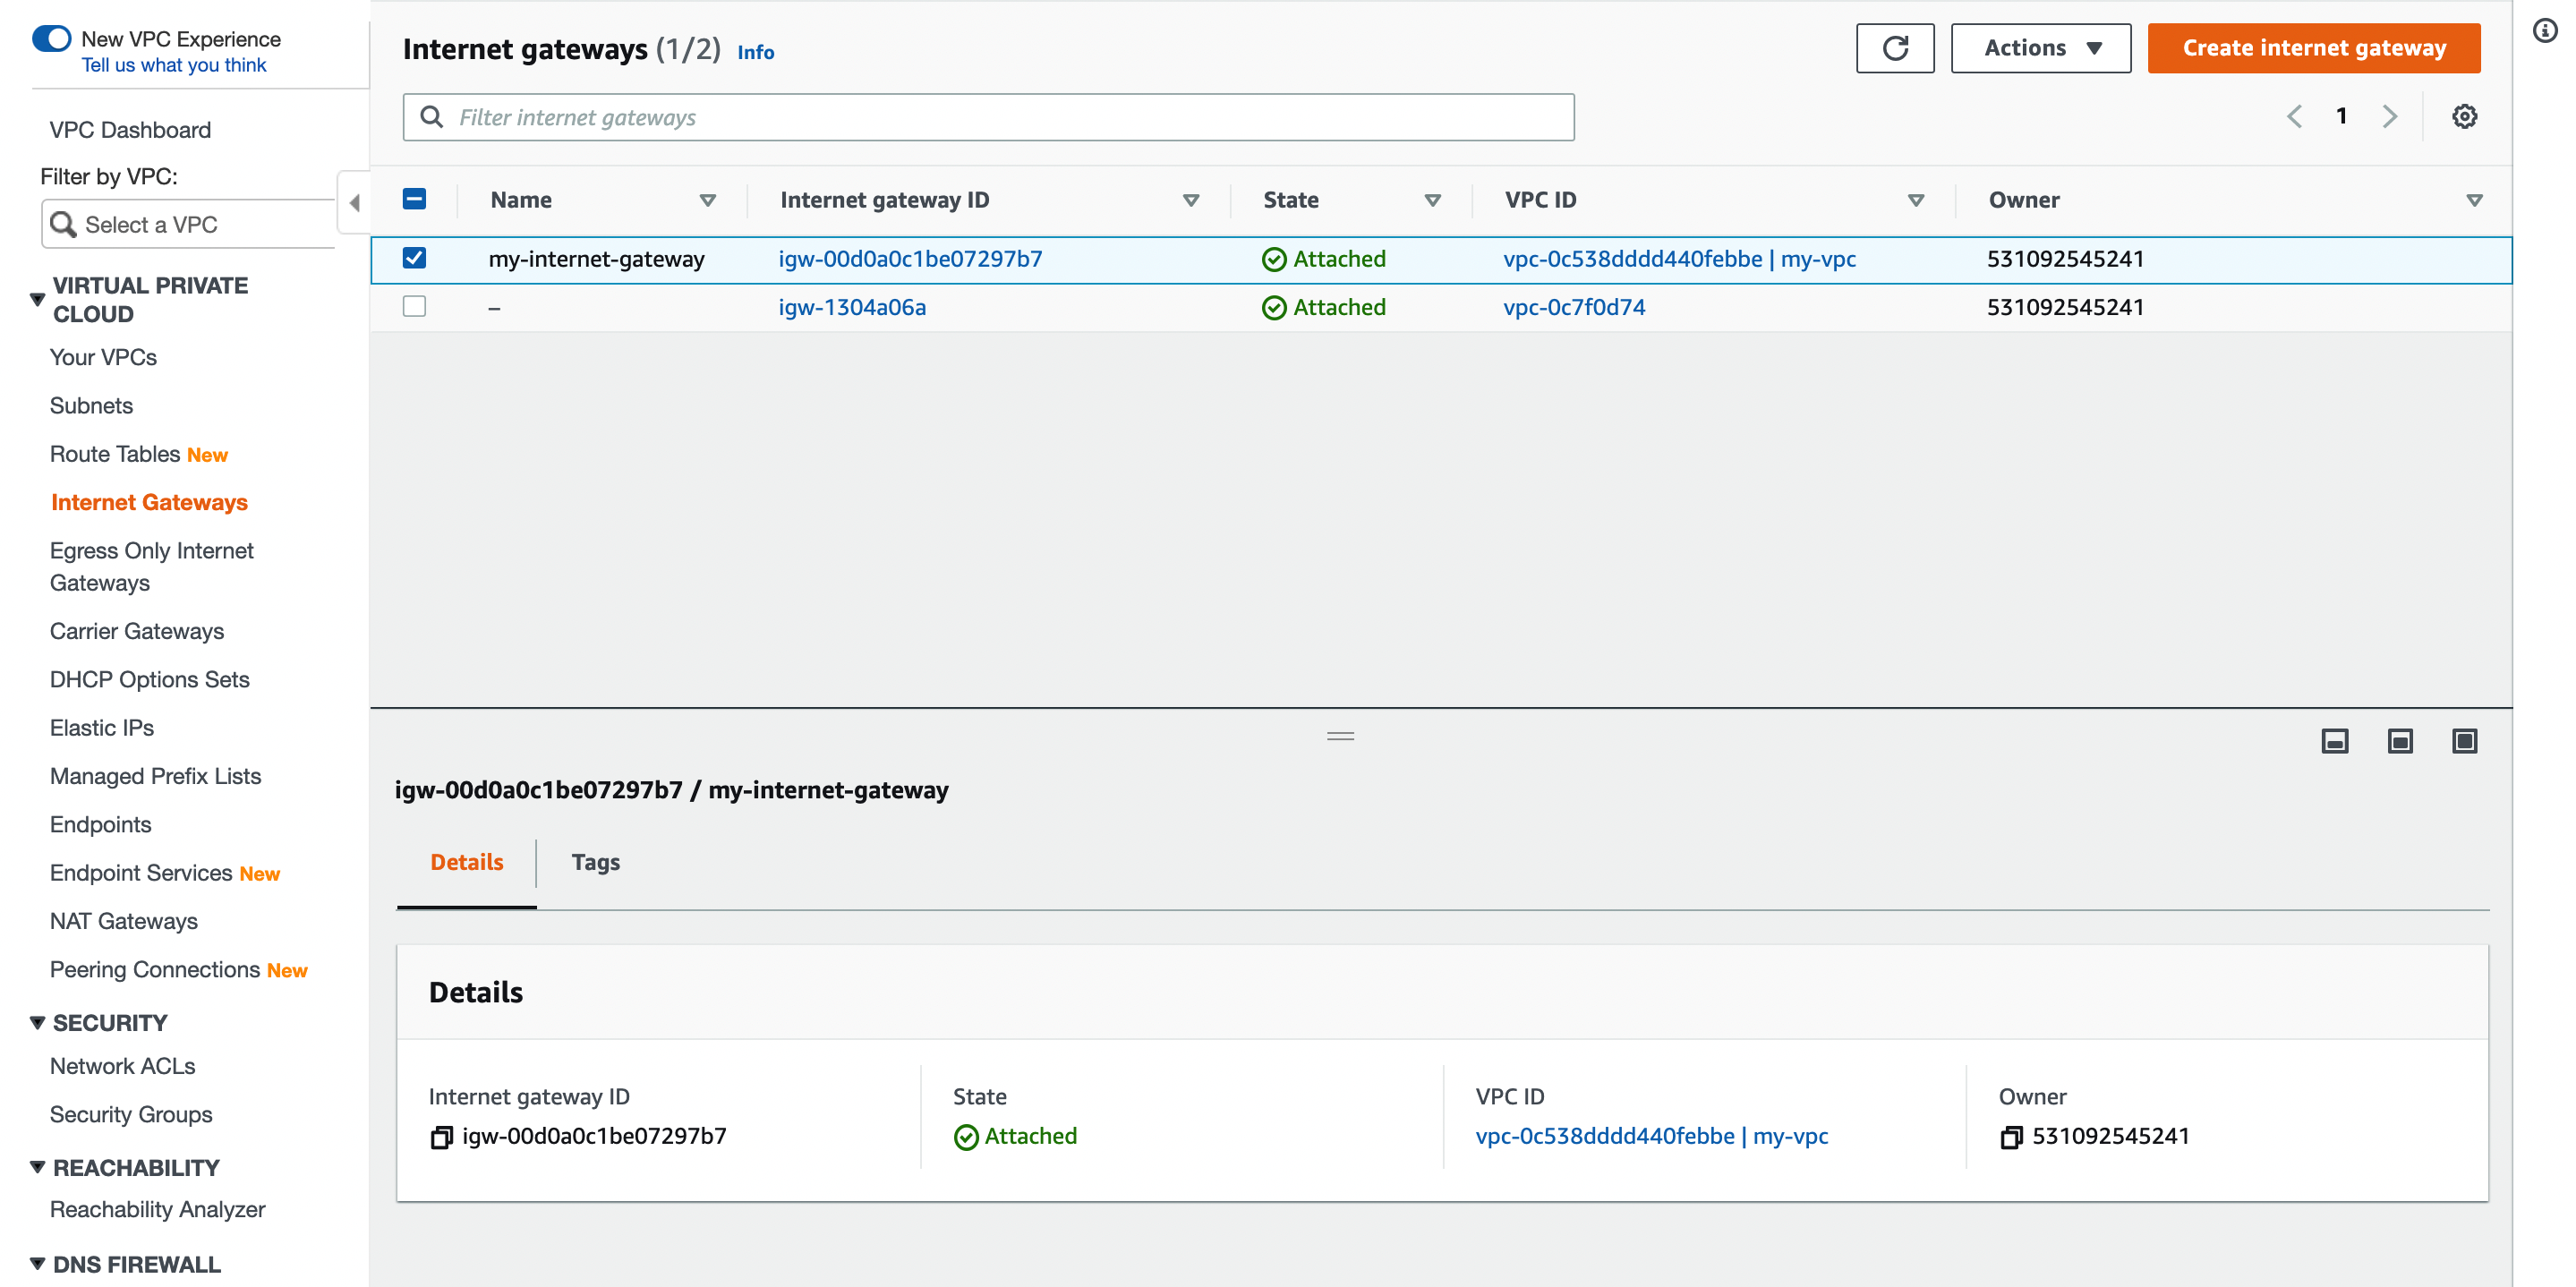
Create an Internet Gateway
Create an internet gateway and attach it to the VPC.
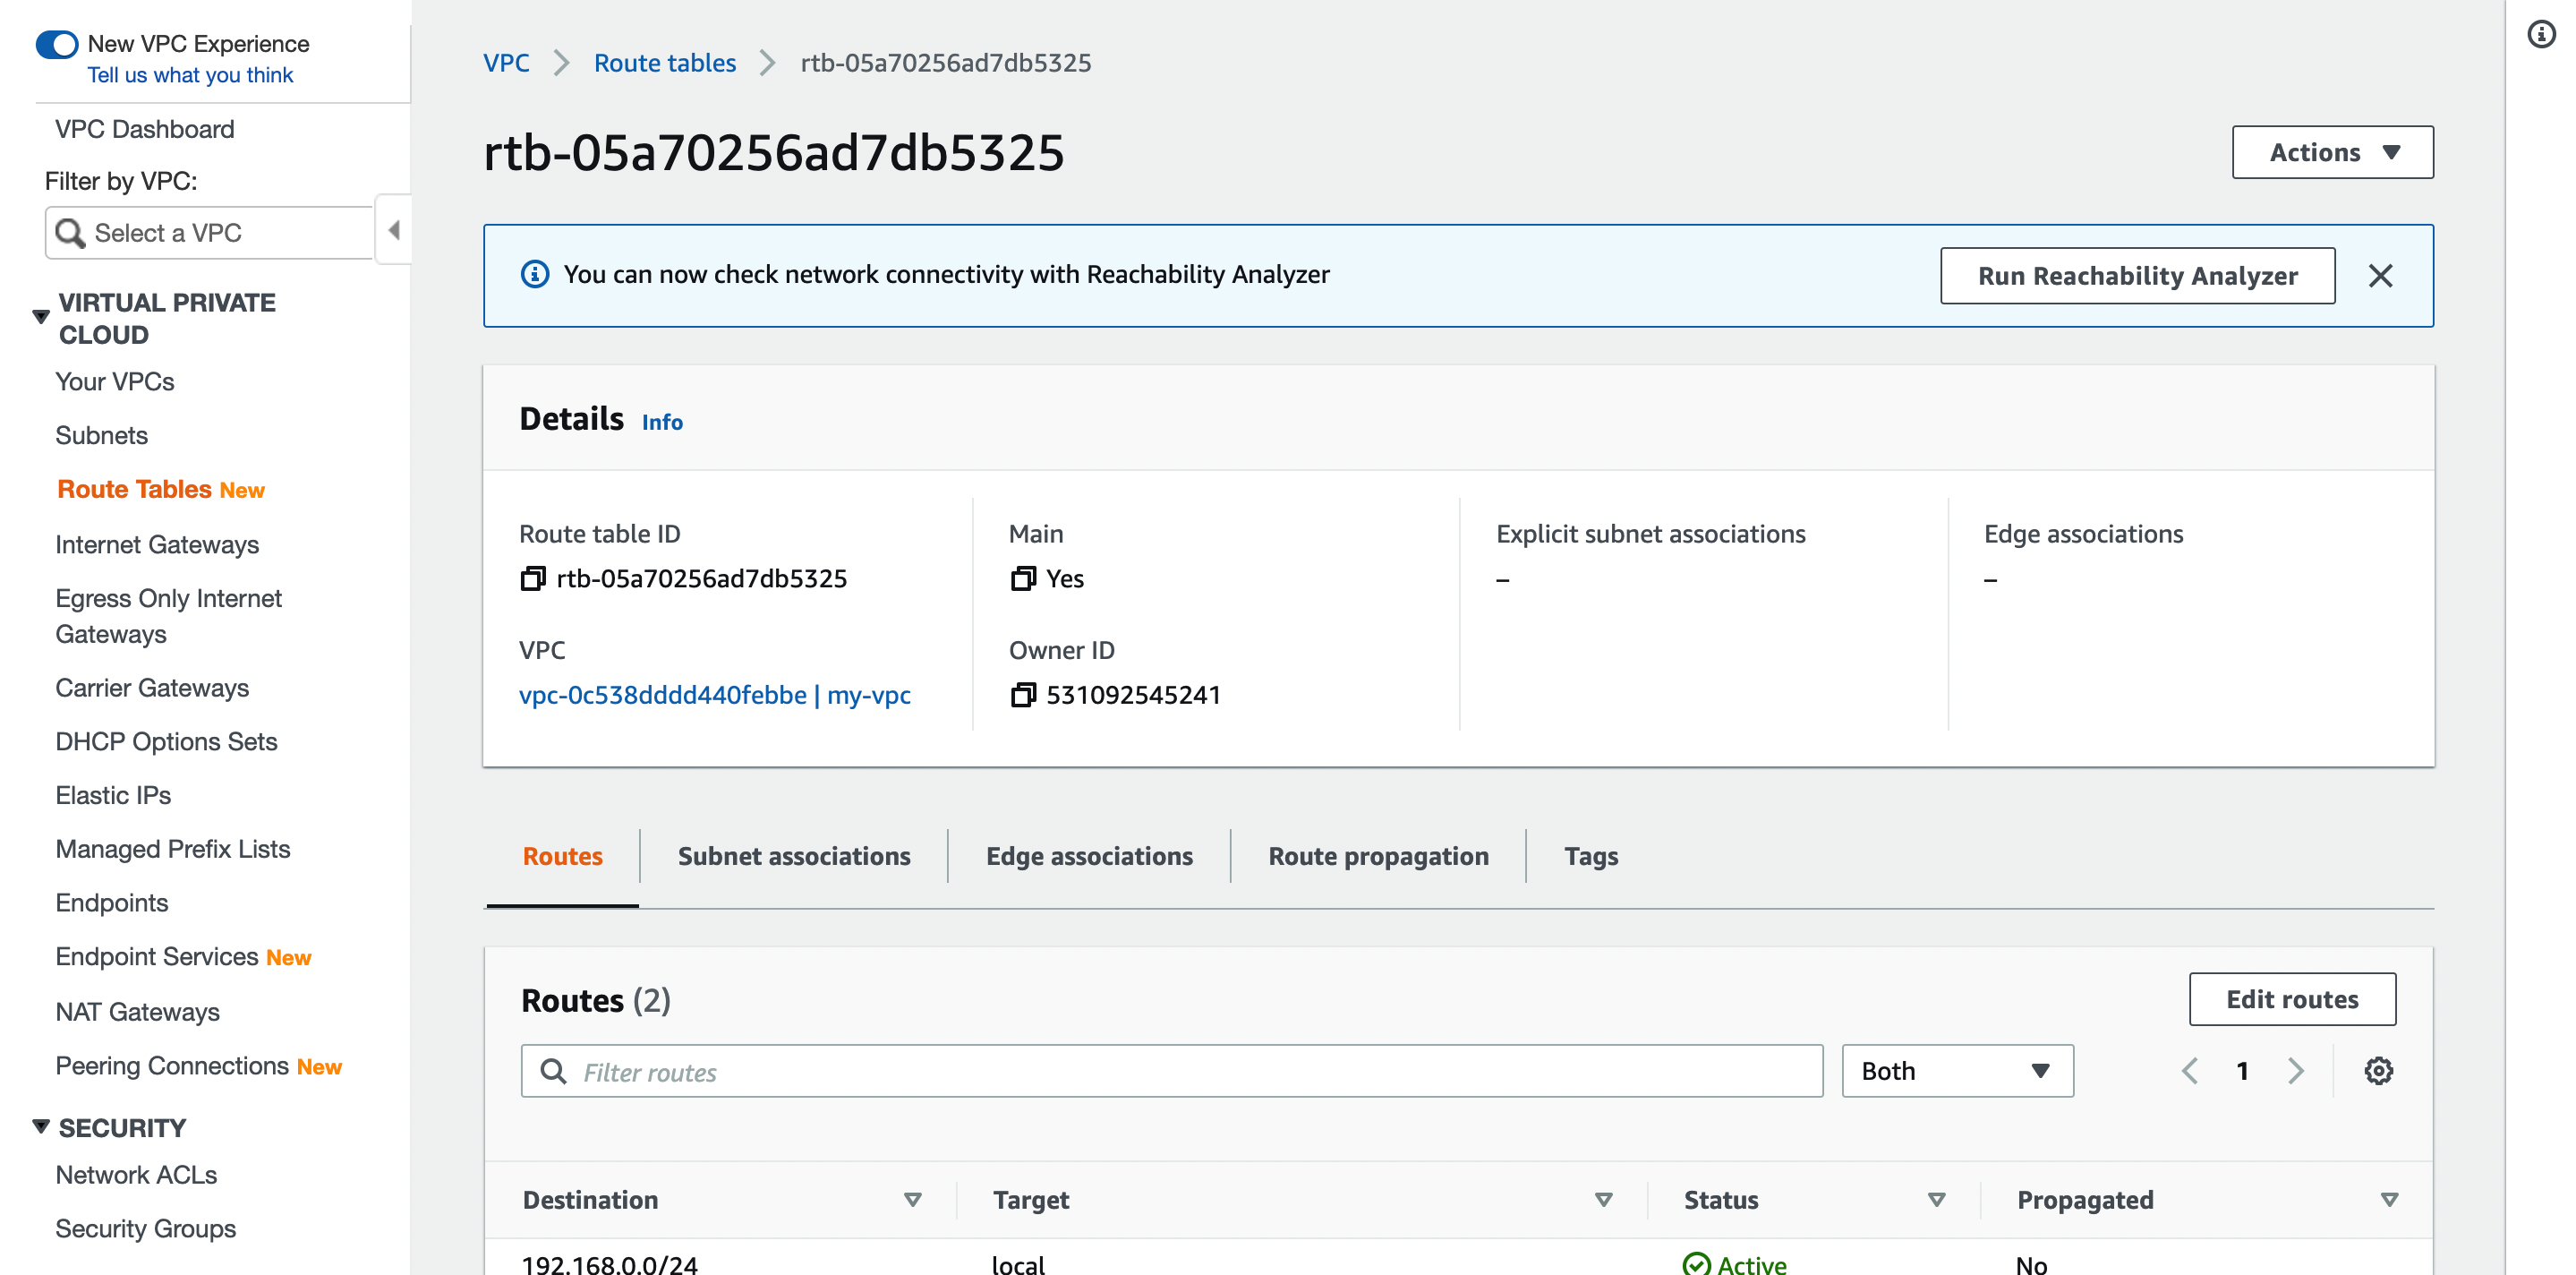
Configure the Route Table
Add the 0.0.0.0/0 route to the default route table of the VPC.
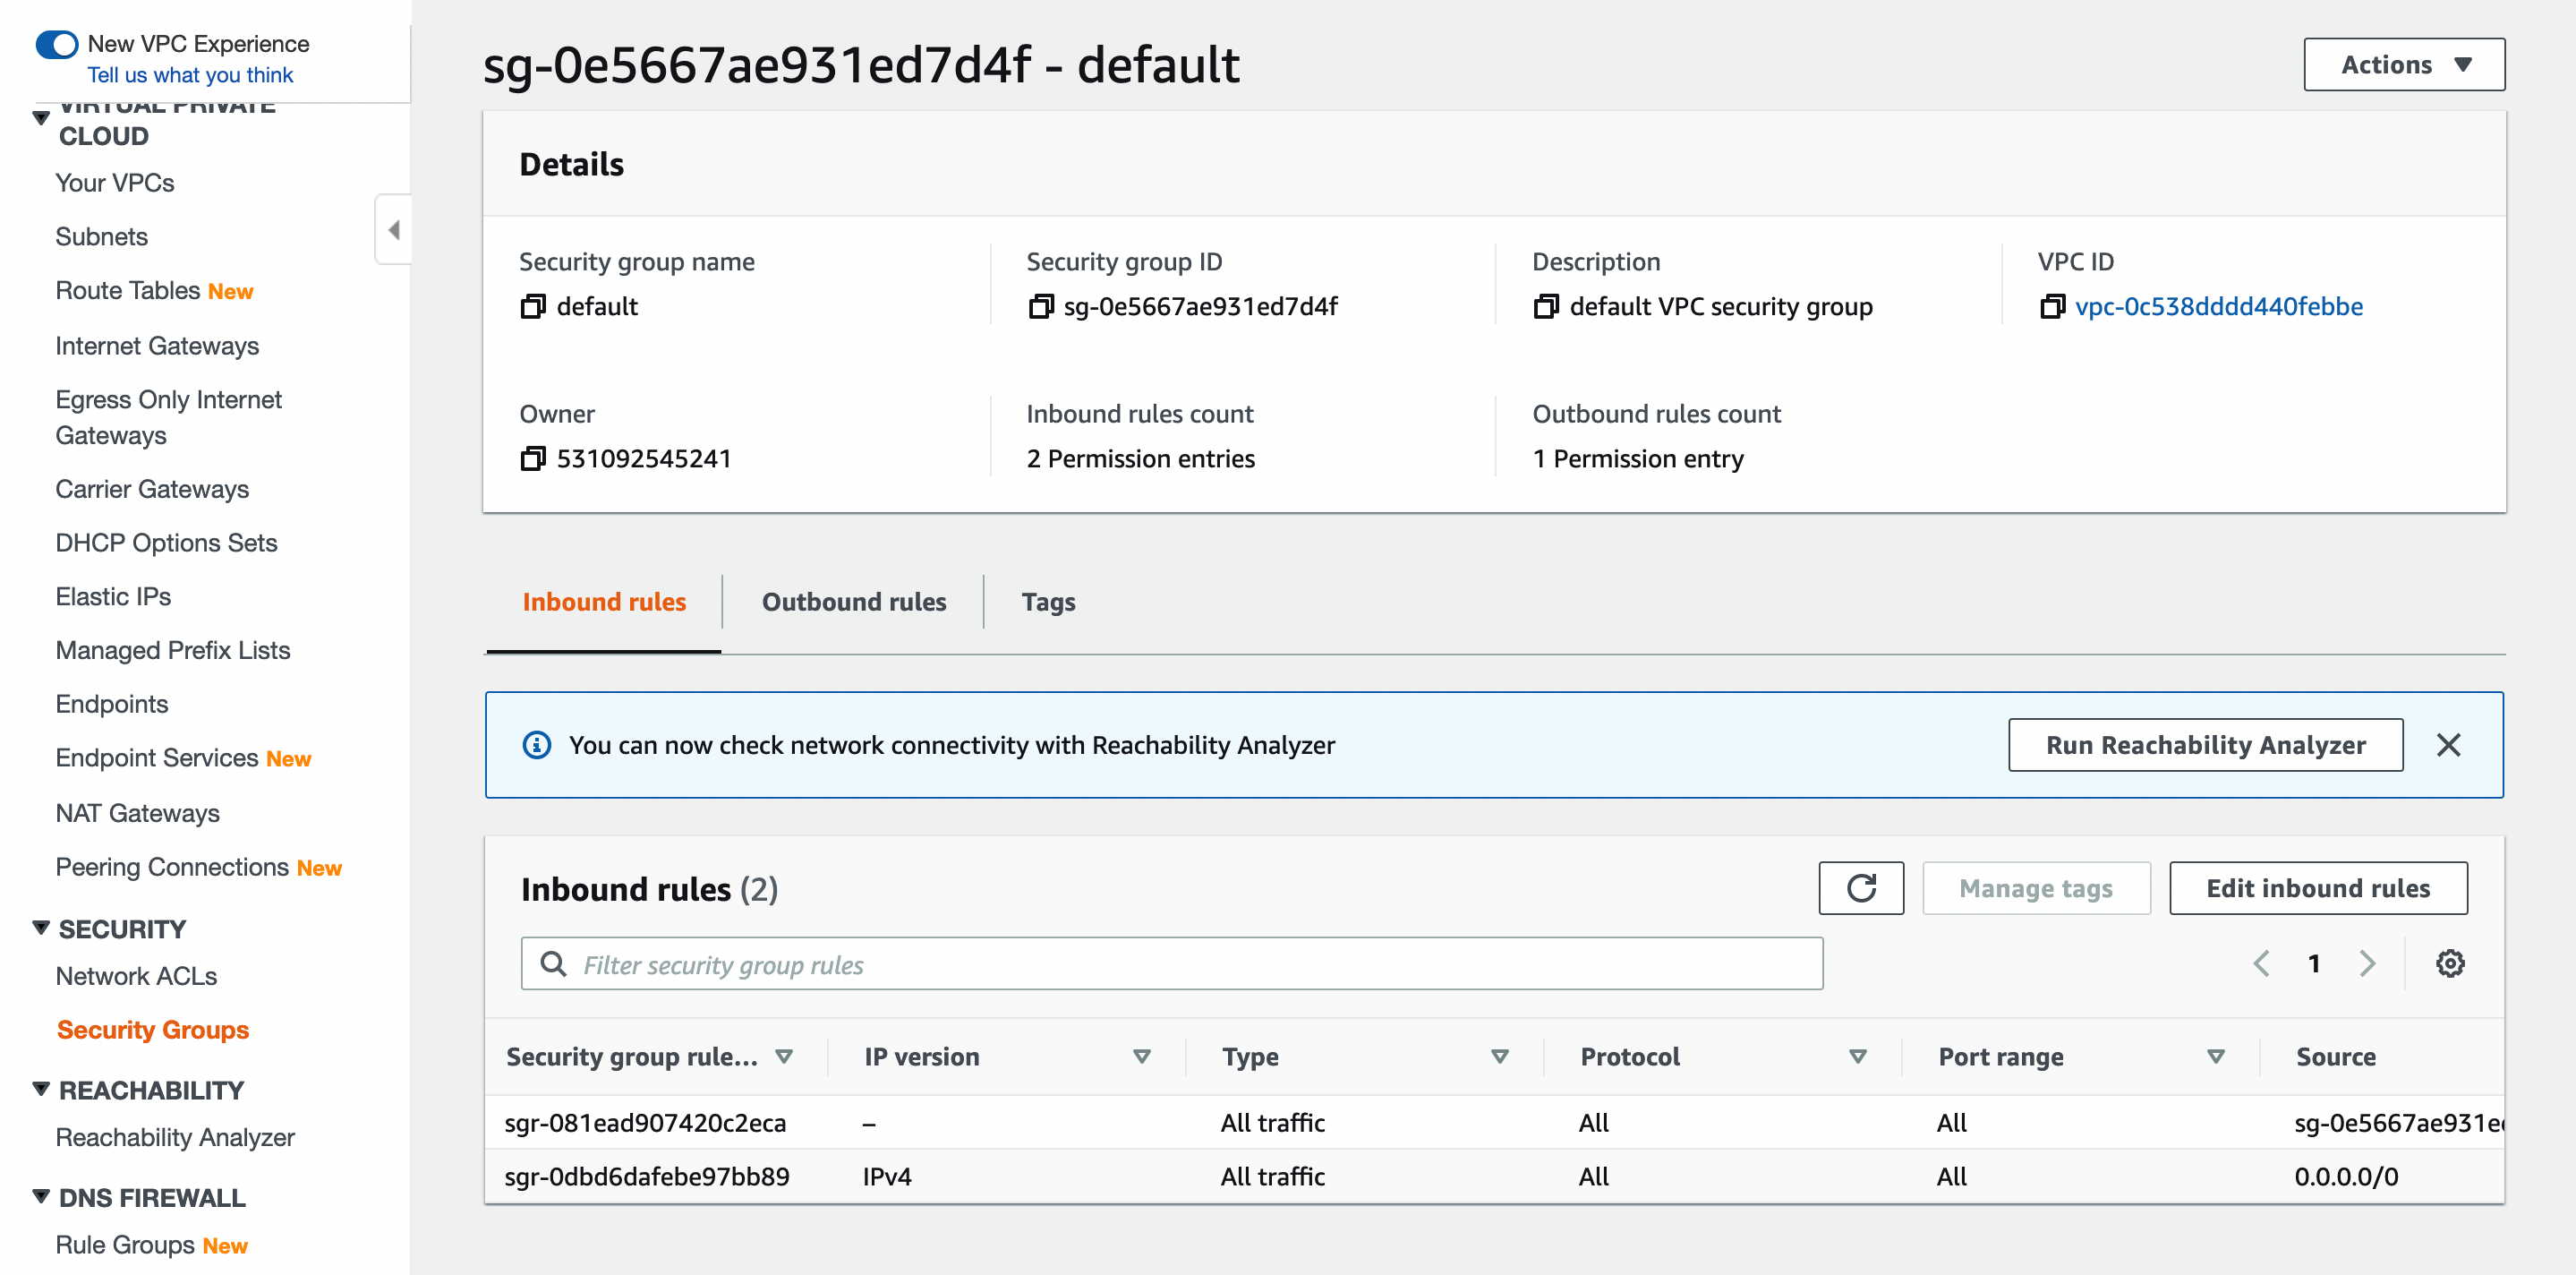
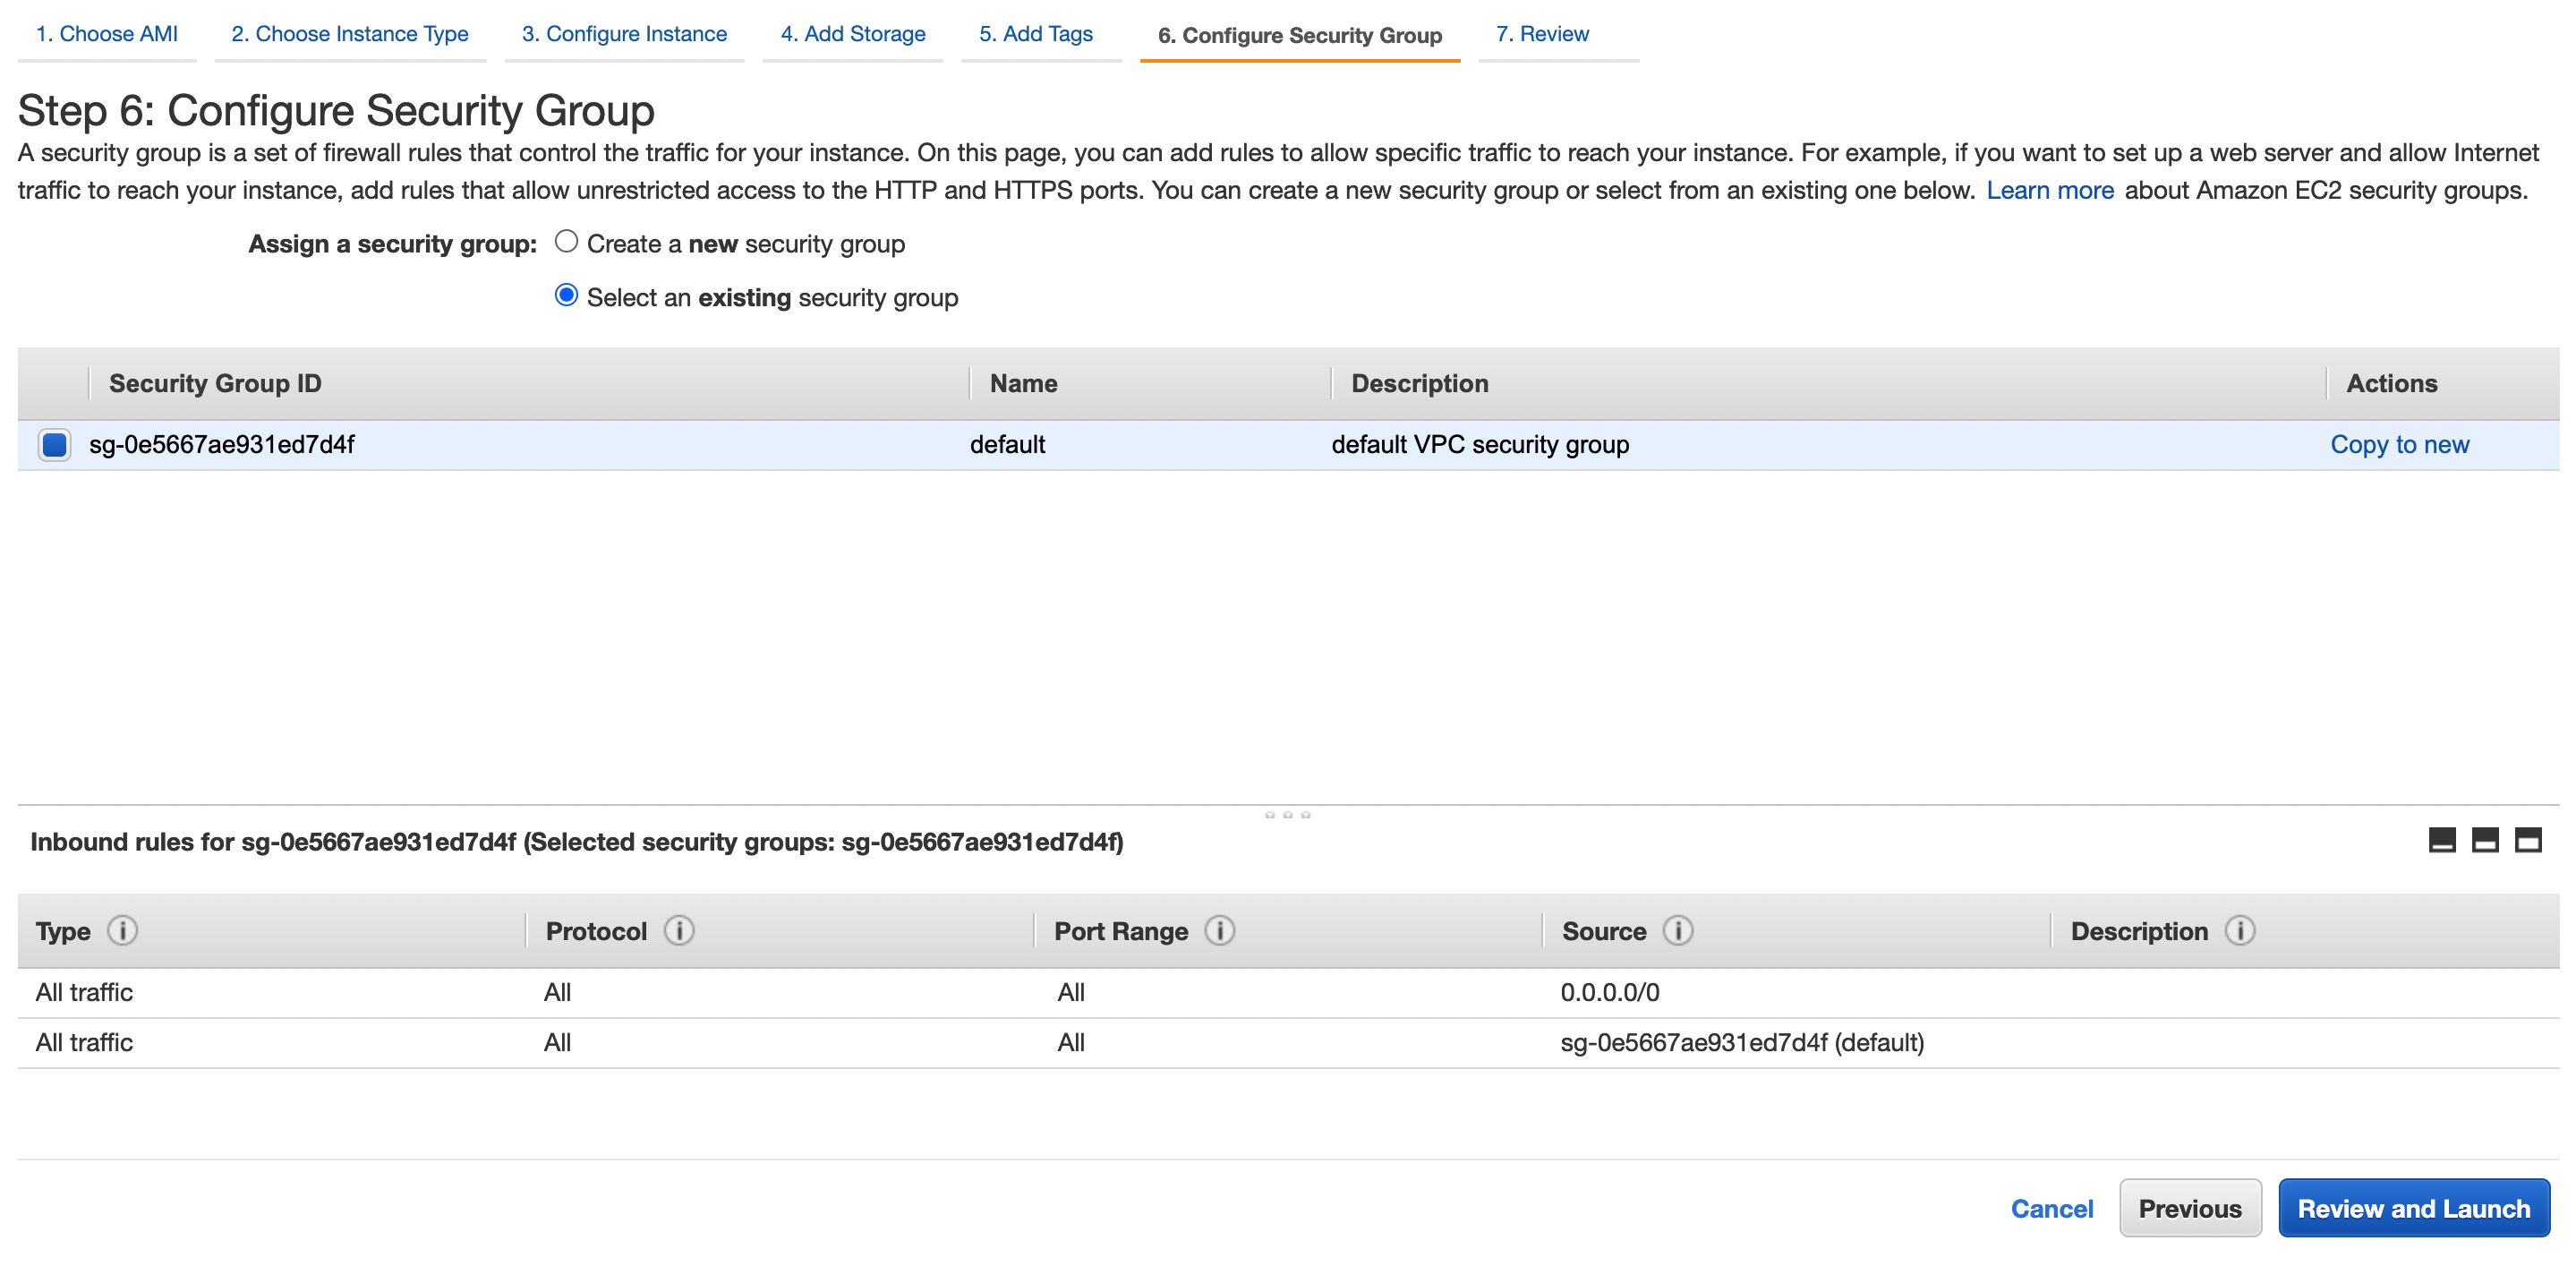
Create a Security Group
Add the following inbound rule to the default security group of the VPC.
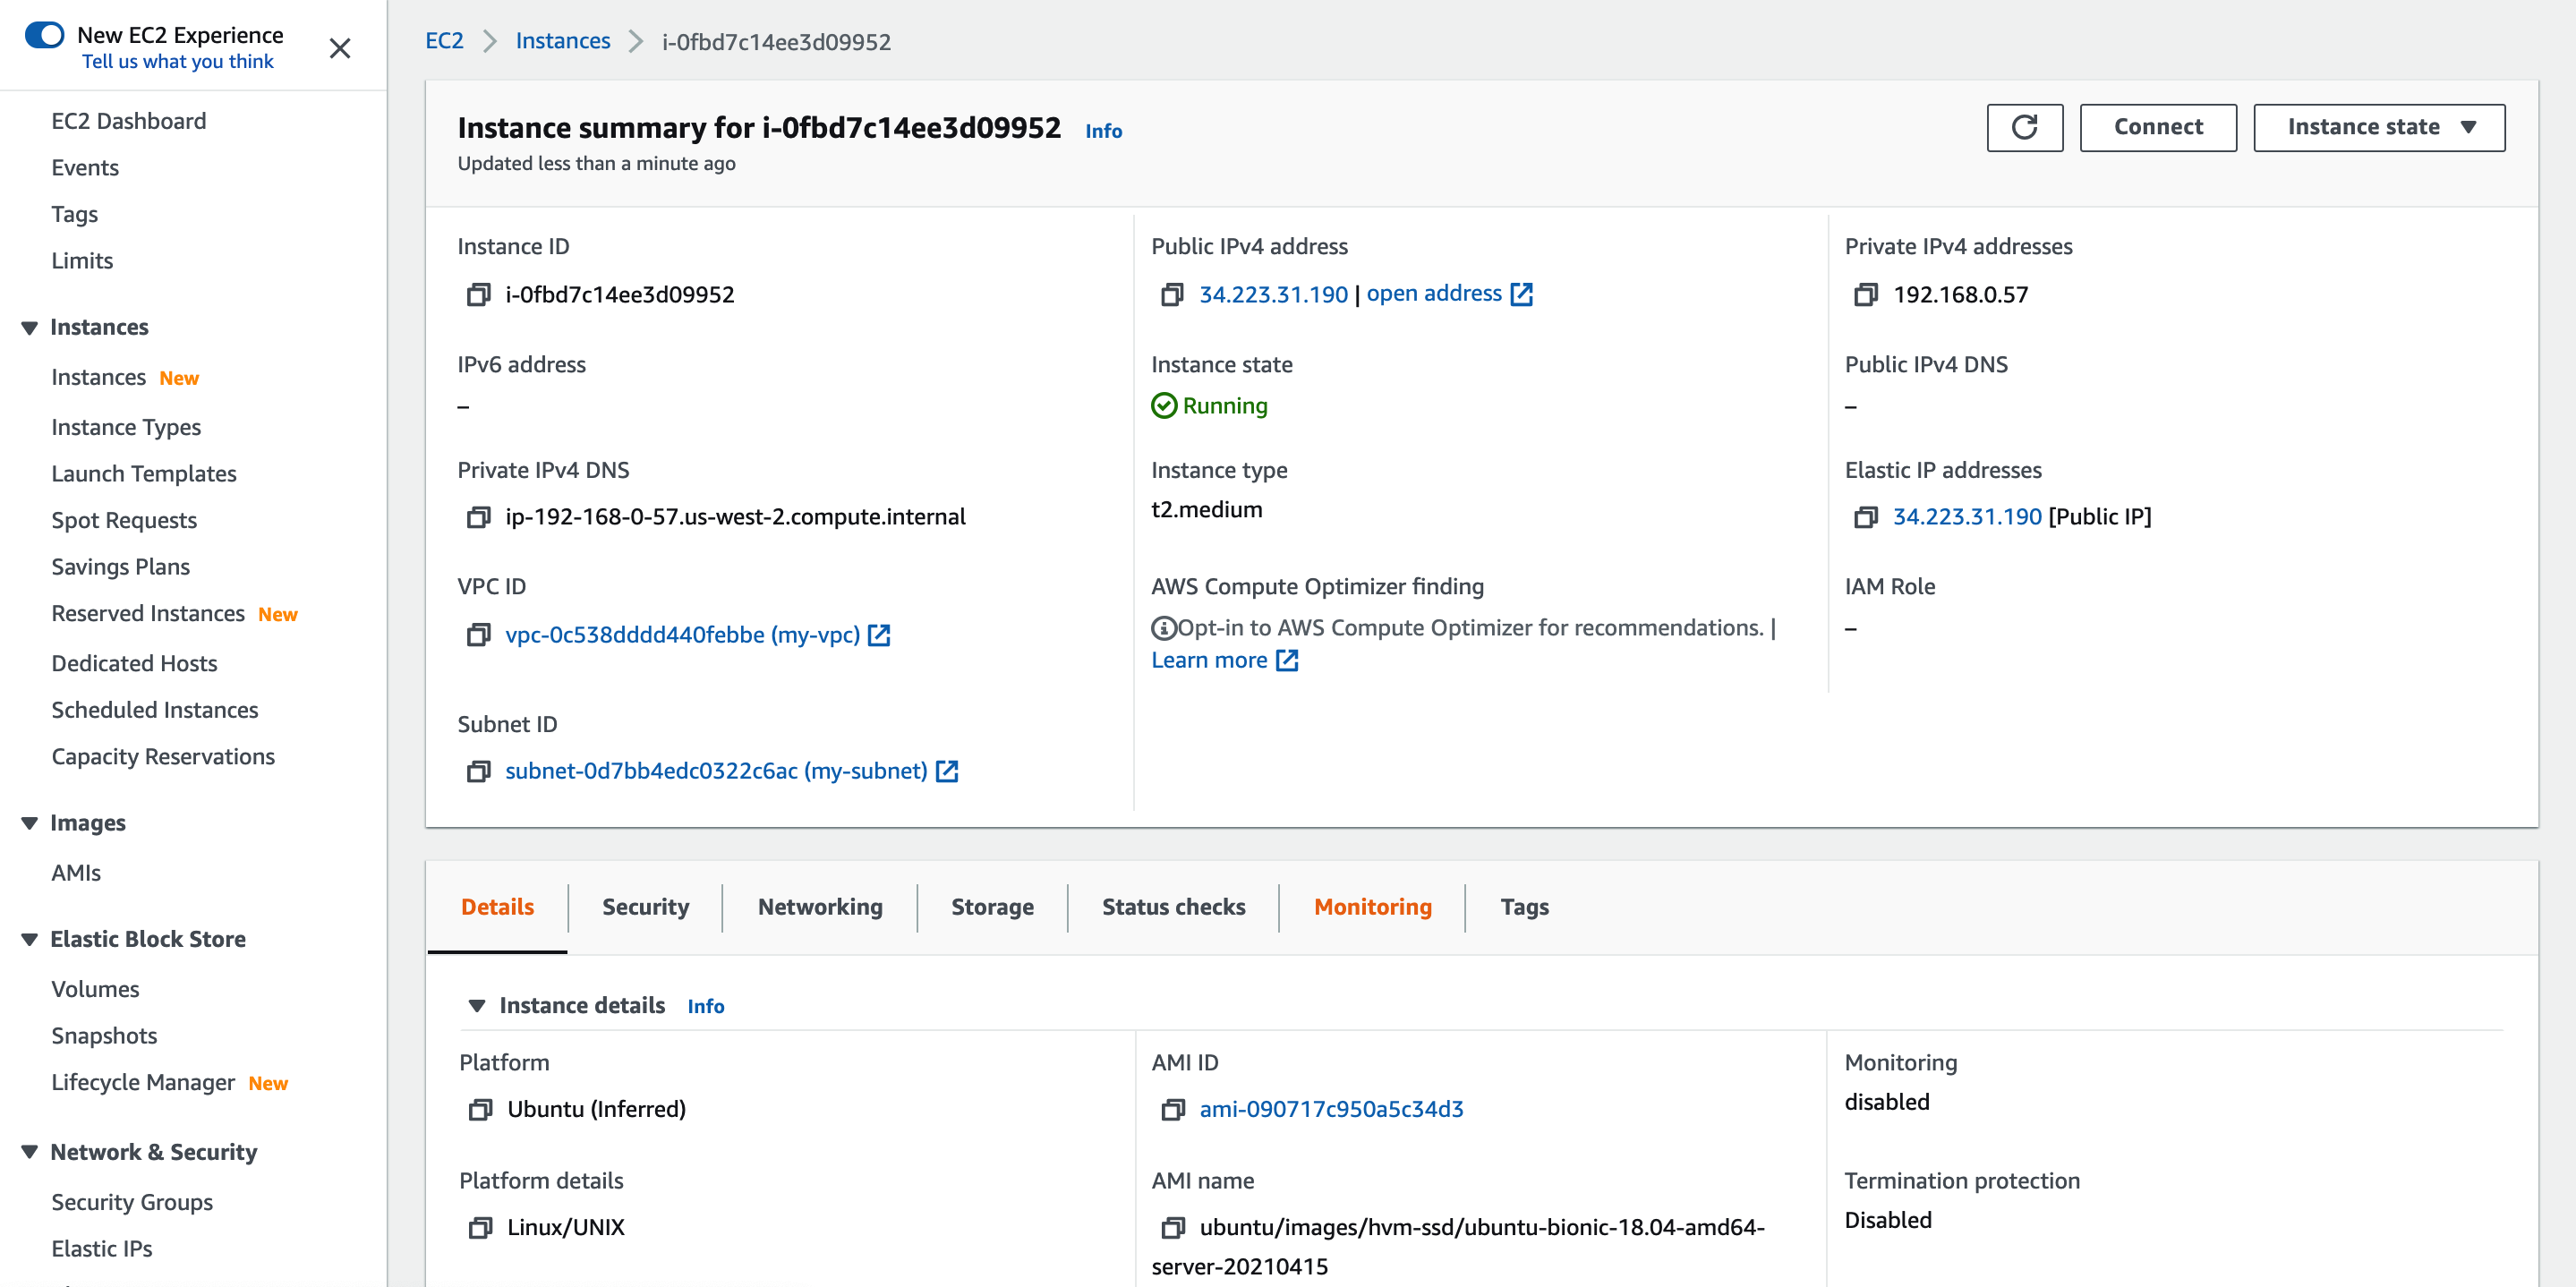
Create Hosts
Go to the EC2 instance creation page and use the following settings to create three EC2 instances.
Select an image.
Select an instance type.
Select the VPC and subnet.
Select the security group.
After the EC2 instances are created, associate an elastic IP address to each instance, which will be used for remote access.
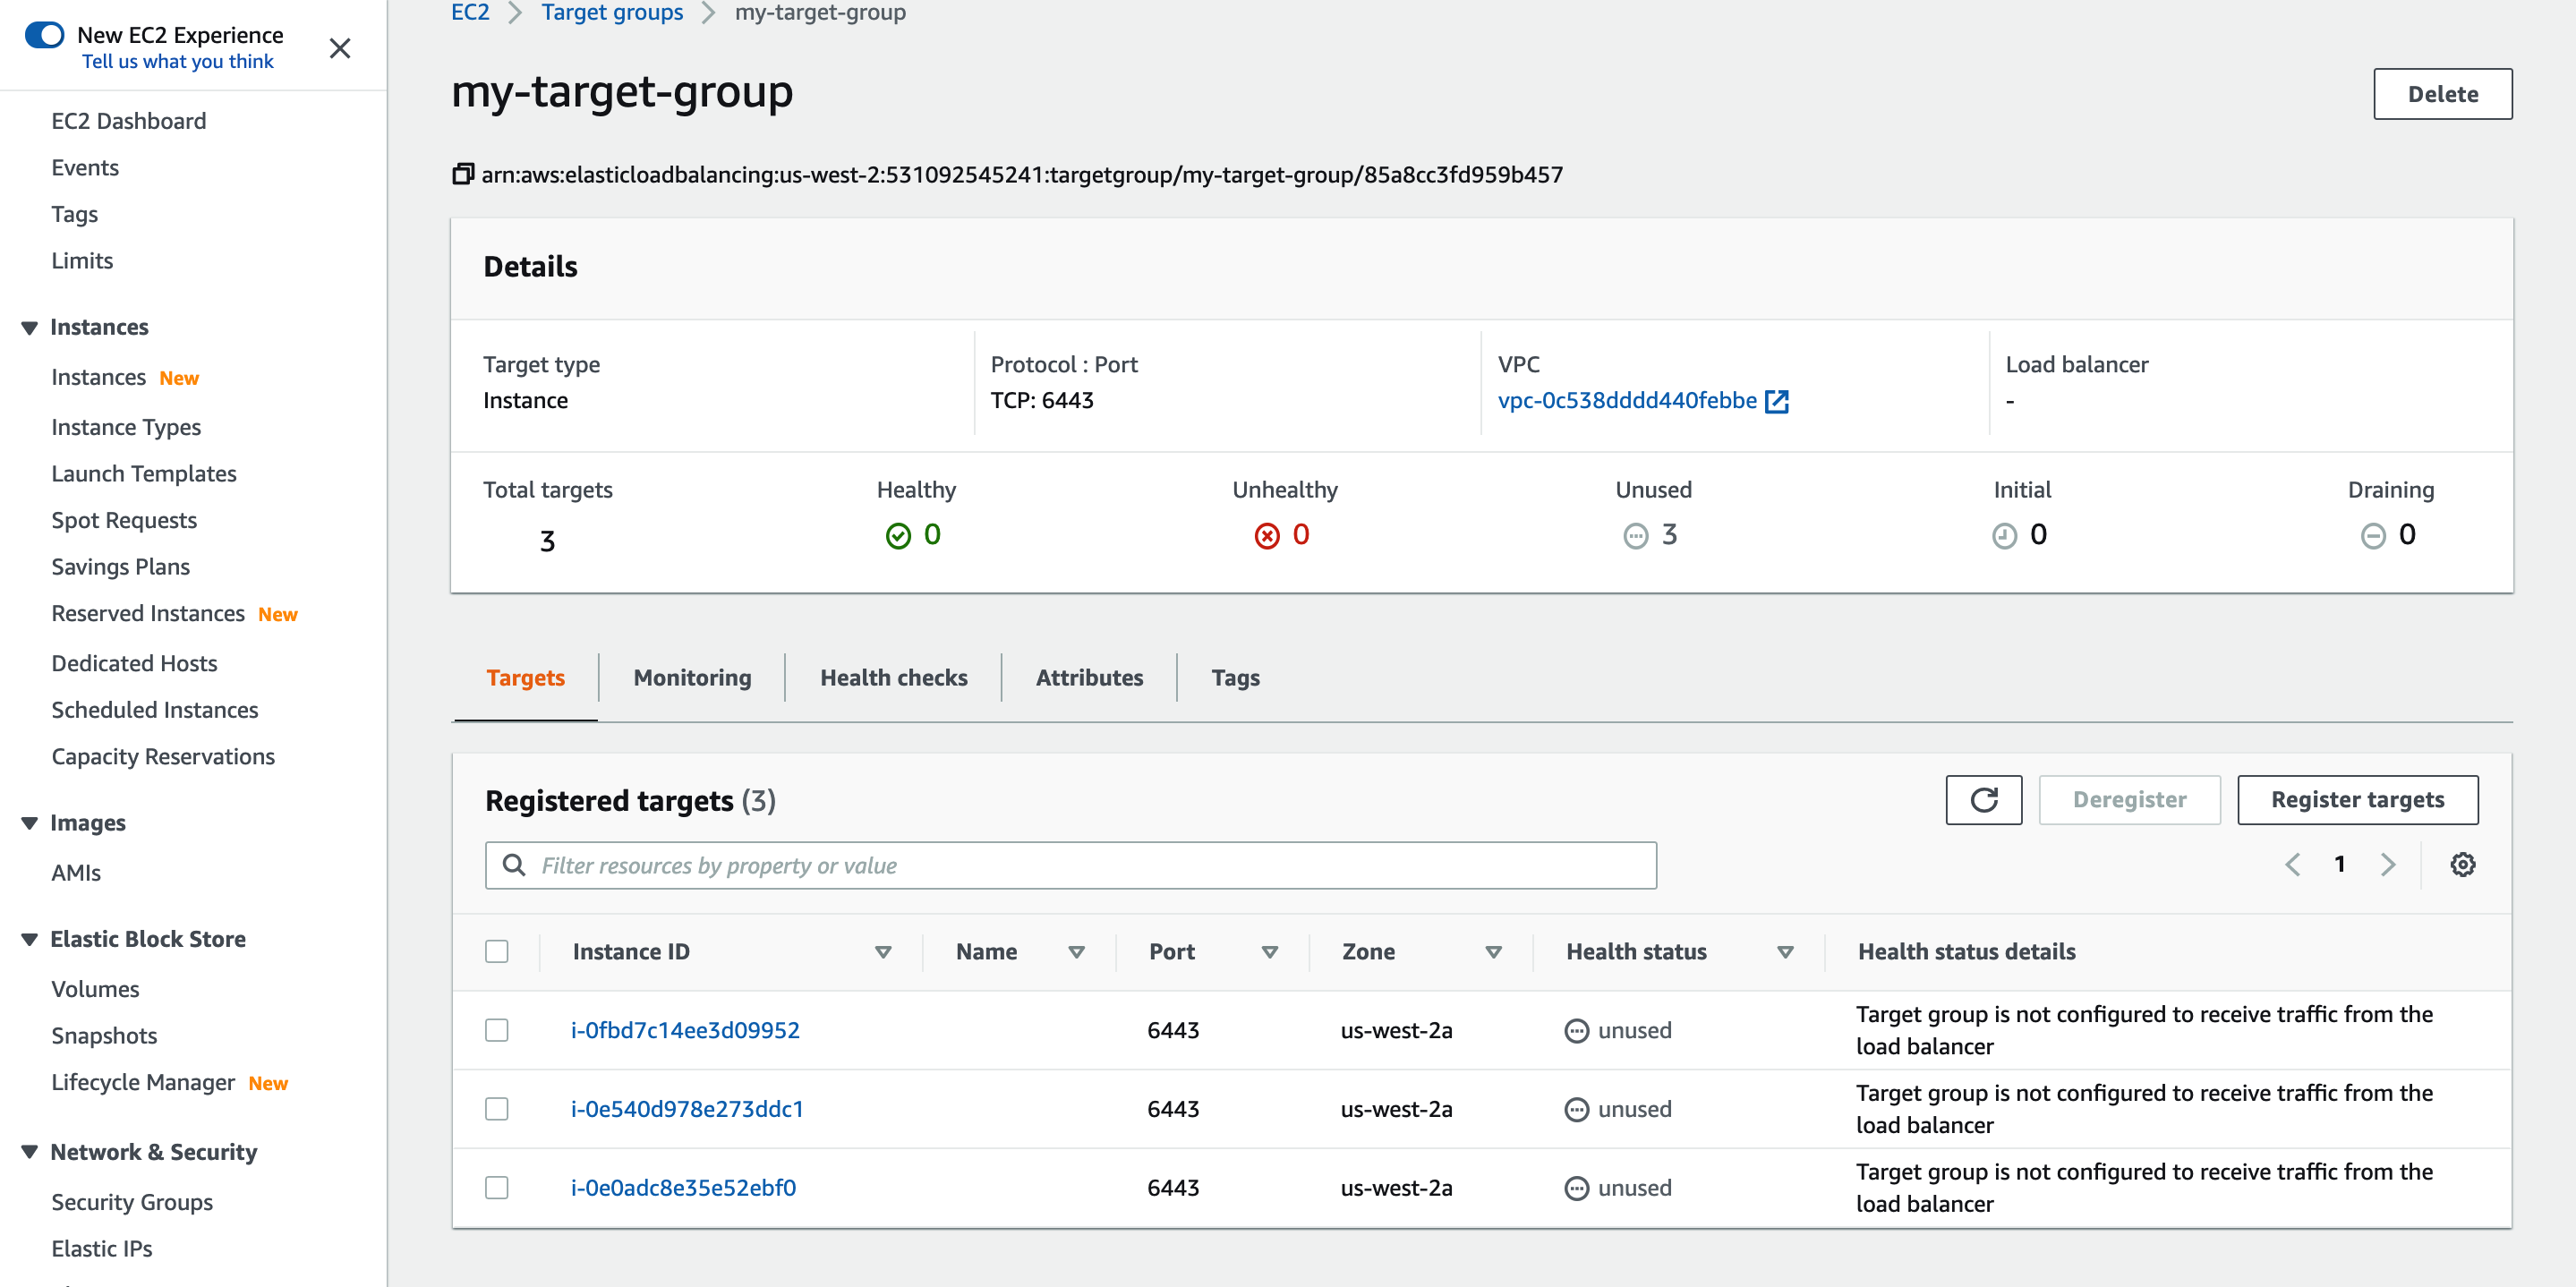
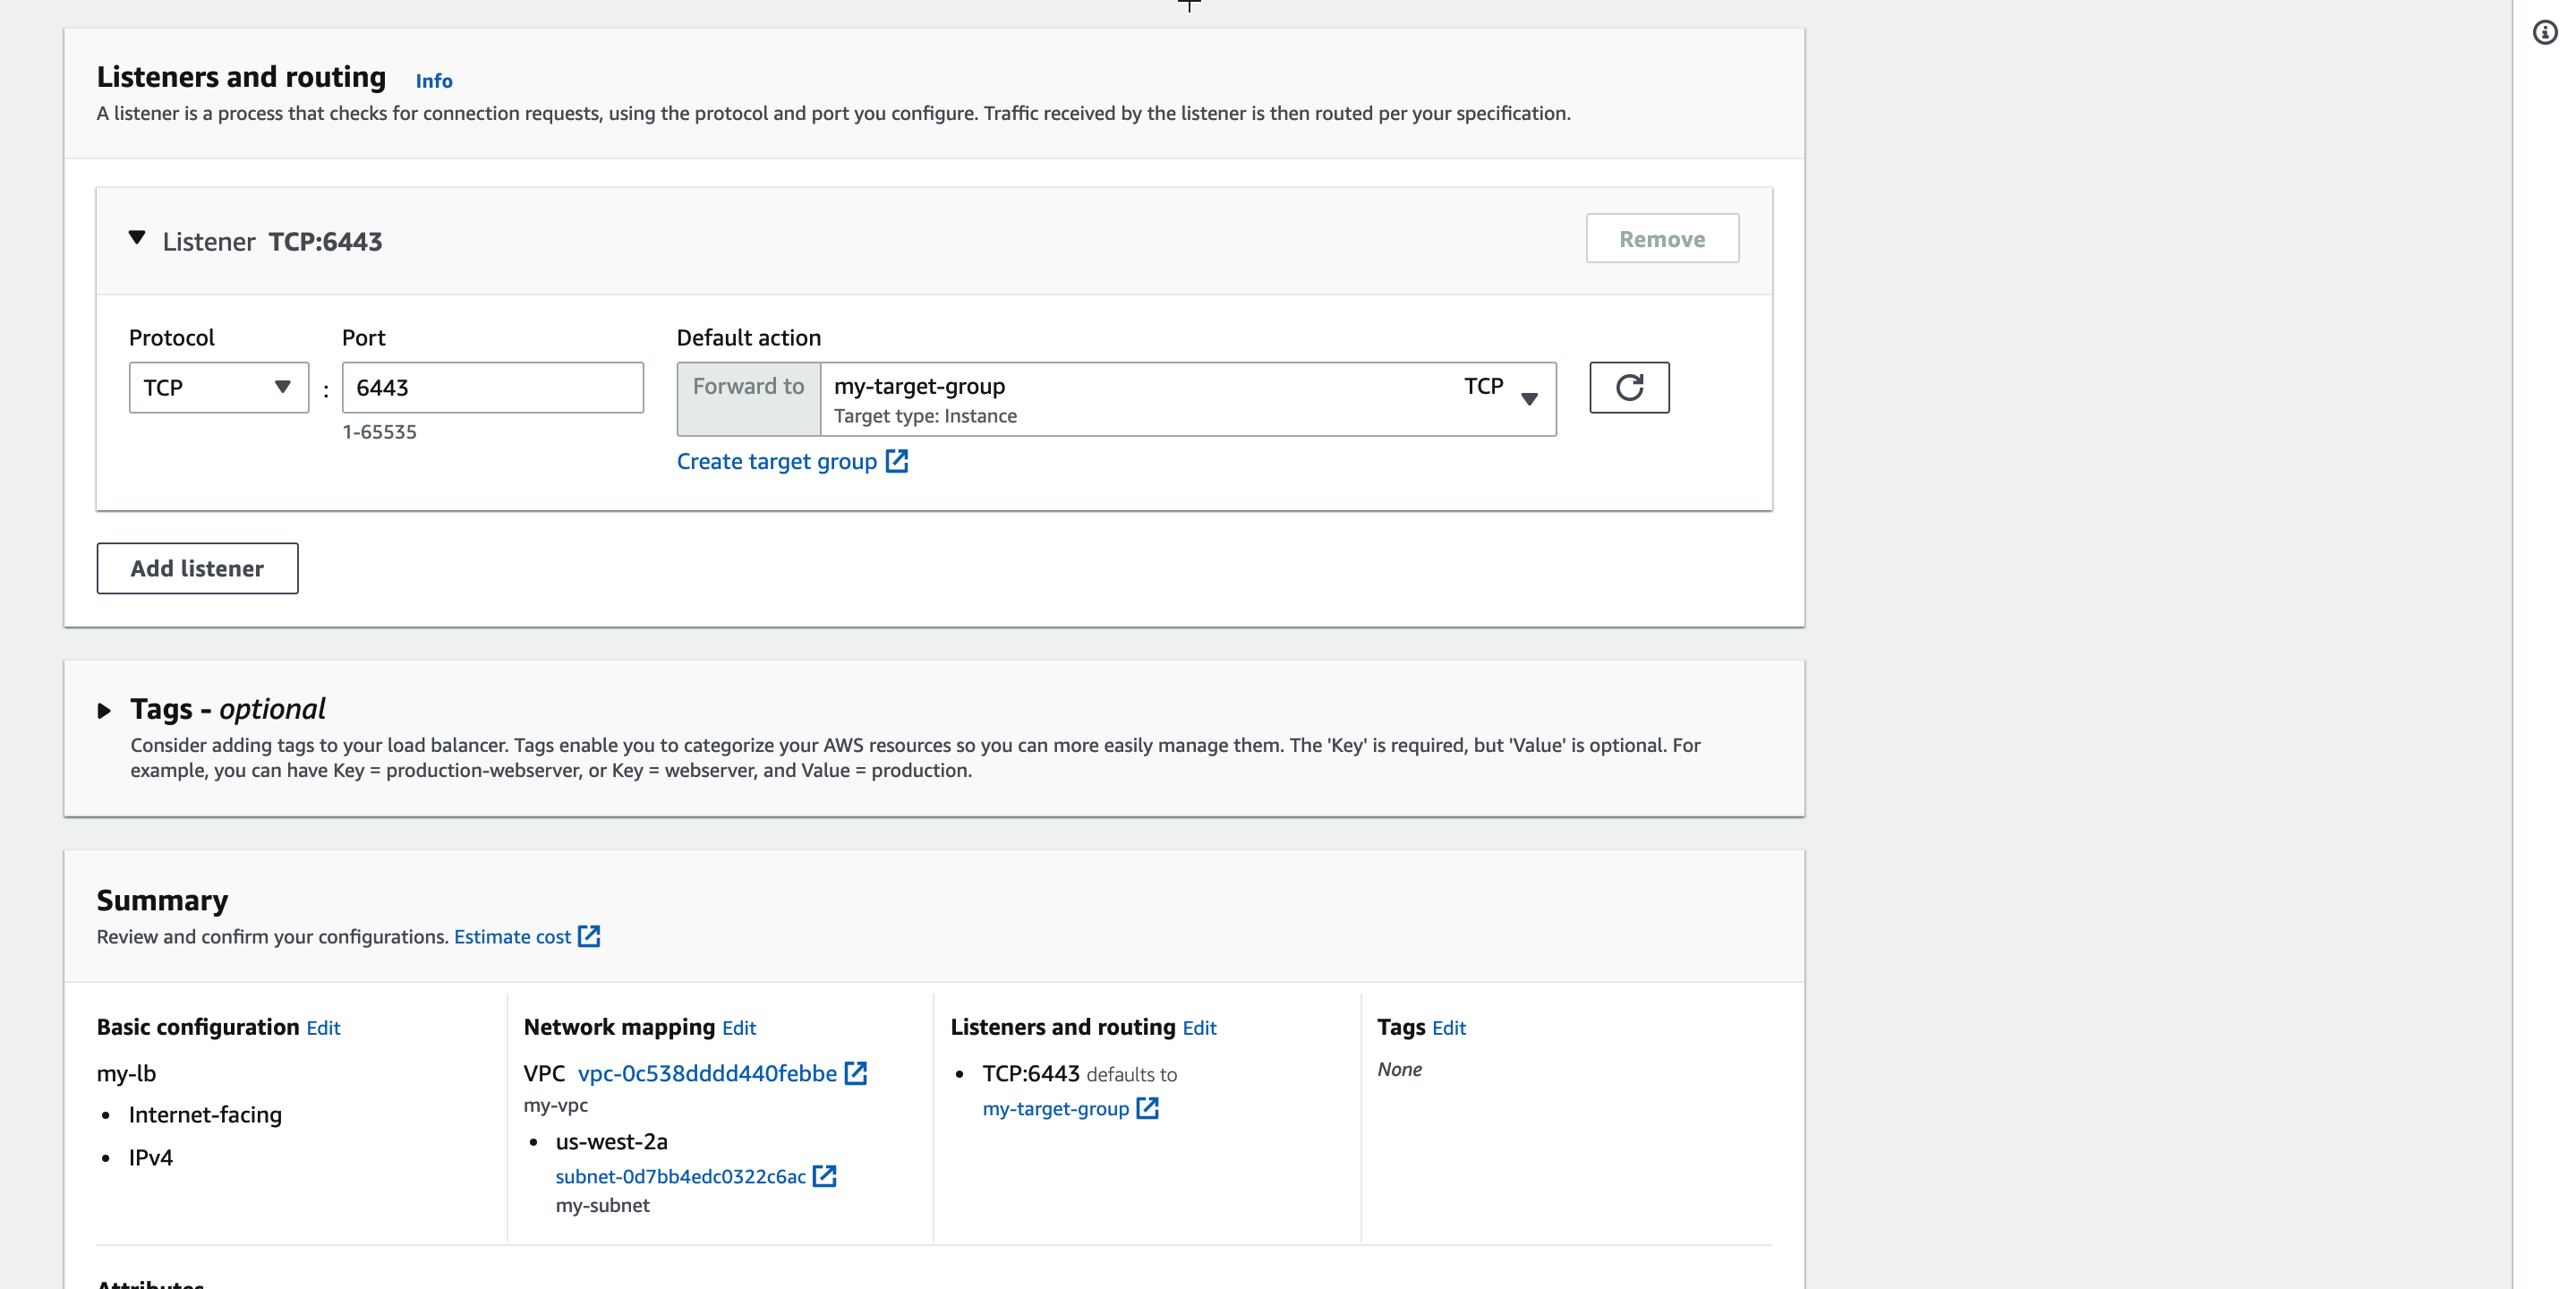
Create a Load Balancer
On the EC2 dashboard, select Load Balancing > Target Groups, create a target group, and register port 6443 of the EC2 instances.
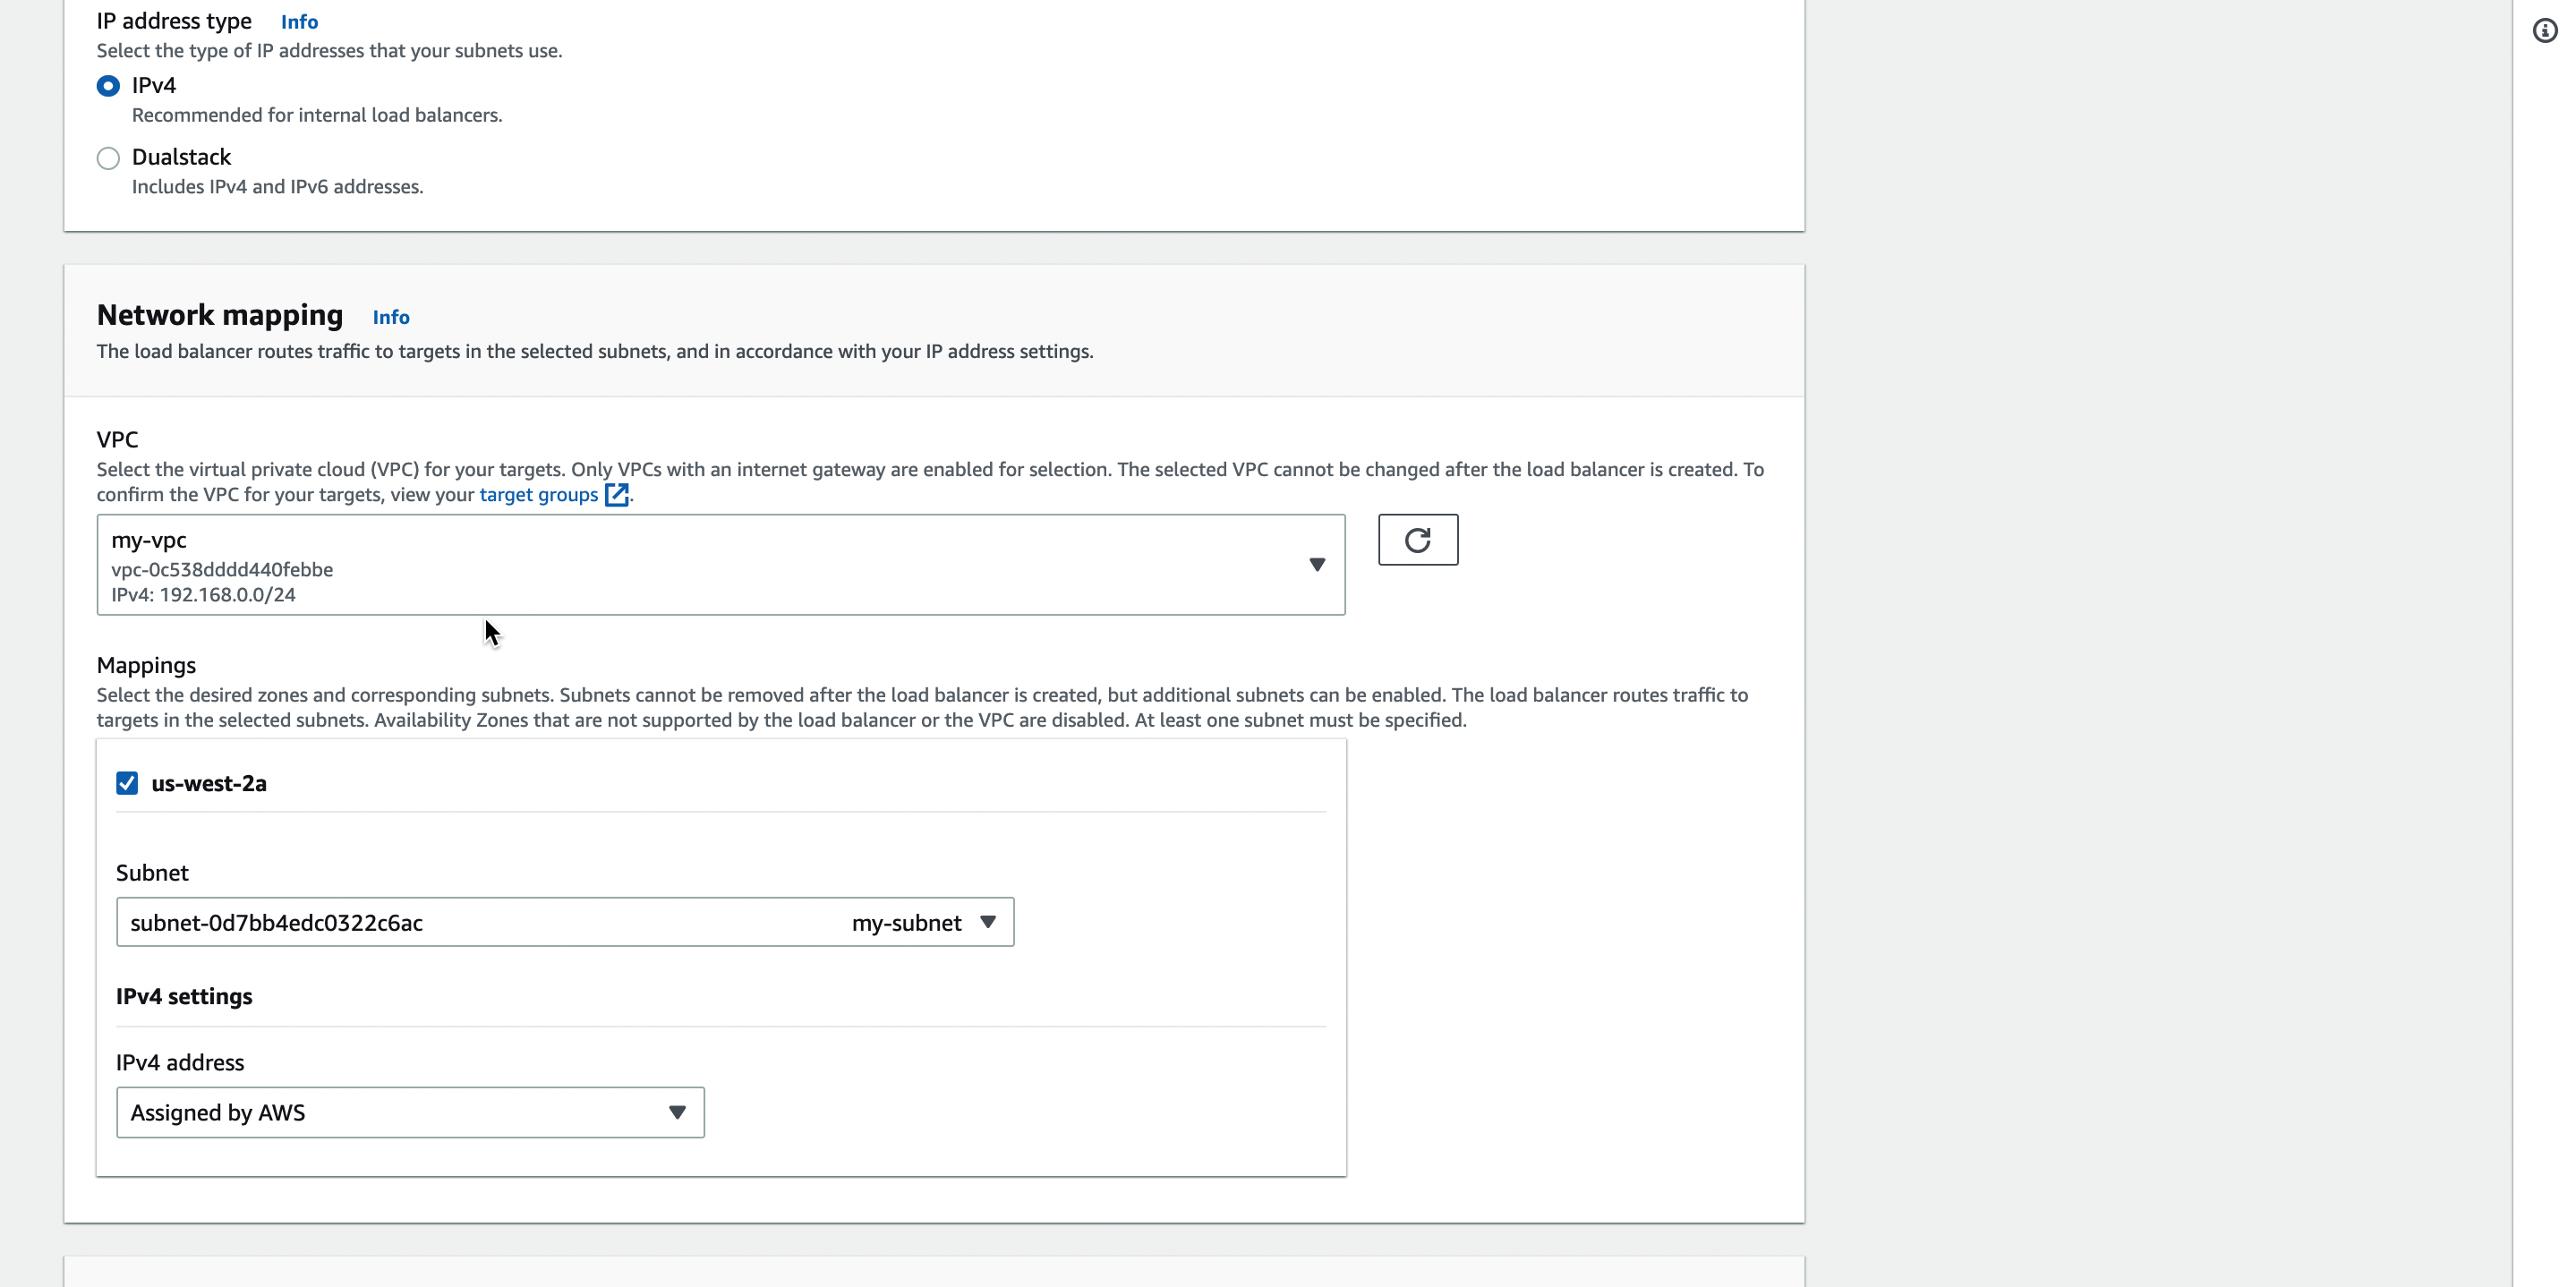
Create a network load balancer and select the VPC and subnet for the load balancer.
Configure the listener to listen on port 6443 and connect to the target group.
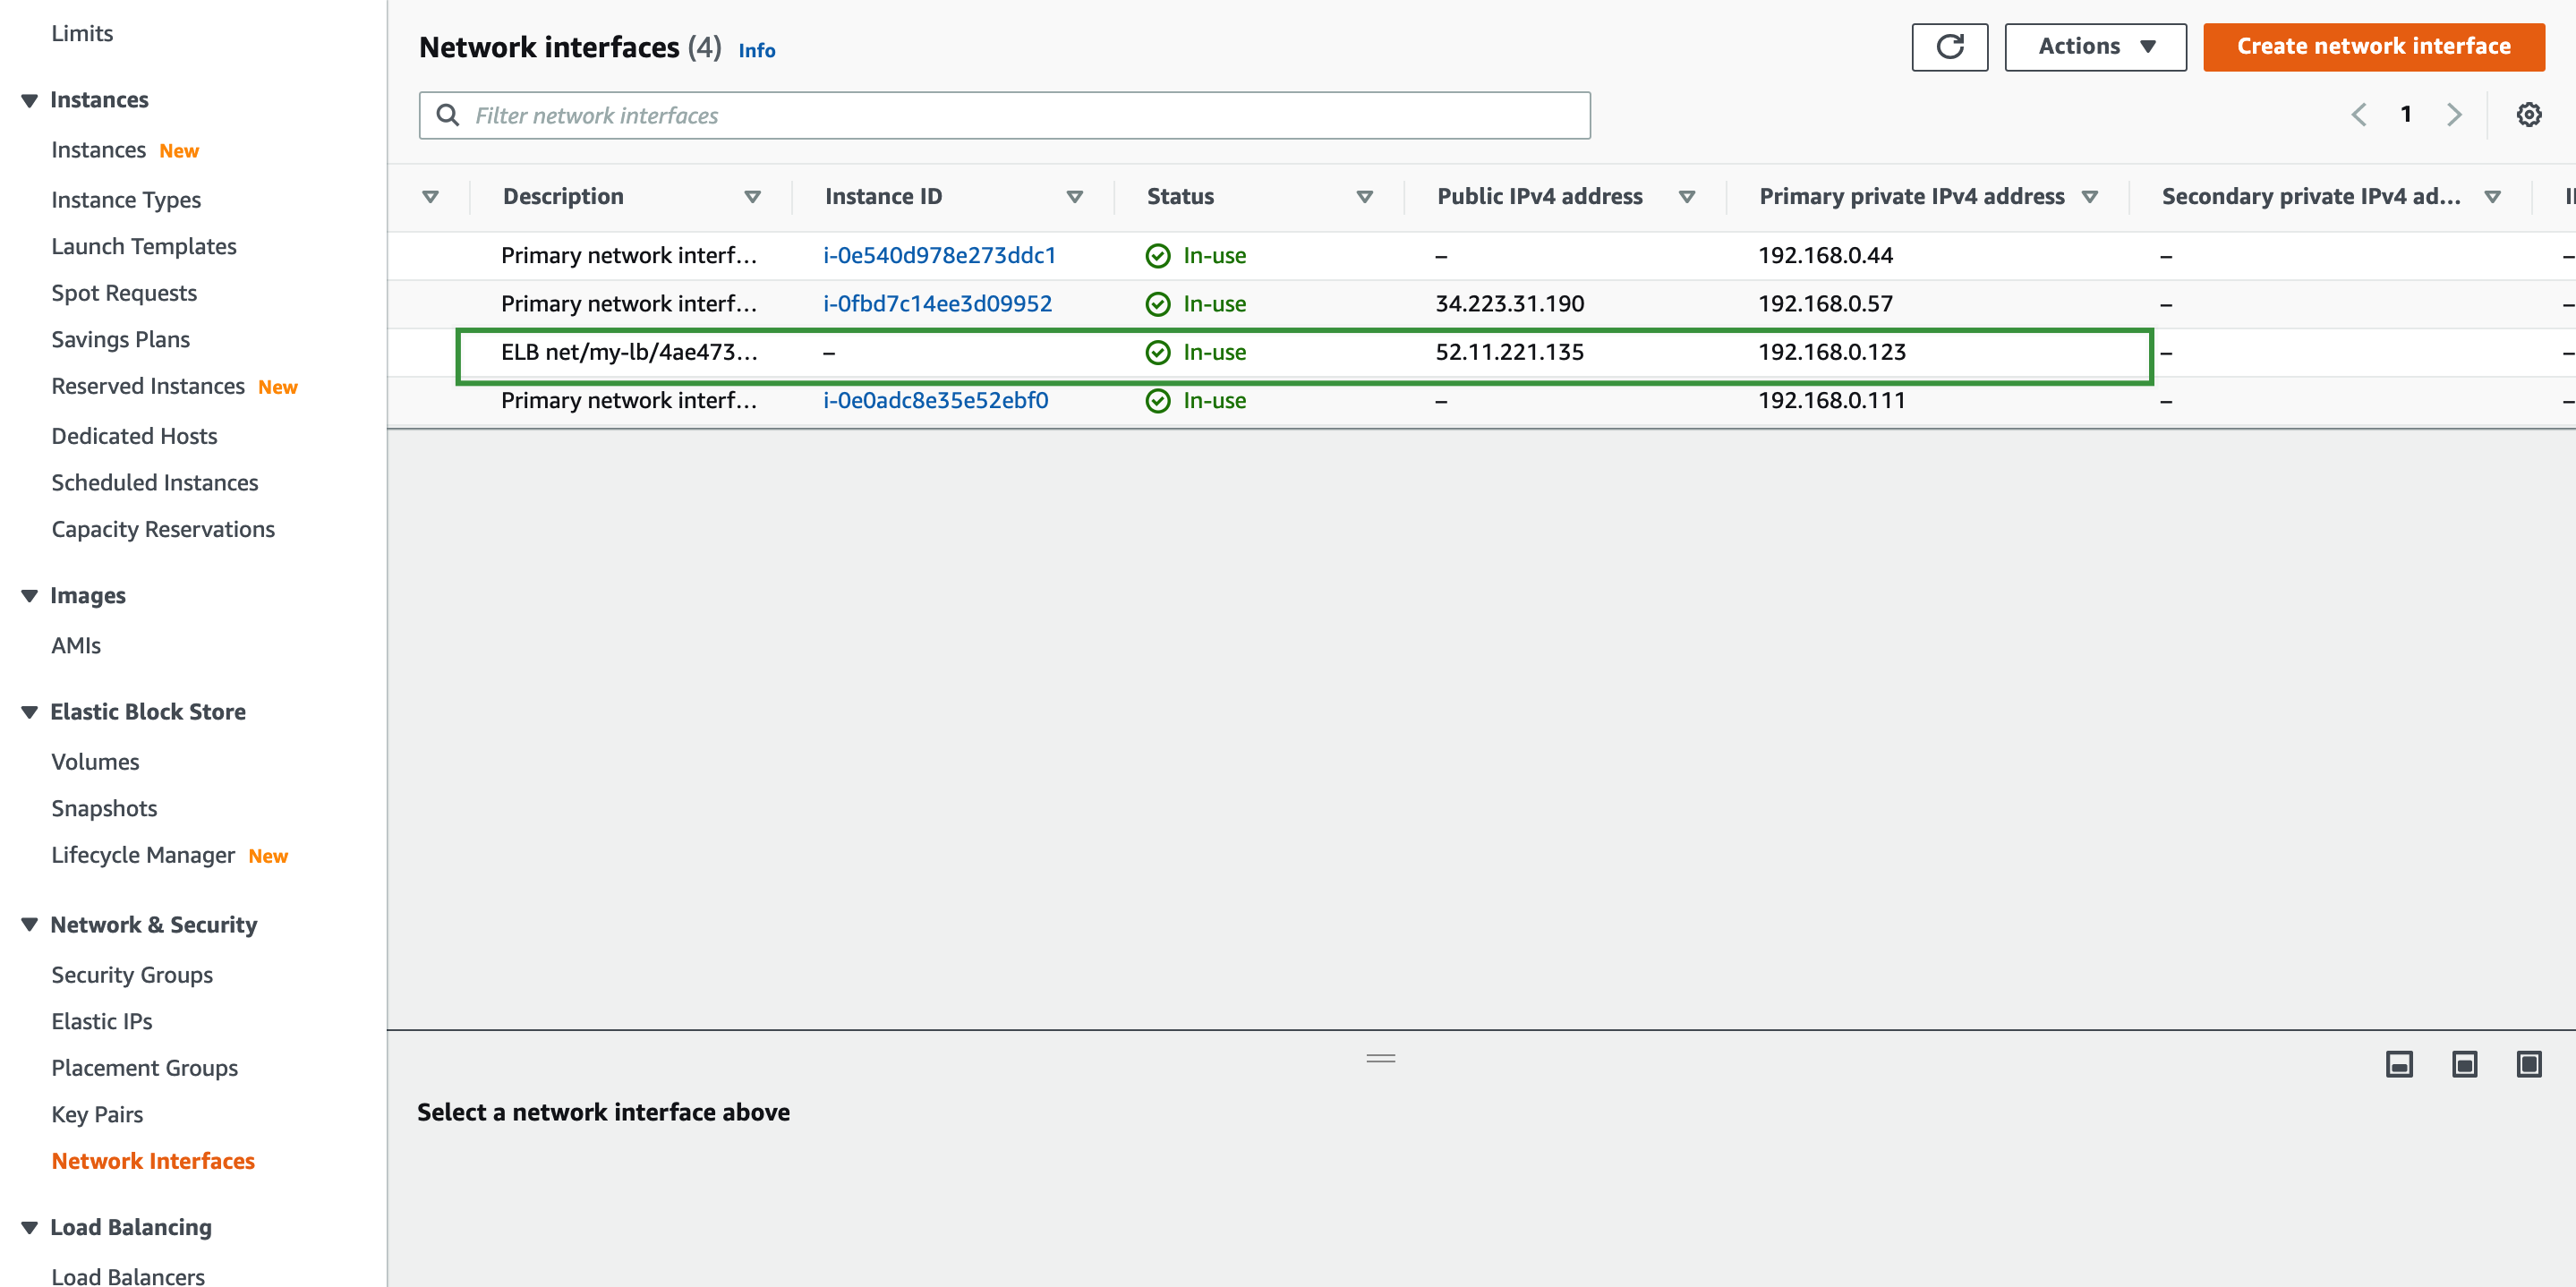
Check the IP Address of the Load Balancer
On the left navigation pane, select Network & Security > Network Interfaces to obtain the public and private IP addresses of the automatically generated ELB network interface.
Change the SSH Passwords of the AWS EC2 Instances
Log in to each AWS EC2 instance and change the password of the ubuntu user.
sudo passwd ubuntu
Change the SSH settings.
# Locate PasswordAuthentication, and change PasswordAuthentication no to: PasswordAuthentication yes
sudo vi /etc/ssh/sshd_config
Restart the SSH service.
sudo systemctl restart sshd
Obtain the KubeKey Deployment Tool
Download KubeKey from the Github Release Page or run the following command:
curl -sfL https://get-kk.kubesphere.io | VERSION=v2.0.0 sh -
Use KubeKey to Deploy a Kubernetes Cluster
Create the config-HA.yaml deployment configuration file.
./kk create config -f config-HA.yaml
Configure Cluster Information
Configure cluster information in the configuration file. For more information, see Multi-node Installation and Kubernetes Cluster Configurations.
apiVersion: kubekey.kubesphere.io/v1alpha1
kind: Cluster
metadata:
  name: sample
spec:
  hosts:
  - {name: master1, address: 192.168.0.10, internalAddress: 192.168.0.10, user: ubuntu, password: password}
  - {name: master2, address: 192.168.0.11, internalAddress: 192.168.0.11, user: ubuntu, password: password}
  - {name: master3, address: 192.168.0.12, internalAddress: 192.168.0.12, user: ubuntu, password: password}
  roleGroups:
    etcd:
    - master1
    - master2
    - master3
    master:
    - master1
    - master2
    - master3
    worker:
    - master1
    - master2
    - master3
  controlPlaneEndpoint:
    domain: lb.kubesphere.local
    address: "192.168.0.151"
    port: 6443
  kubernetes:
    version: v1.19.8
    imageRepo: kubesphere
    clusterName: cluster.local
  network:
    plugin: calico
    kubePodsCIDR: 10.233.64.0/18
    kubeServiceCIDR: 10.233.0.0/18
  registry:
    registryMirrors: []
    insecureRegistries: []
  addons: []
Create a Kubernetes Cluster
Run the following command to install Kubernetes on AWS:
./kk create cluster -f config-HA.yaml
If a message is displayed indicating that conntrack is missing, run the
sudo apt-get install conntrackcommand to install conntrack.
Check the Deployment Result
Run the following commands to check the deployment result:
Run the
kubectl get node -o widecommand. IfReadyis displayed in the STATUS column for all cluster nodes, the cluster nodes are running properly.ubuntu@master1:~$ kubectl get node -o wide NAME STATUS ROLES AGE VERSION INTERNAL-IP EXTERNAL-IP OS-IMAGE KERNEL-VERSION CONTAINER-RUNTIME master1 Ready master,worker 3m45s v1.19.8 192.168.0.10 <none> Ubuntu 18.04.5 LTS 5.4.0-1045-aws docker://20.10.7 master2 Ready master,worker 95s v1.19.8 192.168.0.11 <none> Ubuntu 18.04.5 LTS 5.4.0-1045-aws docker://20.10.7 master3 Ready master,worker 2m v1.19.8 192.168.0.12 <none> Ubuntu 18.04.5 LTS 5.4.0-1045-aws docker://20.10.7Run the
kubectl get po -Acommand. IfRunningis displayed in the STATUS column for all components in thekube-systemnamespace, all Kubernetes components are running properly.ubuntu@master1:~$ kubectl get po -A NAMESPACE NAME READY STATUS RESTARTS AGE kube-system calico-kube-controllers-8f59968d4-gchrc 1/1 Running 0 104s kube-system calico-node-c65wl 1/1 Running 0 105s kube-system calico-node-kt4qd 1/1 Running 0 105s kube-system calico-node-njxsh 1/1 Running 0 105s kube-system coredns-86cfc99d74-ldx9b 1/1 Running 0 3m59s kube-system coredns-86cfc99d74-pg5lj 1/1 Running 0 3m59s kube-system kube-apiserver-master1 1/1 Running 0 4m19s kube-system kube-apiserver-master2 1/1 Running 0 115s kube-system kube-apiserver-master3 1/1 Running 0 2m33s kube-system kube-controller-manager-master1 1/1 Running 0 4m19s kube-system kube-controller-manager-master2 1/1 Running 0 115s kube-system kube-controller-manager-master3 1/1 Running 0 2m34s kube-system kube-proxy-klths 1/1 Running 0 2m12s kube-system kube-proxy-nm79t 1/1 Running 0 3m59s kube-system kube-proxy-nsvmh 1/1 Running 0 2m37s kube-system kube-scheduler-master1 1/1 Running 0 4m19s kube-system kube-scheduler-master2 1/1 Running 0 115s kube-system kube-scheduler-master3 1/1 Running 0 2m34s kube-system nodelocaldns-nblsl 1/1 Running 0 2m12s kube-system nodelocaldns-q78k4 1/1 Running 0 3m54s kube-system nodelocaldns-q9244 1/1 Running 0 2m37sRun the
kubectl get epcommand. If the IP addresses of all master nodes are displayed in the ENDPOINTS column, HA is functioning properly for the AWS-managed Kubernetes cluster.ubuntu@master1:~$ kubectl get ep NAME ENDPOINTS AGE kubernetes 192.168.0.10:6443,192.168.0.11:6443,192.168.0.12:6443 5m10s
