


KubeSphere offers a developer-friendly wizard that simplifies the operations & maintenance of Kubernetes, but it is essentially built on Kubernetes. Kubernetes' TLS certificates are valid for only one year, so we need to update the certificates every year, which is unavoidable even though the cluster is installed by the powerful and lightweight installation tool KubeKey. To prevent possible risks arising from certificate expiration, we need to find a way to monitor certificate validity of Kubernetes components.
Some of you may have heard of ssl-exporter, which exports metrics for SSL certificates collected from various sources, such as the HTTPS certificate, file certificate, Kubernetes Secret, and kubeconfig file. Basically, ssl-exporter can meet our needs, but it does not have a wealth of metrics. Here, I will share a more powerful Prometheus Exporter: x509-certificate-exporter with you.
Unlike ssl-exporter, x509-certificate-exporter only focuses on expiration monitoring of certificates of Kubernetes clusters, such as the file certificates of each component, Kubernetes TLS Secret, and kubeconfig file. Moreover, it provides more metrics. Next, I'll show you how to deploy x509-certificate-exporter on KubeSphere to monitor all certificates of the cluster.
Prepare a KubeSphere App Template
With OpenPitrix, a multicloud application management platform, KubeSphere is capable of managing the full lifecycle of apps and allowing you to intuitively deploy and manage apps using the App Store and app templates. For an app that has not been published in the App Store, you can import its Helm chart to the public repository of KubeSphere, or import it to a private app repository to provide an app template.
Here, we use a KubeSphere app template to deploy x509-certificate-exporter.
To deploy an app using an app template, you need to create a workspace, a project, and two users (ws-admin and project-regular), and assign platform role workspace-admin in the workspace to ws-admin, and role operator in the project to project-regular. To begin with, let's review the multi-tenant architecture of KubeSphere.
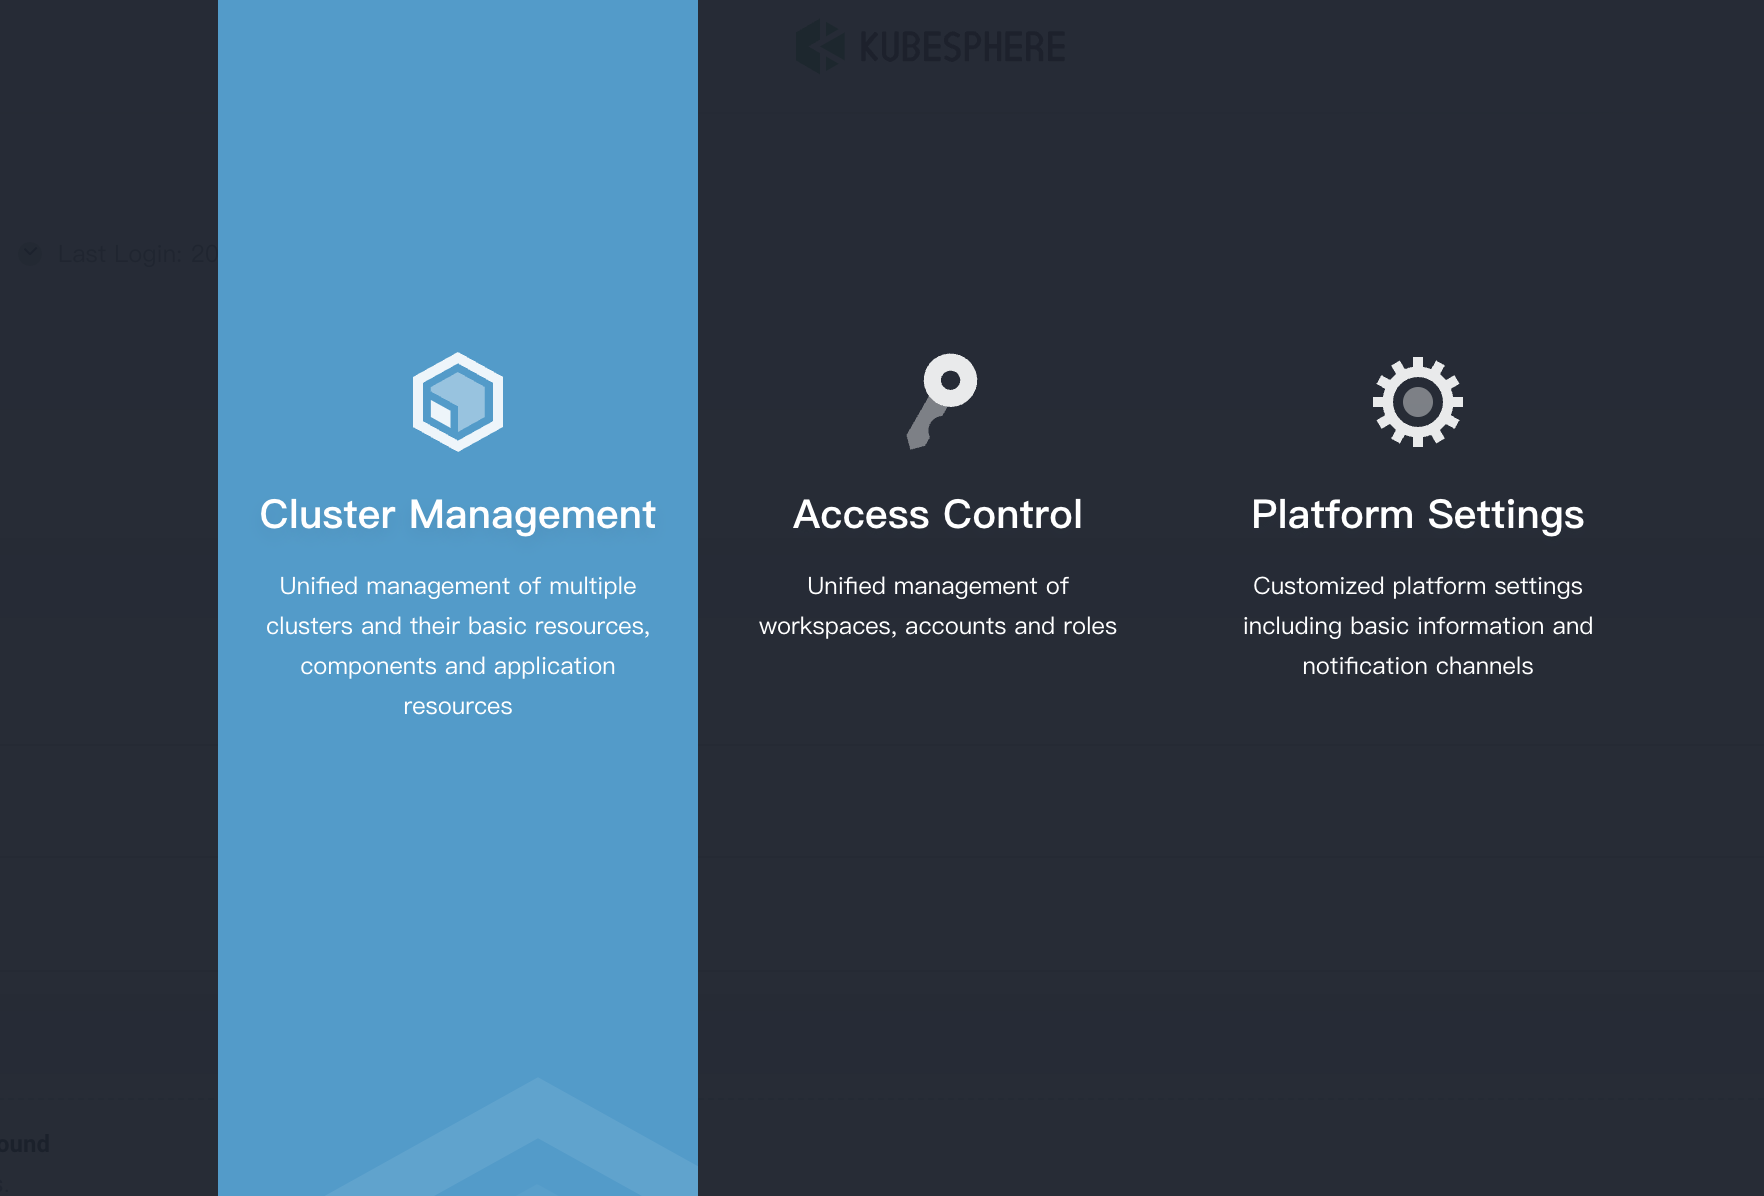
Multi-tenant Kubernetes Architecture
KubeSphere's multi-tenant system is divided into three levels: cluster, workspace, and project (equivalent to namespace of Kubernetes).
As the system workspace runs system resources, most of which are viewable only, it is suggested that you create a new workspace. For security reasons, we strongly recommend you granting different permissions to different tenants when they are collaborating in a workspace.
You can create multiple workspaces in a KubeSphere cluster. In each workspace, you can create multiple projects. By default, KubeSphere has several built-in roles for each level. Additionally, KubeSphere allows you to create roles with customized permissions. Overall speaking, KubeSphere's multi-tenant architecture is ideal for enterprises and organizations who are yearning for role-based management.
Create a User
After you have installed KubeSphere, you need to create users with different roles so that they can work within the authorized scope. Initially, the system has a default user admin, which has been assigned role platform-admin. In the following, we will create a user named user-manager, which will be used to create new users.
- Log in to the KubeSphere web console as user
adminand the default password isP@88w0rd.
For account security, it is highly recommended that you change your password the first time you log in to the console. To change your password, click User Settings in the drop-down list in the upper-right corner. In Password Settings, set a new password. You also can change the language of the console in User Settings.
Click Platform in the upper-left corner, and then click Access Control.
In the left navigation pane, click Platform Roles, and you will find four available built-in roles. Assign role
users-managerto the first user you create.Built-in Roles Description workspaces-managerWorkspace manager who can manage all workspaces on the KubeSphere platform. users-managerUser manager who can manage all users on the KubeSphere platform. platform-regularRegular user who has no access to any resources before joining a workspace. platform-adminAdministrator who can manage all resources on the KubeSphere platform. In Users, click Create. In the displayed dialog box, provide all the necessary information (marked with *) and select
users-managerfor Platform Role.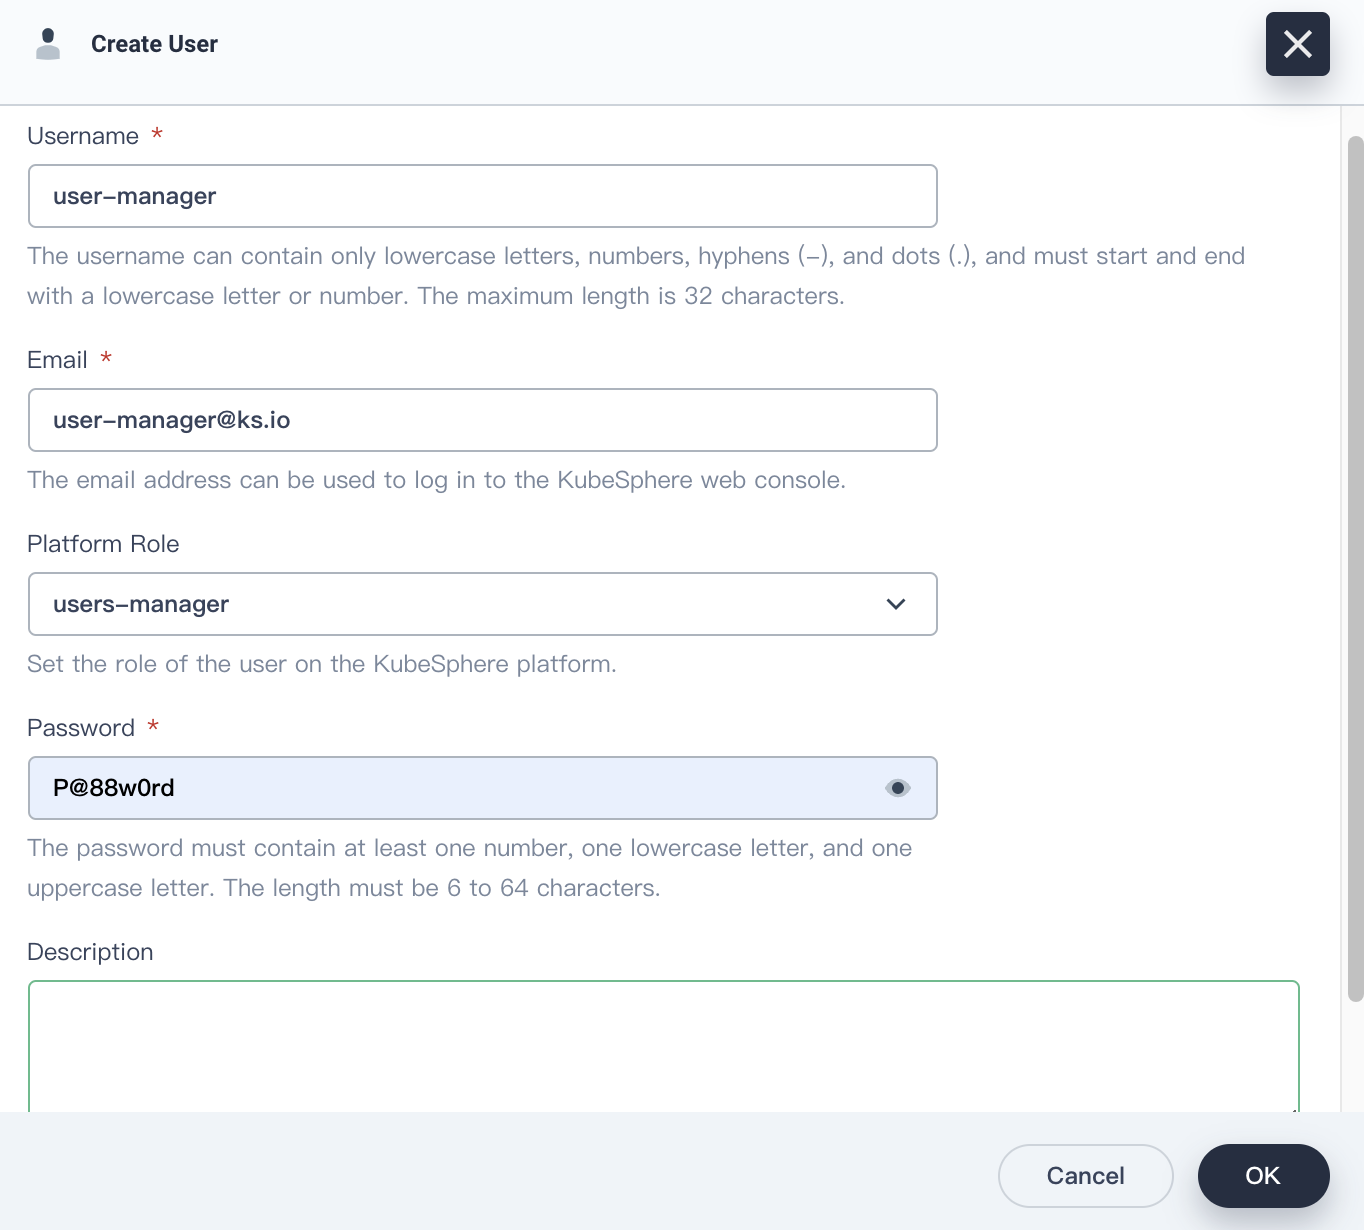
Click OK. In Users, you can find the newly created user in the user list.
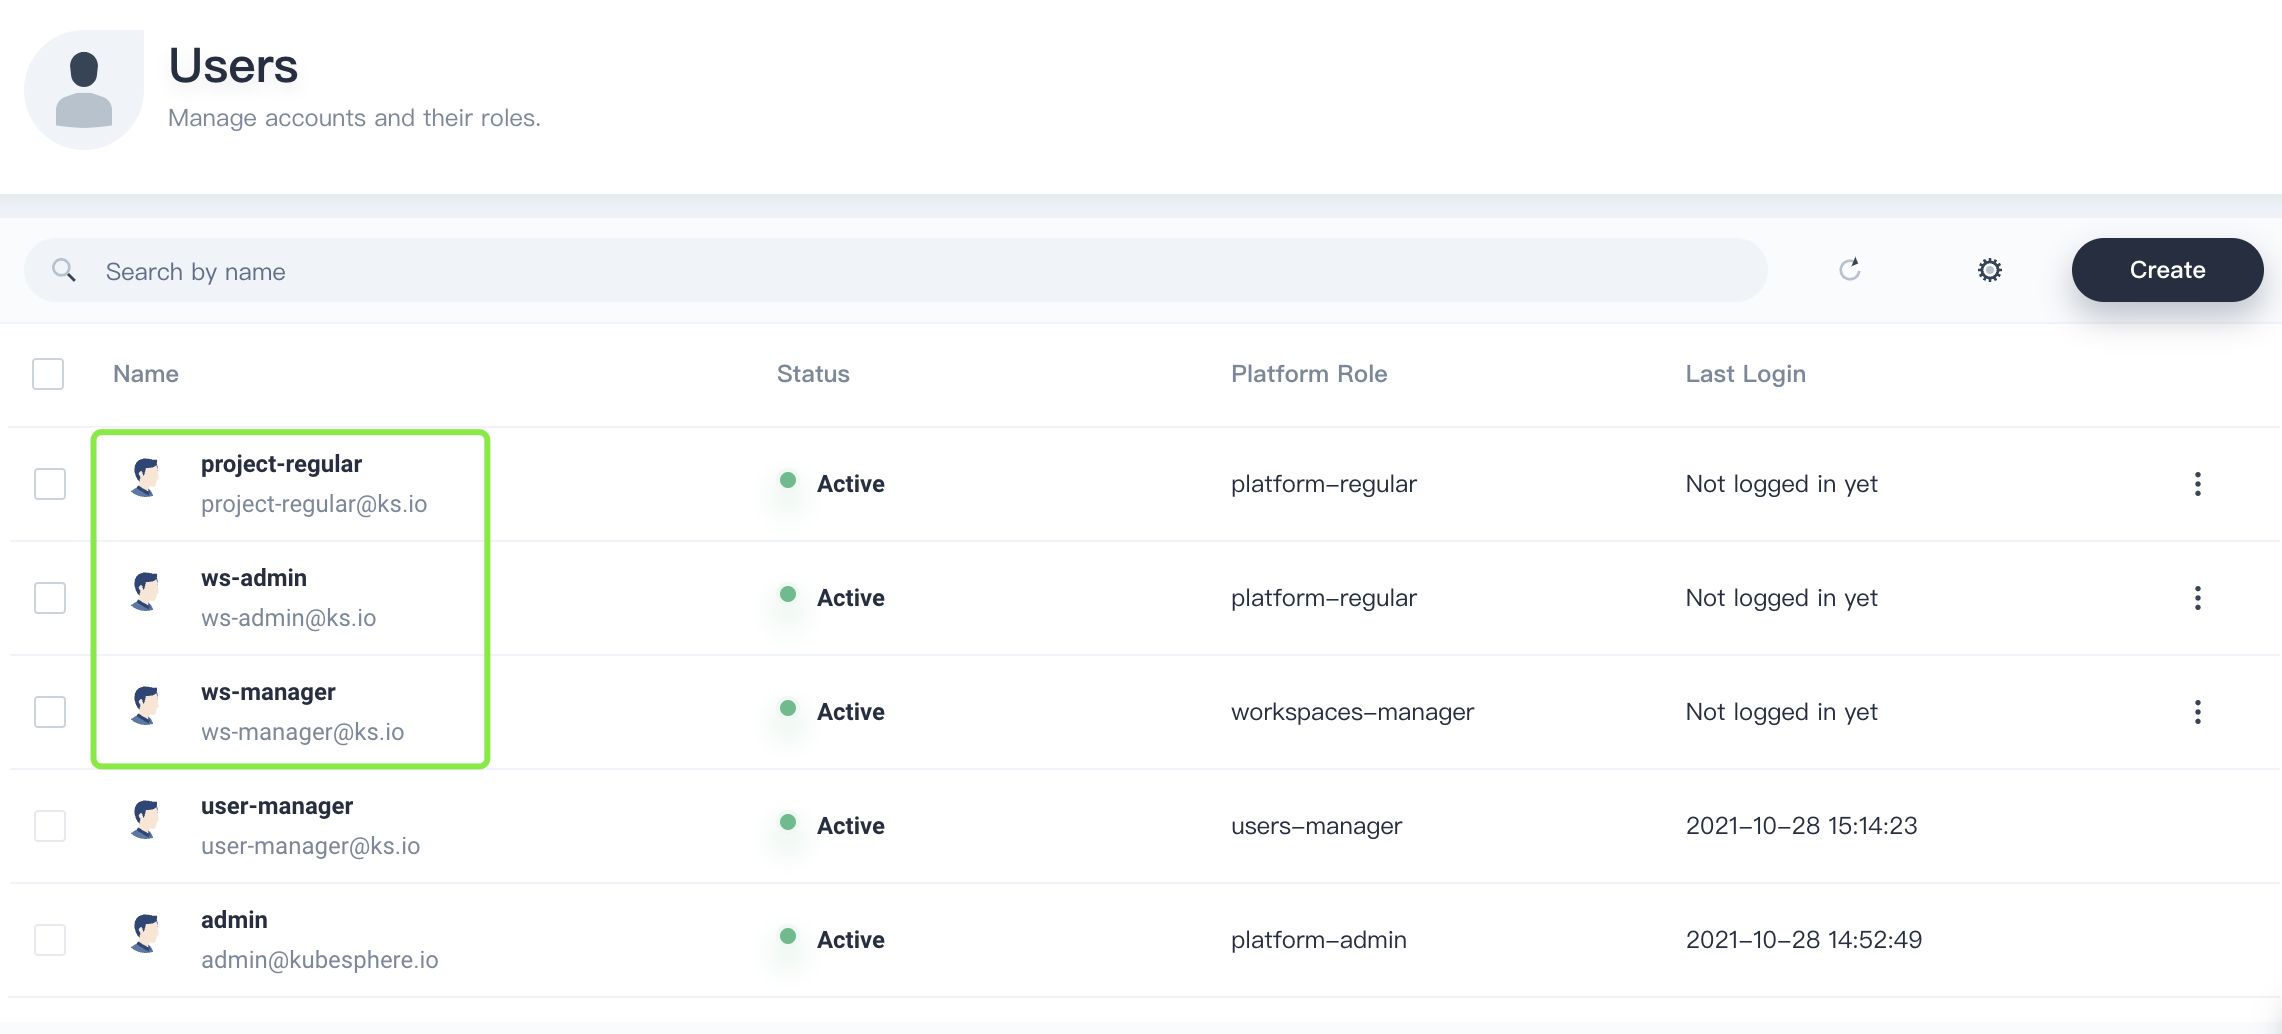
Log out of the console and log back as user
user-managerto create another three users listed in the following table.User Role Description ws-managerworkspaces-managerCreates and manages all workspaces. ws-adminplatform-regularManages all resources in a specified workspace (used to invite the project-regularuser to the workspace).project-regularplatform-regularCreates workloads, pipelines, and other resources in a specified project. In Users, you can view the three users you just created.
Create a Workspace
In this section, you need to use user ws-manager created in the previous step to create a workspace. As a basic logic unit for the management of projects, workload creation, and organization members, workspaces underpin the multi-tenant system of KubeSphere.
Log in to KubeSphere as
ws-manager, who has the permission to manage all workspaces on the platform. Click Platform in the upper-left corner and select Access Control. In Workspaces, you can see there is only one default workspacesystem-workspace, where system-related components and services run. You are not allowed to delete this workspace.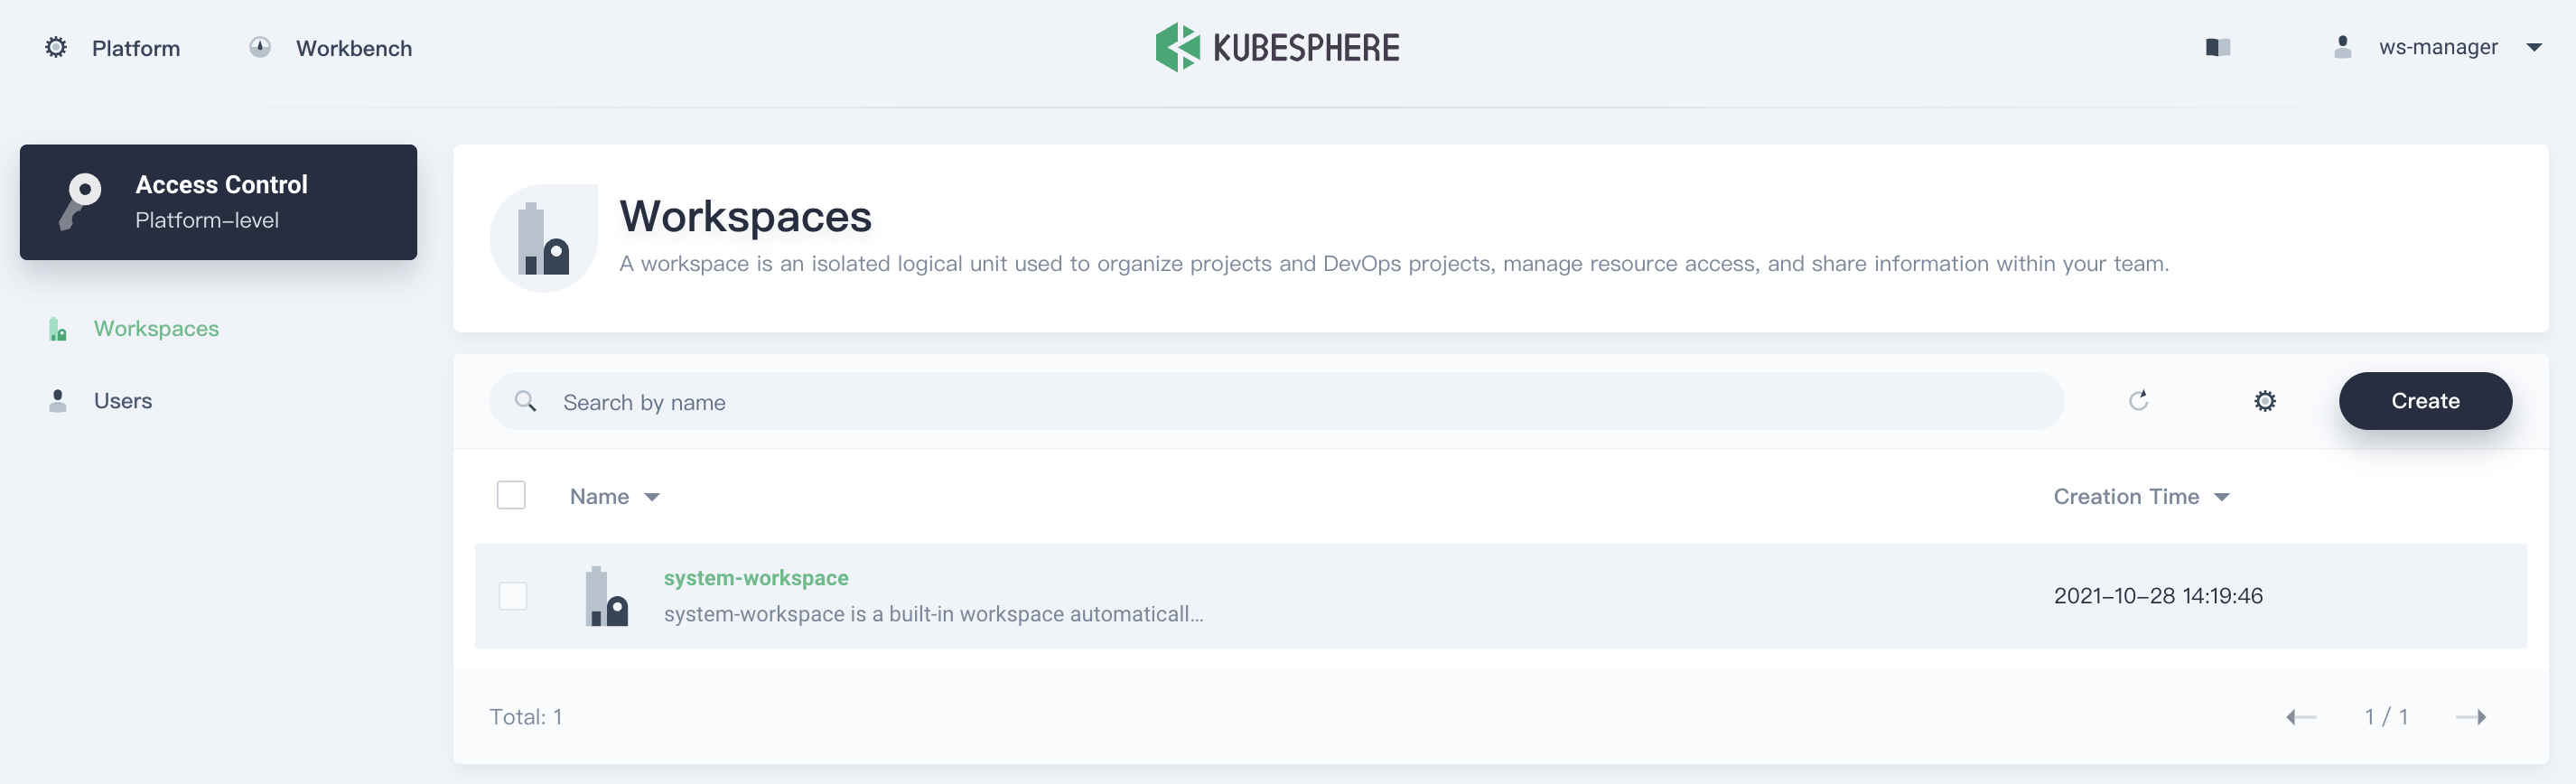
Click Create on the right, set a name for the new workspace (for example,
demo-workspace) and set userws-adminas the workspace administrator.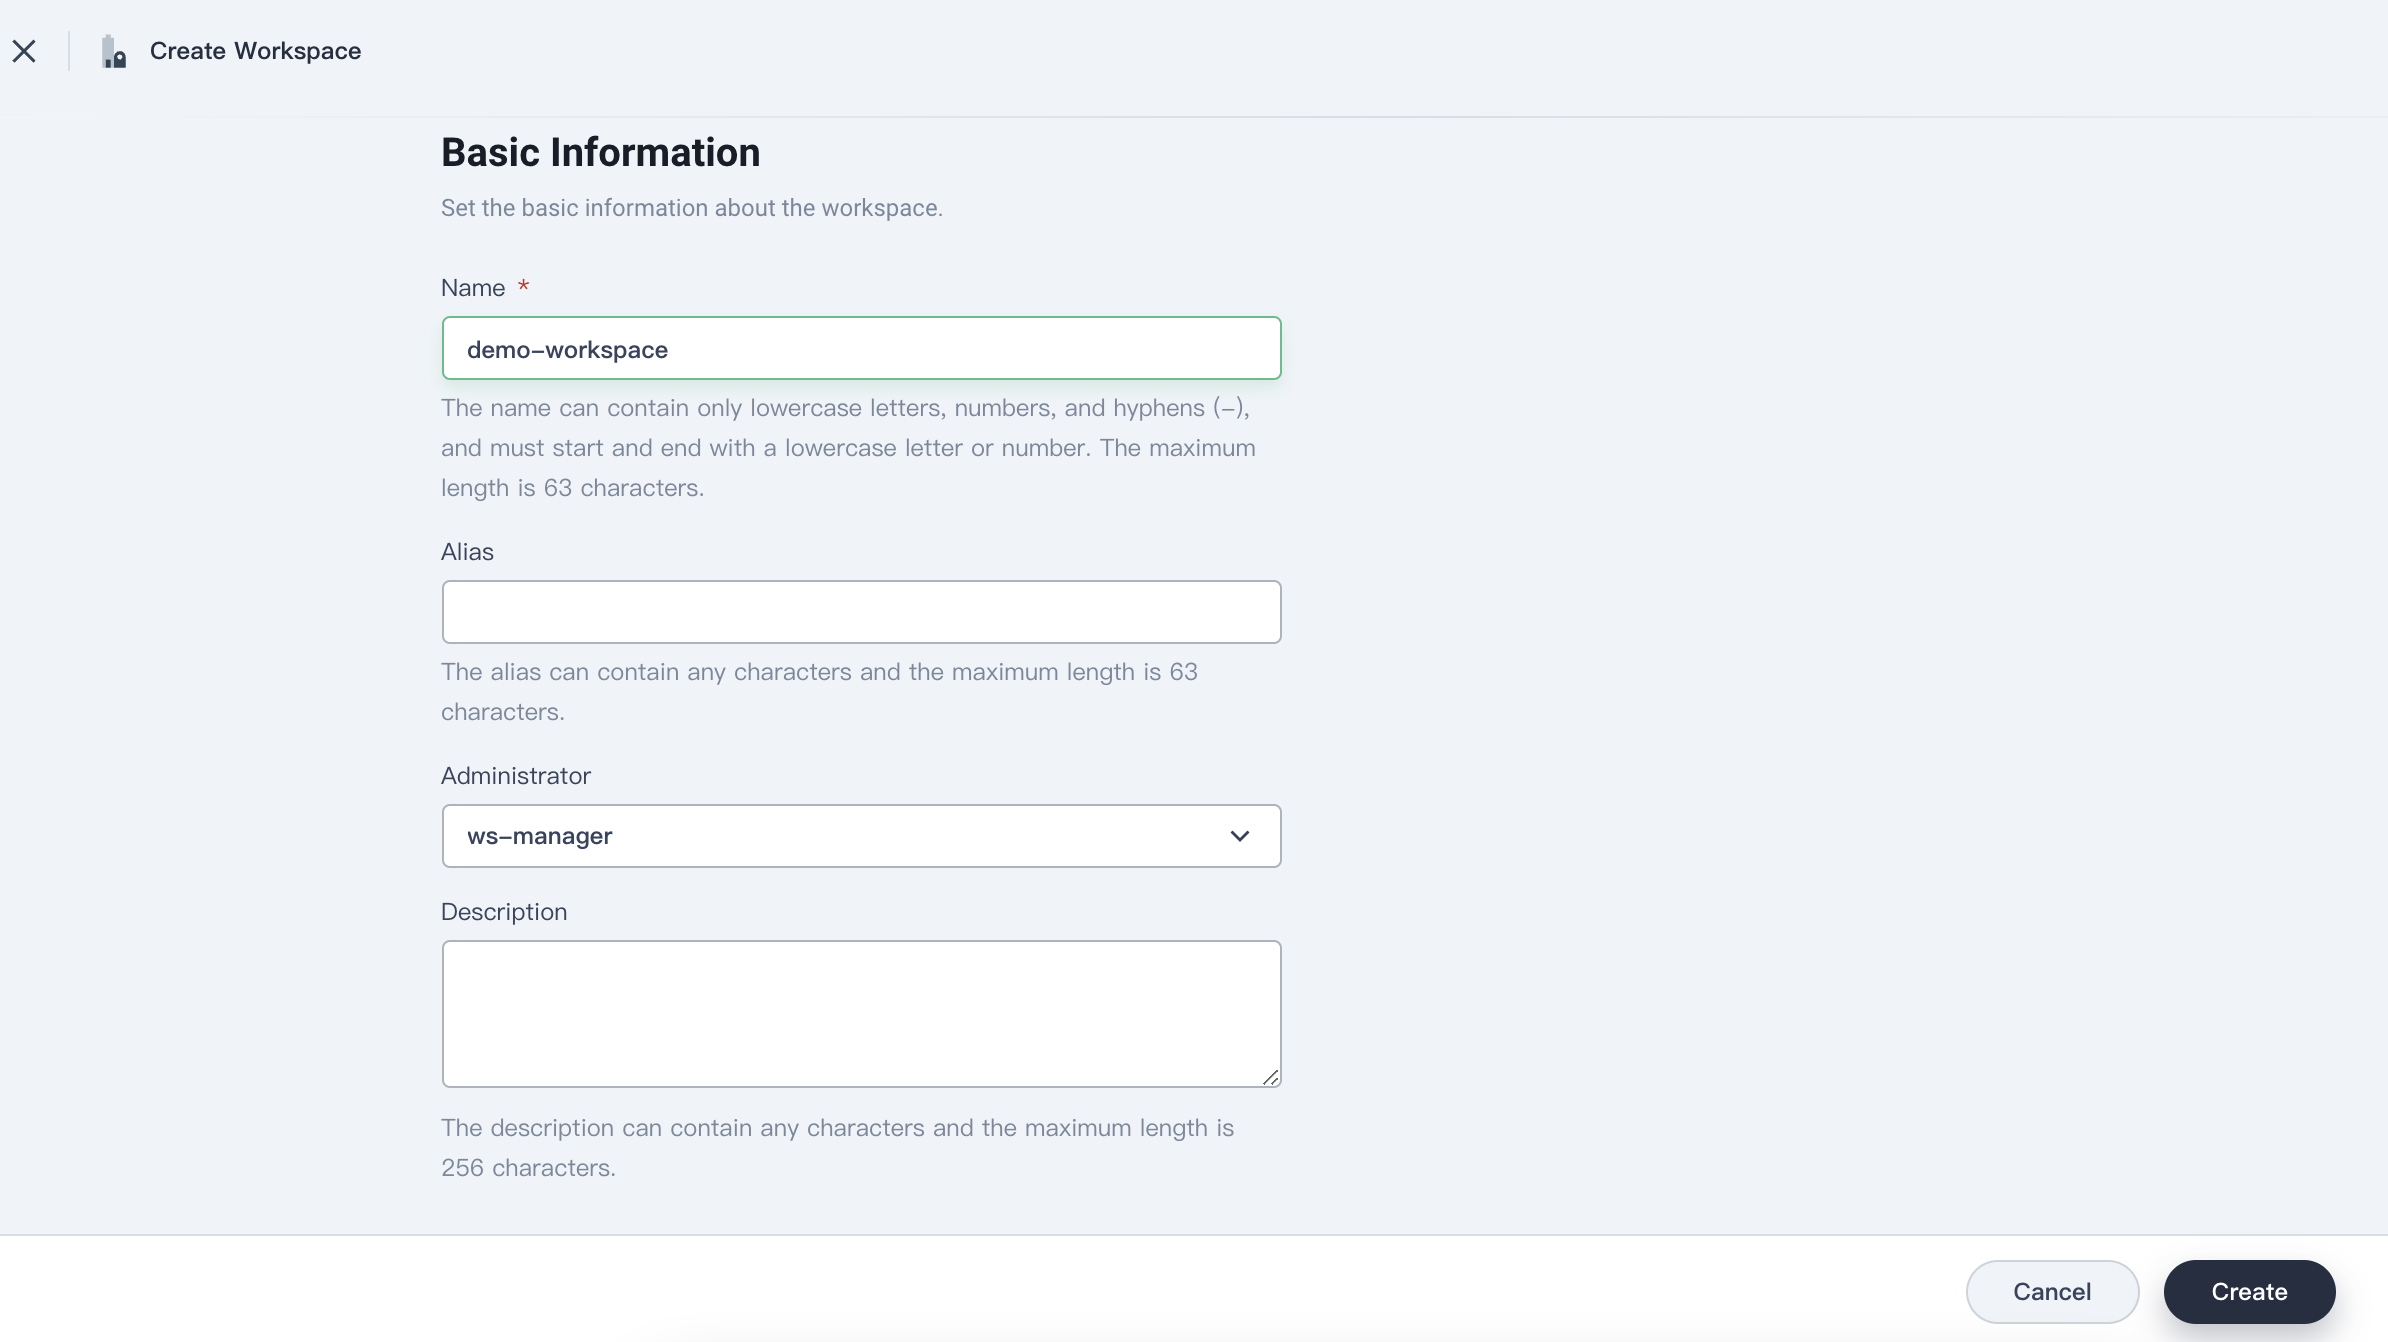
Click Create after you finish.
Log out of the console, and log back in as
ws-admin. In Workspace Settings, select Workspace Members, and then click Invite.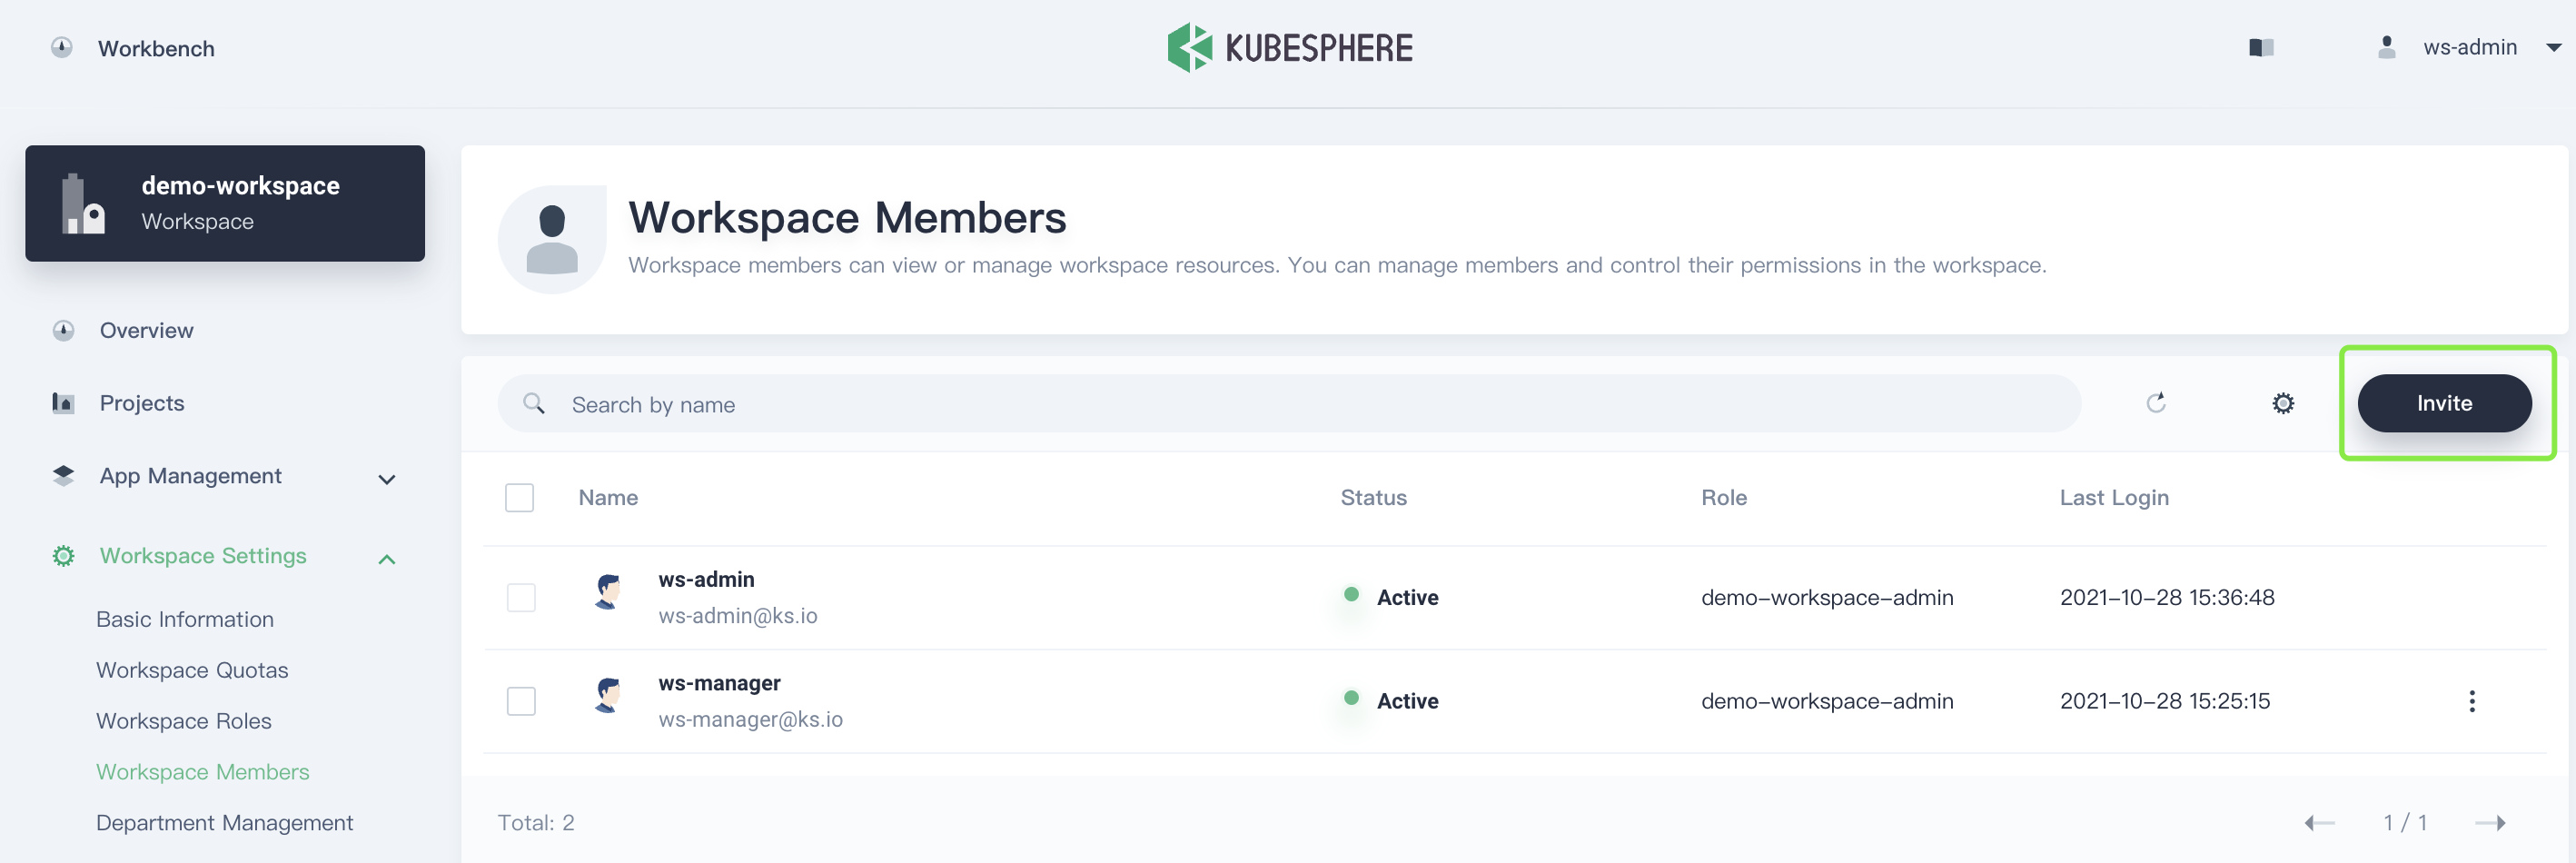
Invite
project-regularto the workspace, assign it roleworkspace-viewer, and then click OK.The actual role name follows a naming convention: <workspace name>-<role name>. For example, in workspace
demo-workspace, the actual role name of roleviewerisdemo-workspace-viewer.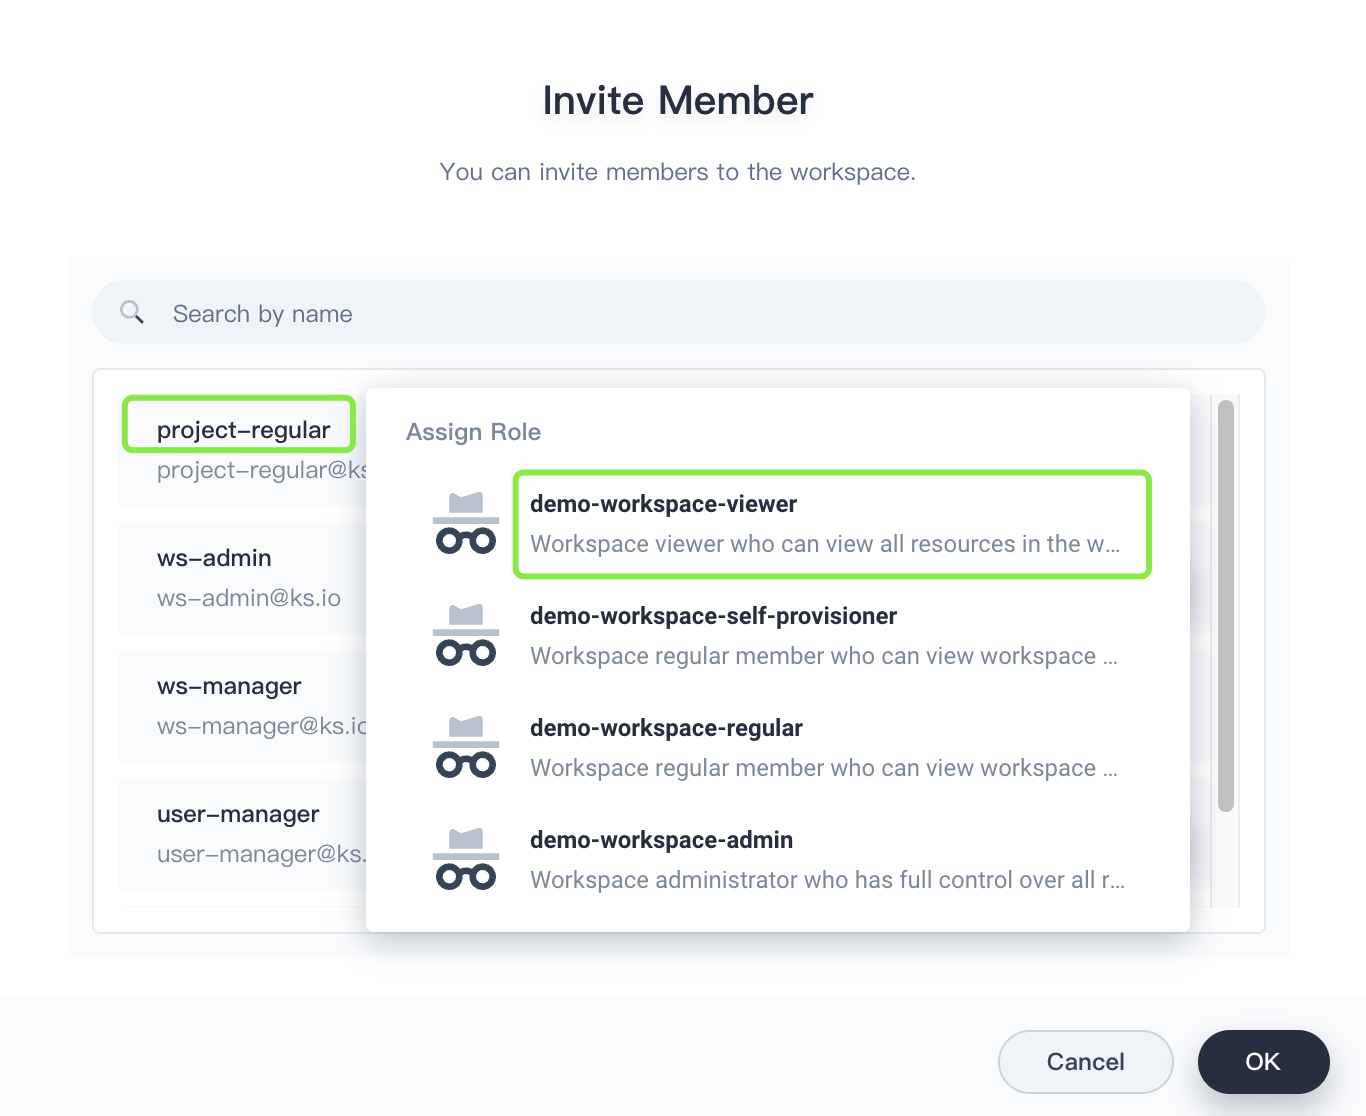
After you add
project-regularto the workspace, click OK. In Workspace Members, you can see two members listed.User Role Description ws-adminworkspace-adminManages all resources under a workspace (Here, it is used to invite new members to the workspace and create a project). project-regularworkspace-viewerCreates workloads and other resources in a specified project.
Create a Project
In this section, you need to use the previously created user ws-admin to create a project. A project in KubeSphere is the same as a namespace in Kubernetes, which provides virtual isolation for resources. For more information, see Namespace.
Log in to the KubeSphere web console as
ws-admin. In Projects, click Create.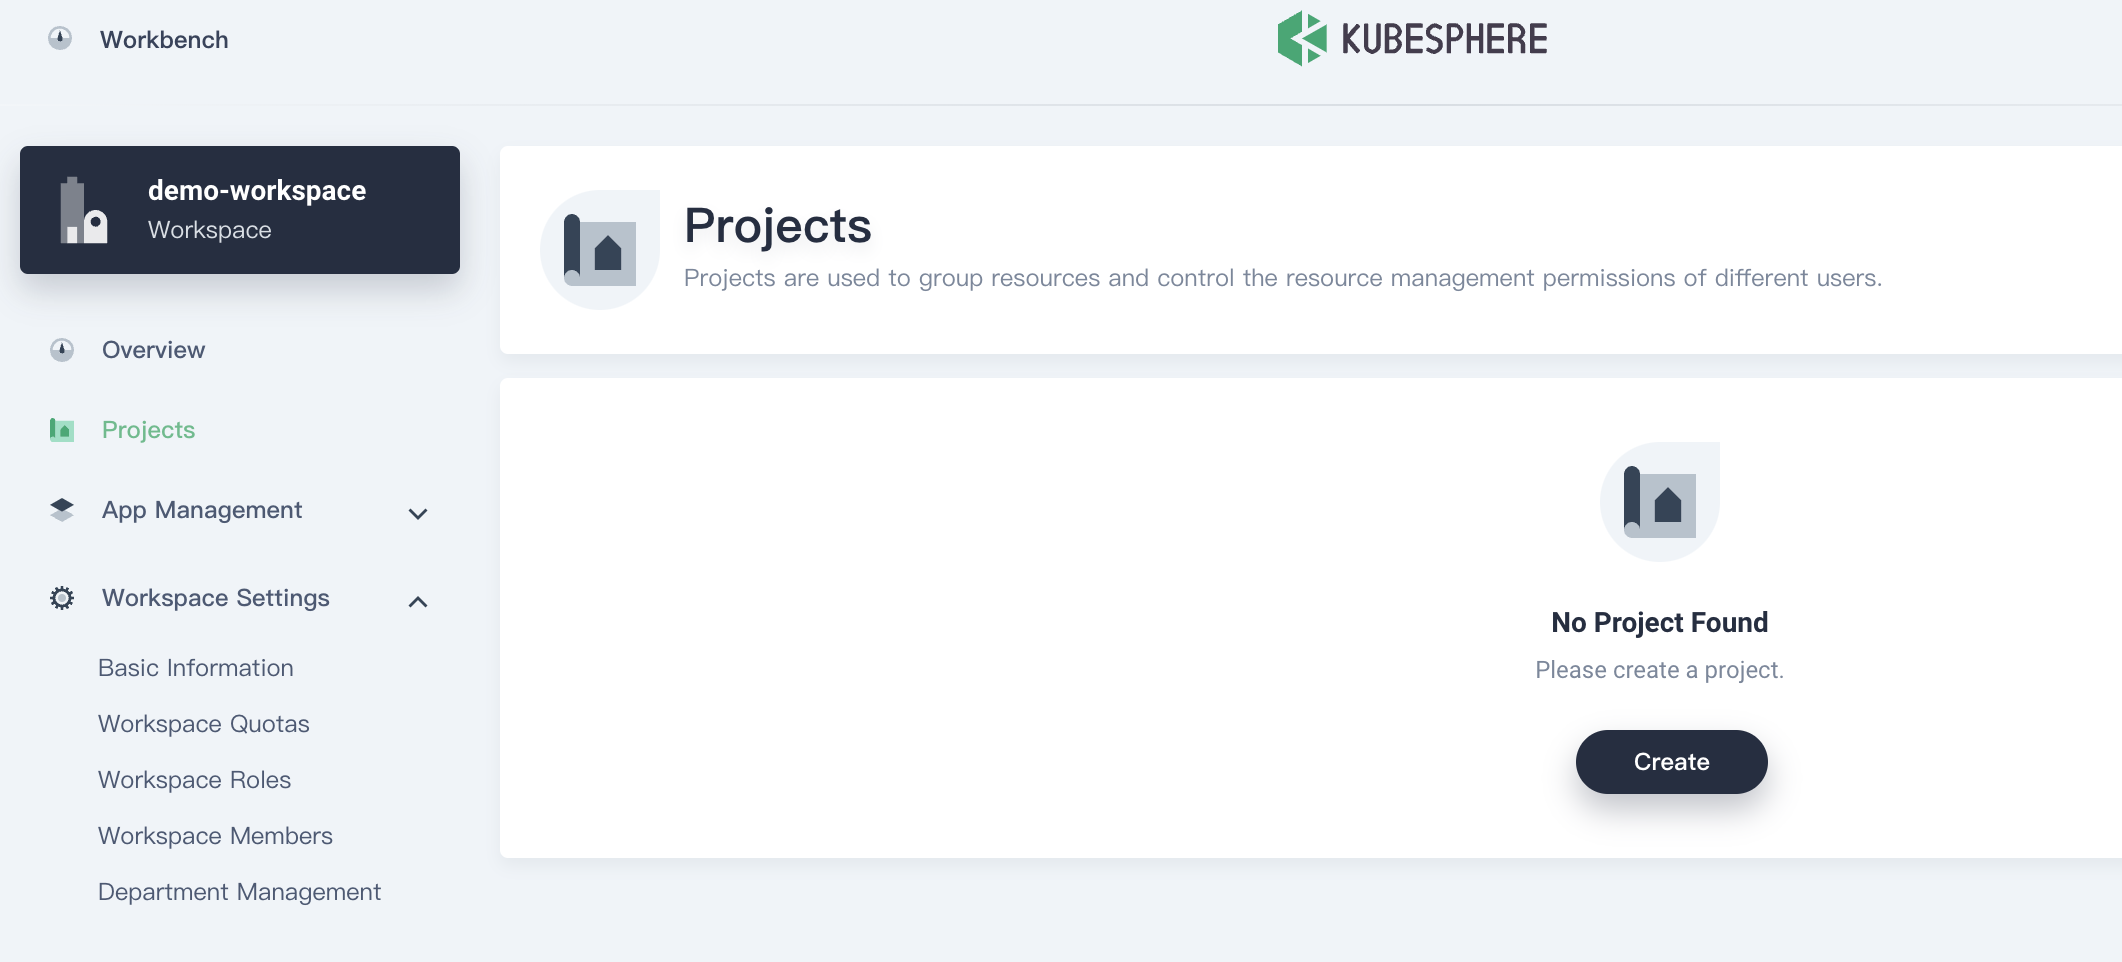
Enter a project name (for example,
exporter) and click OK. You can also add an alias and description for the project.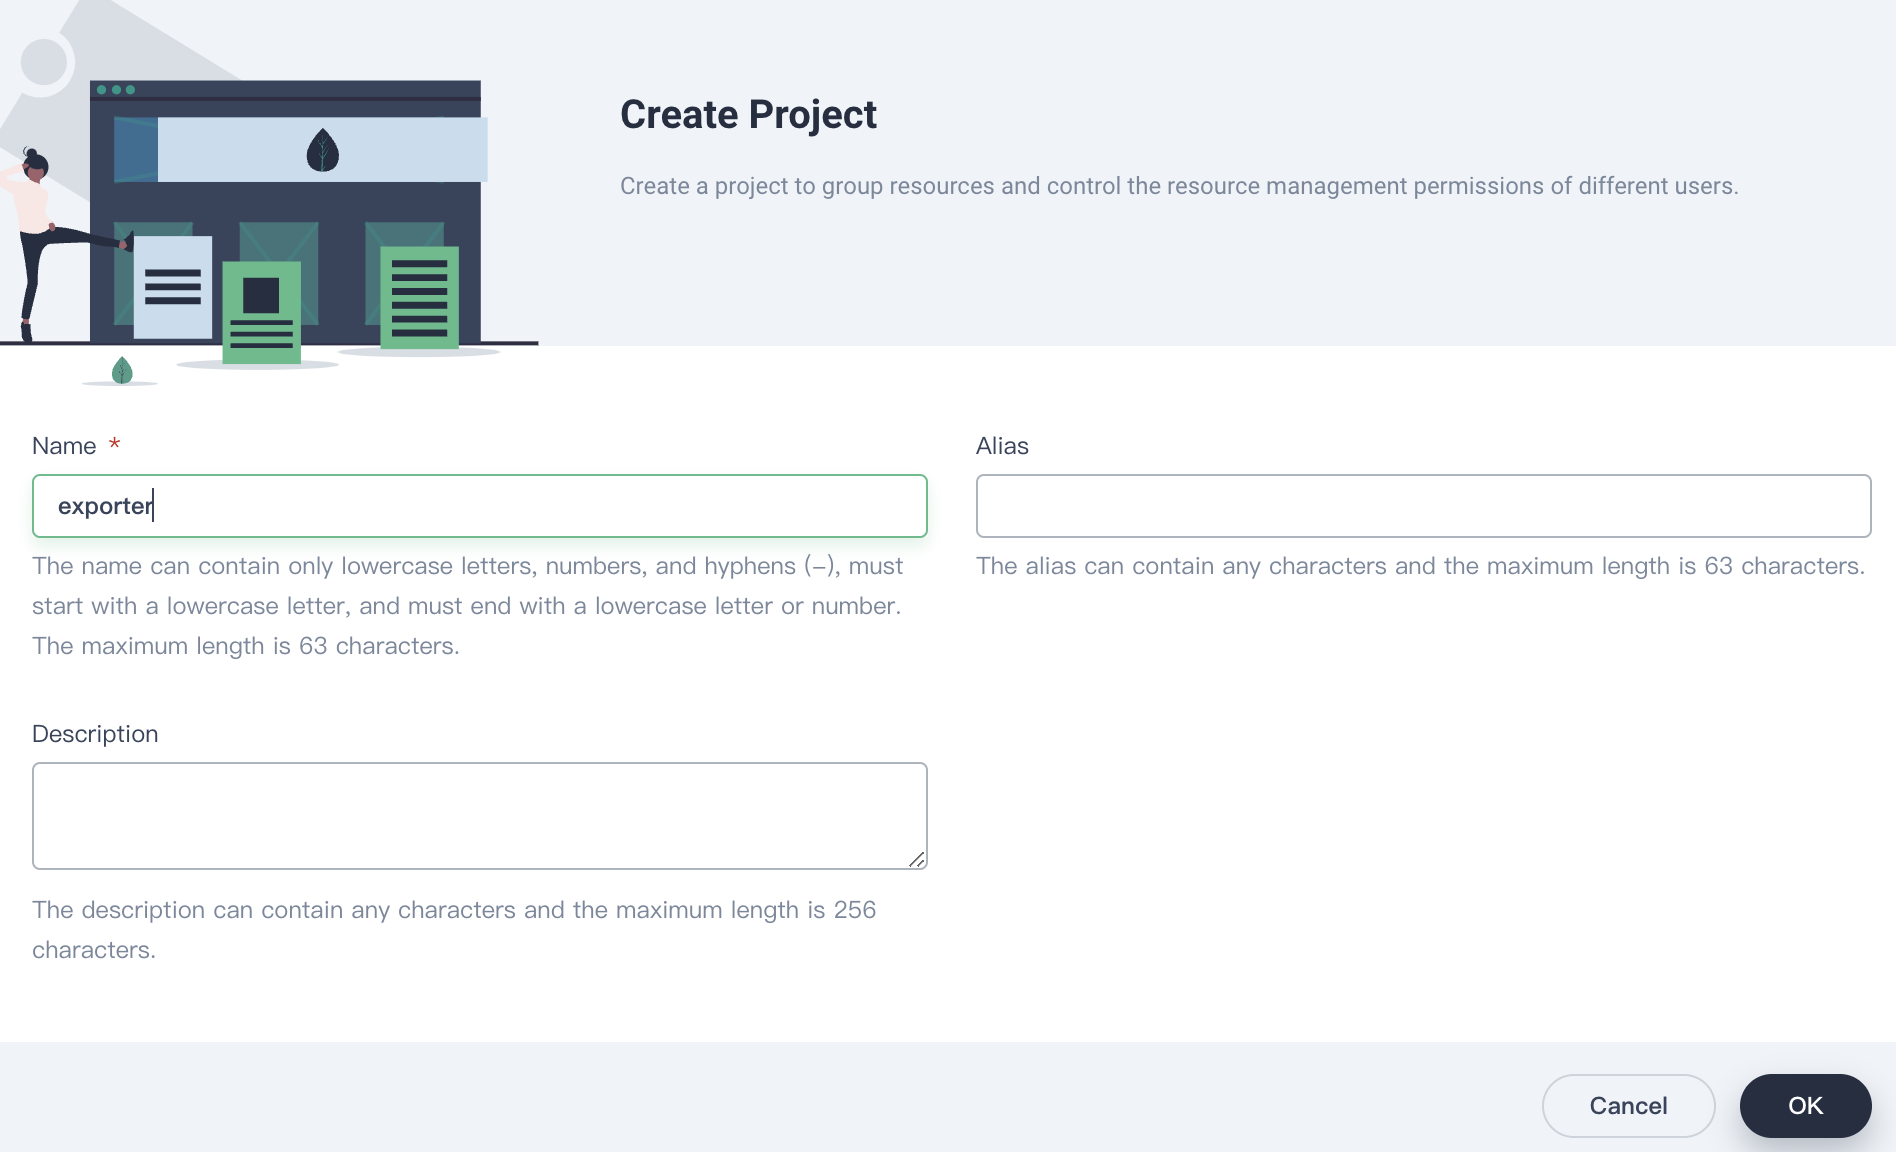
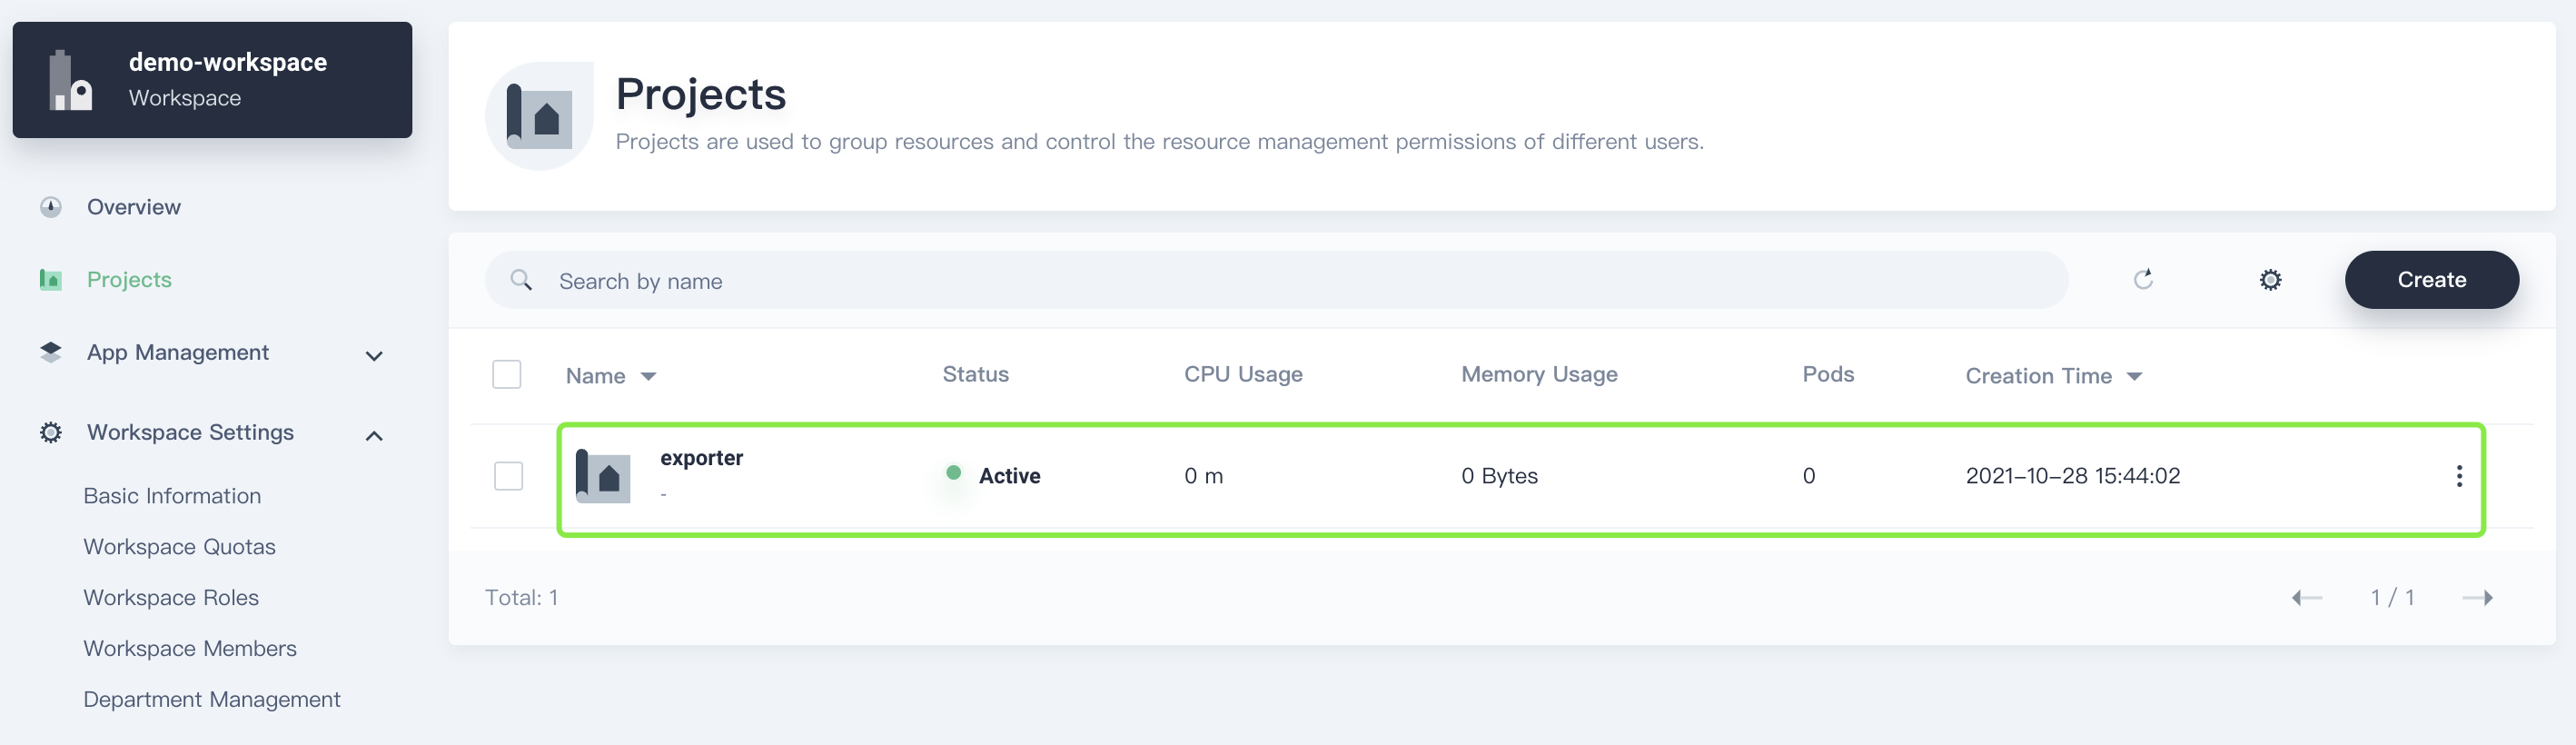
In Projects, click the project name to view its details.
In Project Settings, select Project Members, click Invite to invite
project-regularto the project, and assign roleoperatortoproject regular.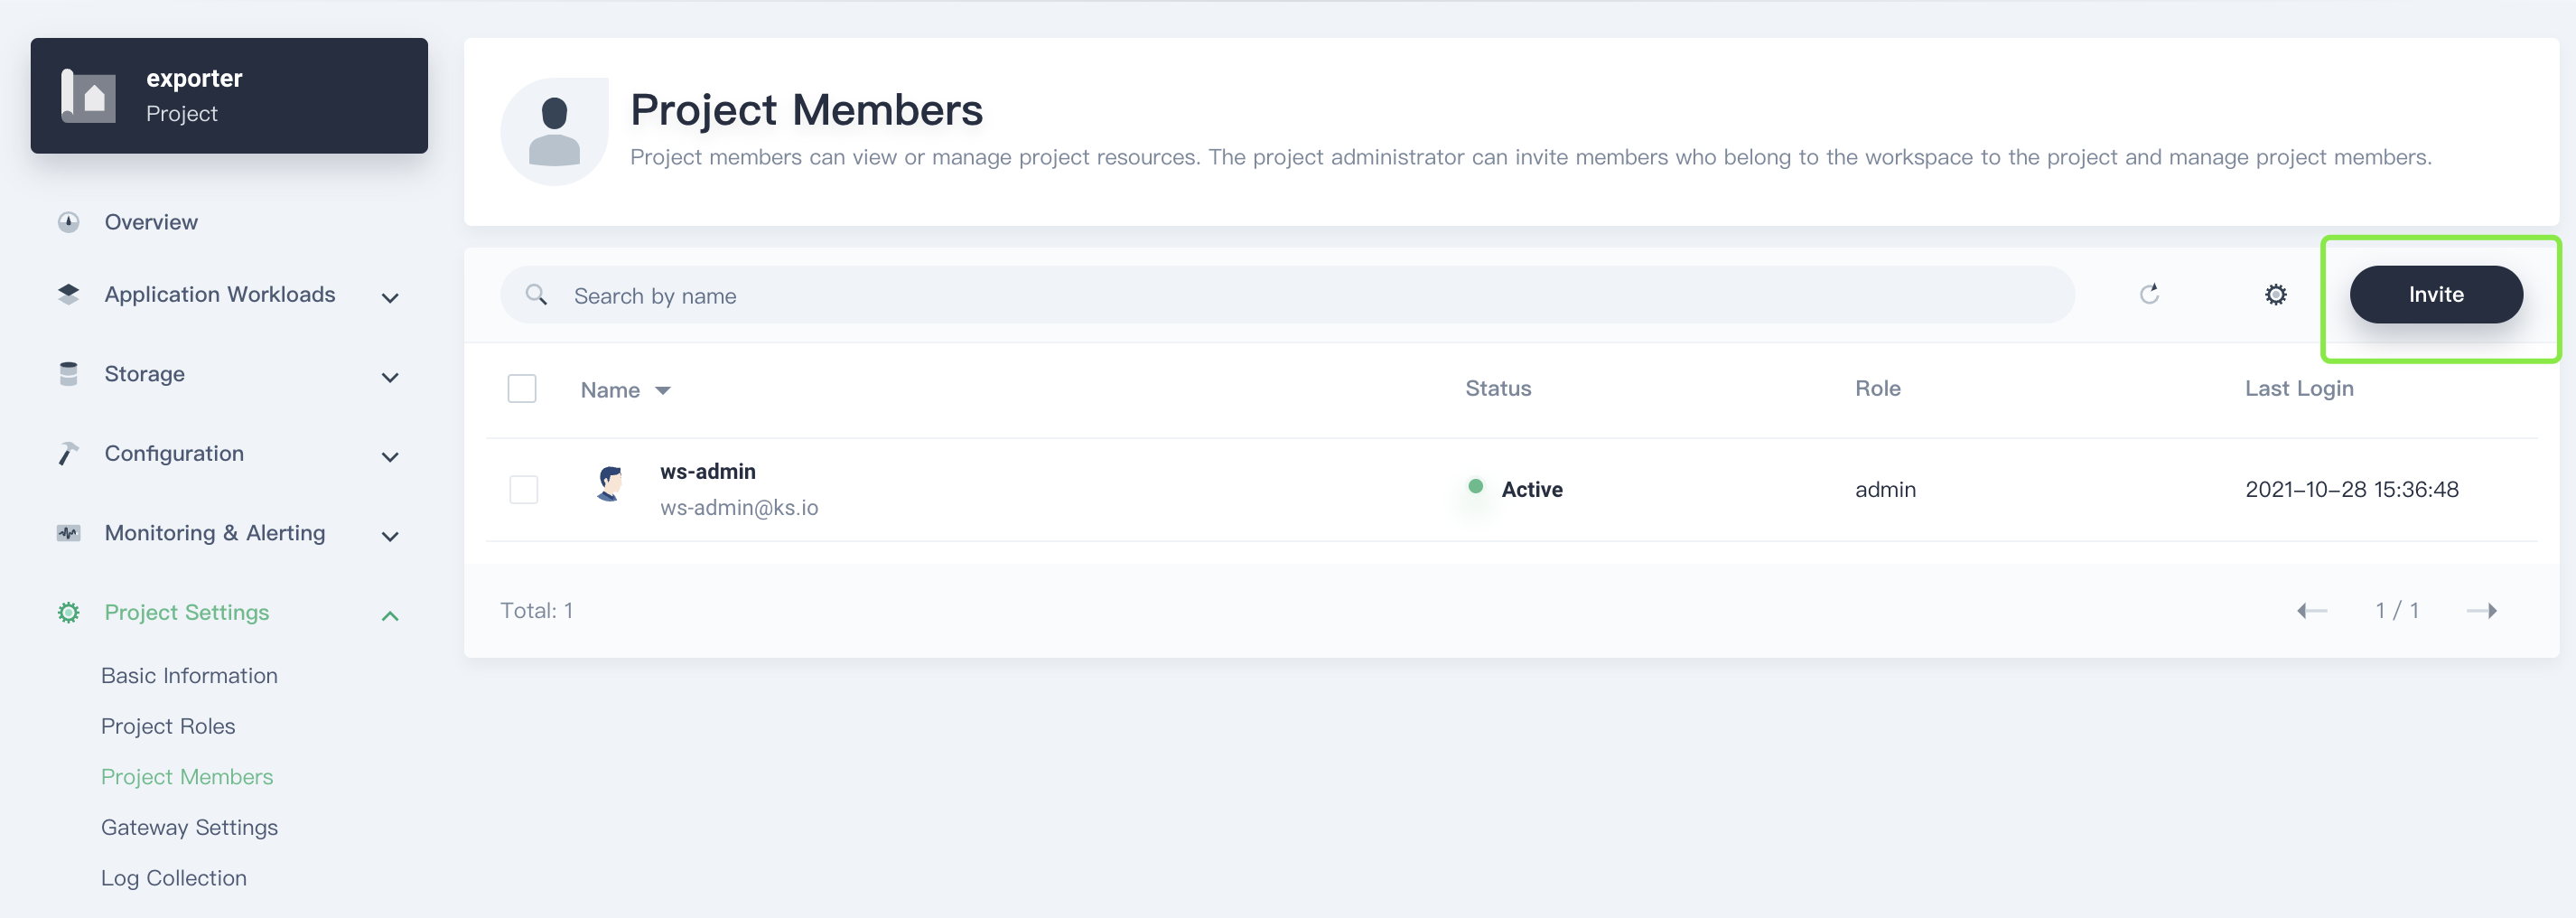
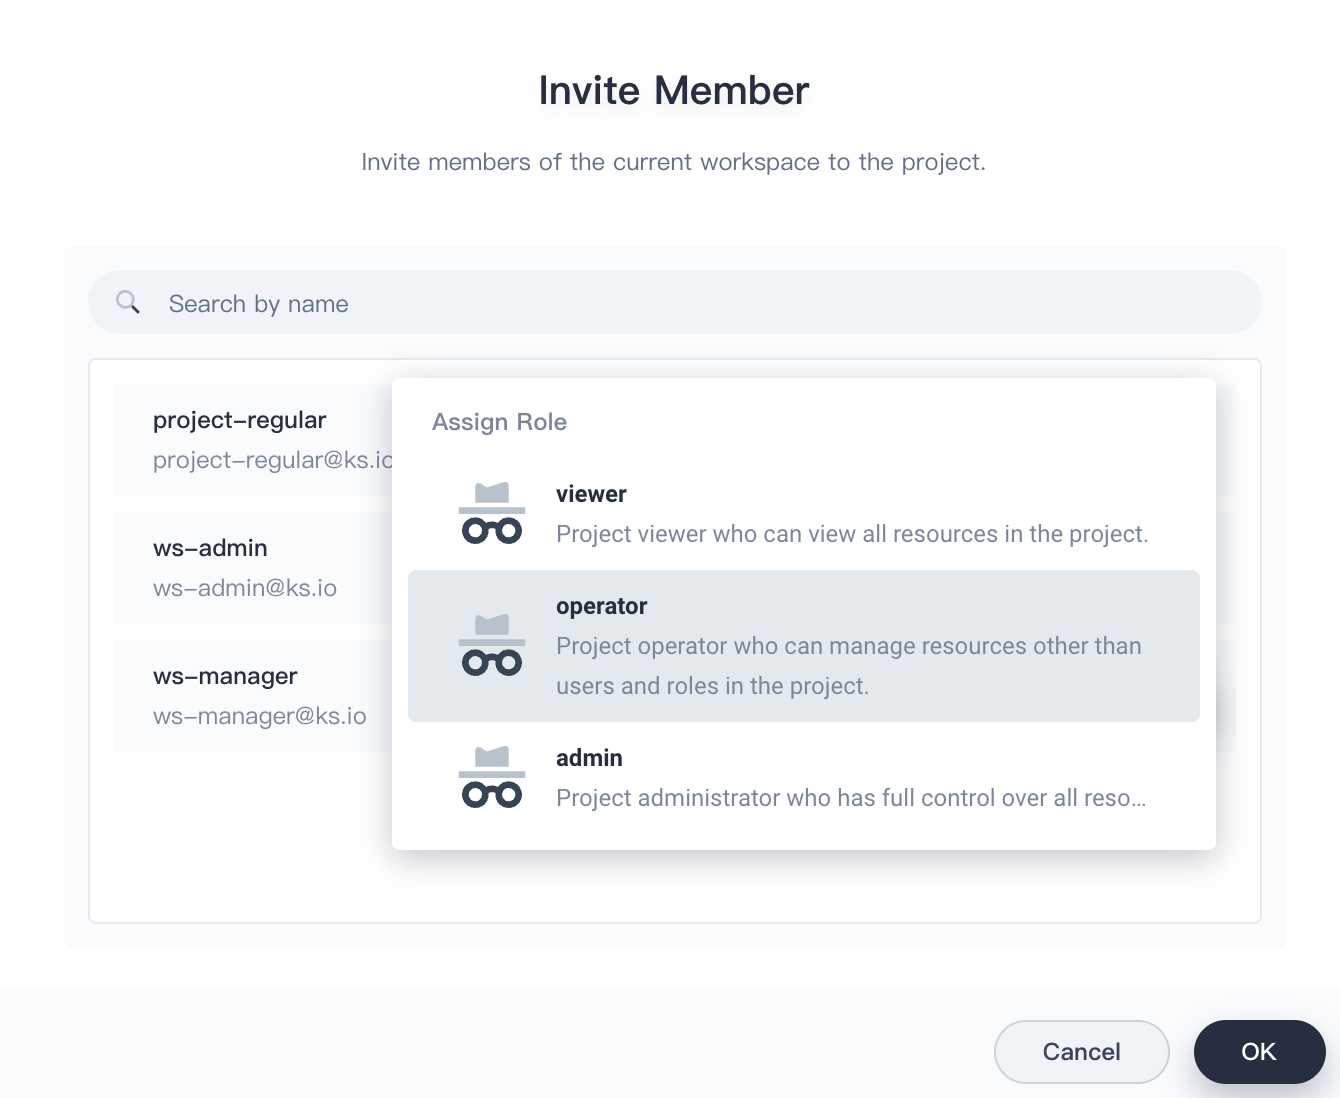
Users with role
operatorare project maintainers who can manage resources other than users and roles in the project.
Add an App Repository
Log in to the web console of KubeSphere as user
ws-admin. In your workspace, go to App Repositories under App Management, and then click Add.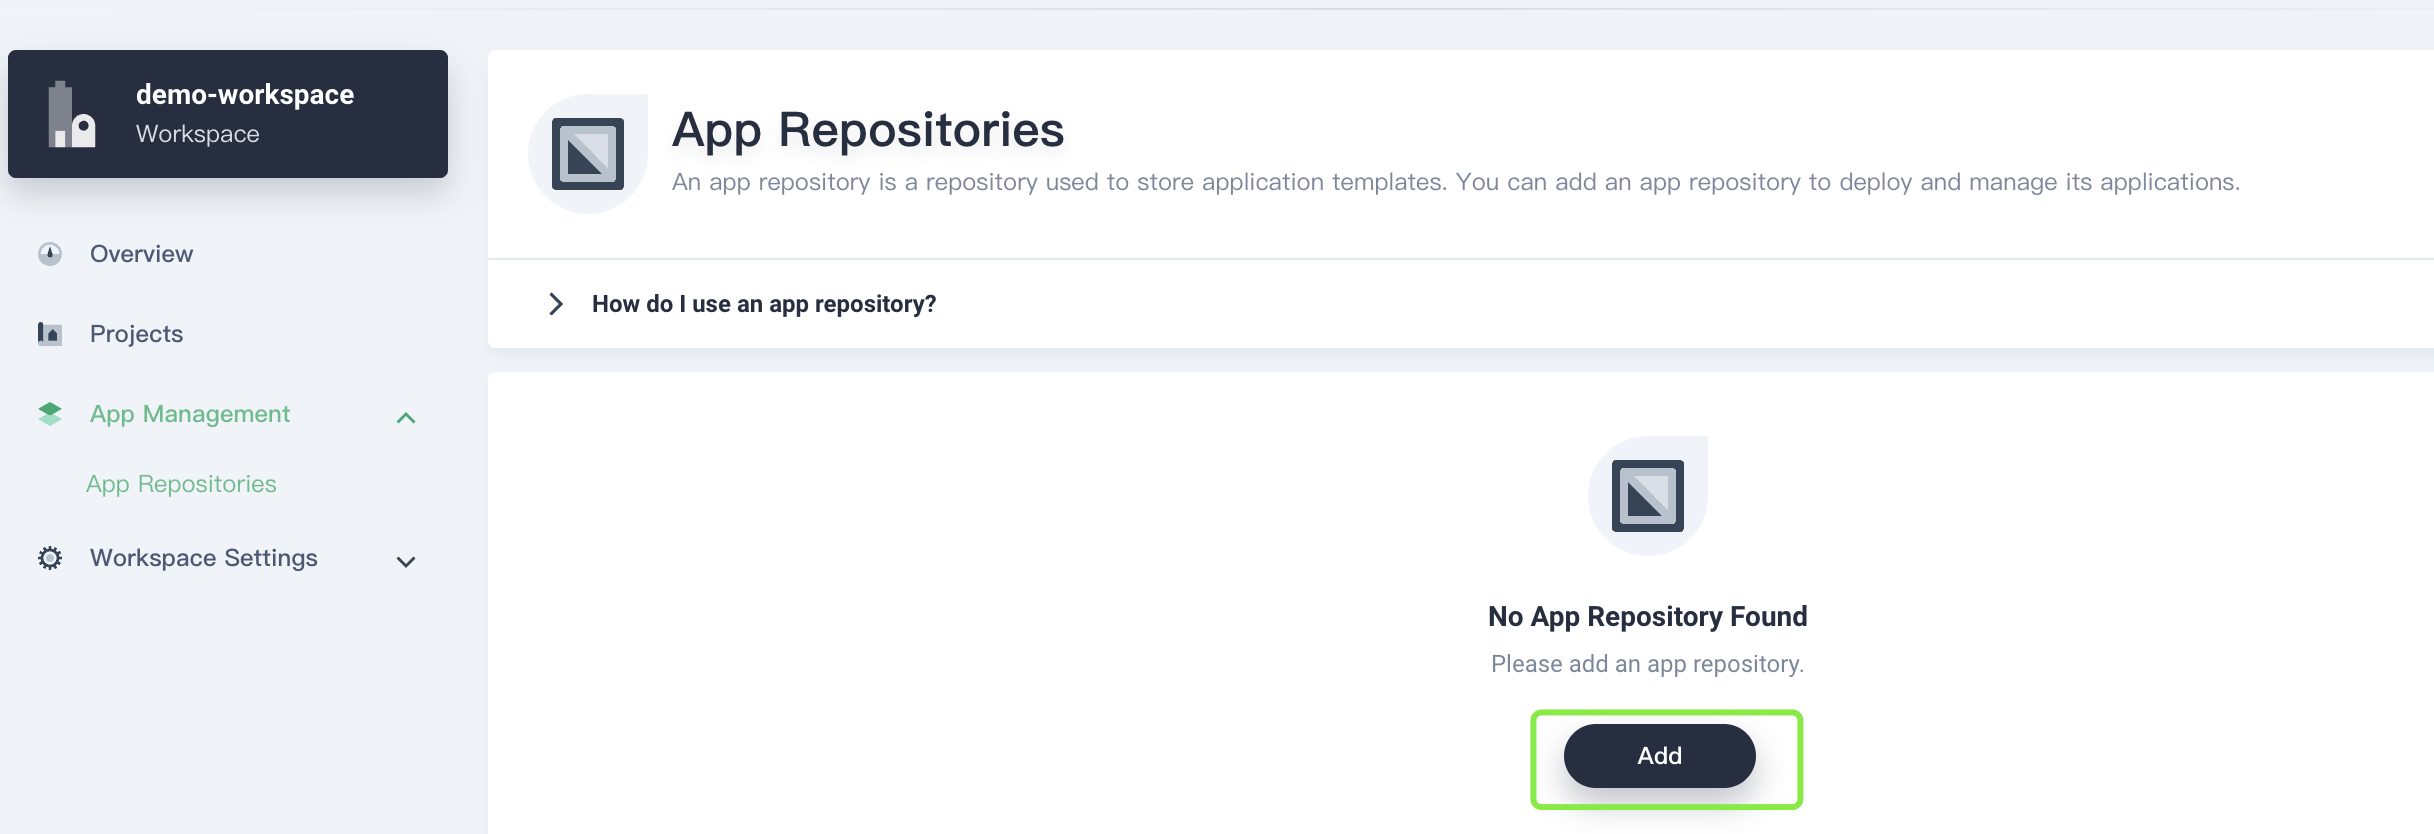
In the displayed dialog box, specify an app repository name (for example,
enix) and add your repository URL (for example,https://charts.enix.io). Click Validate to validate the URL, and then click OK.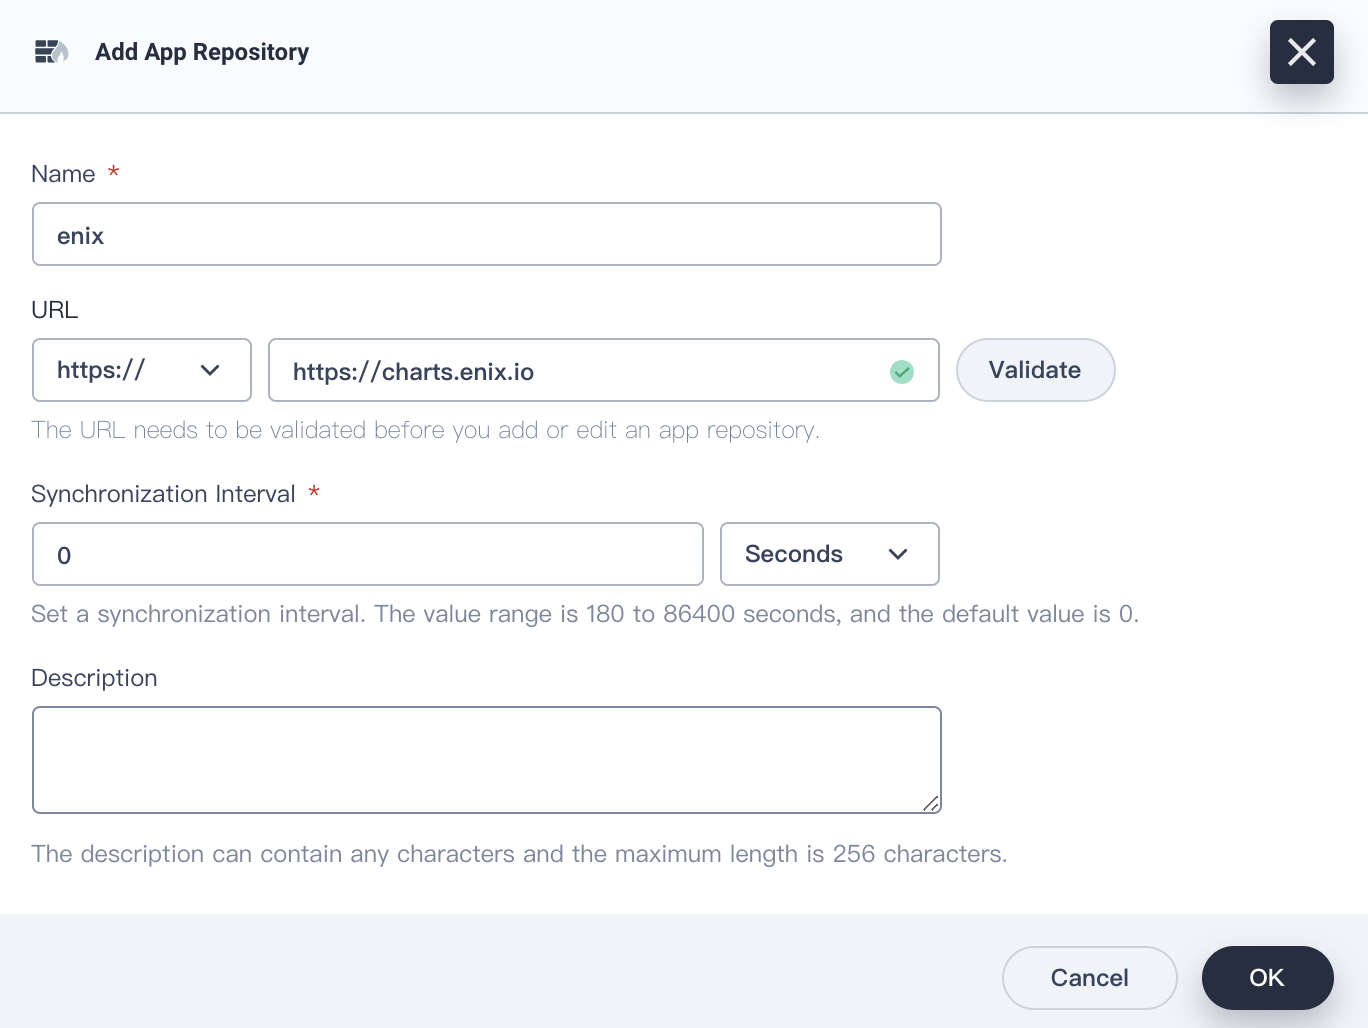
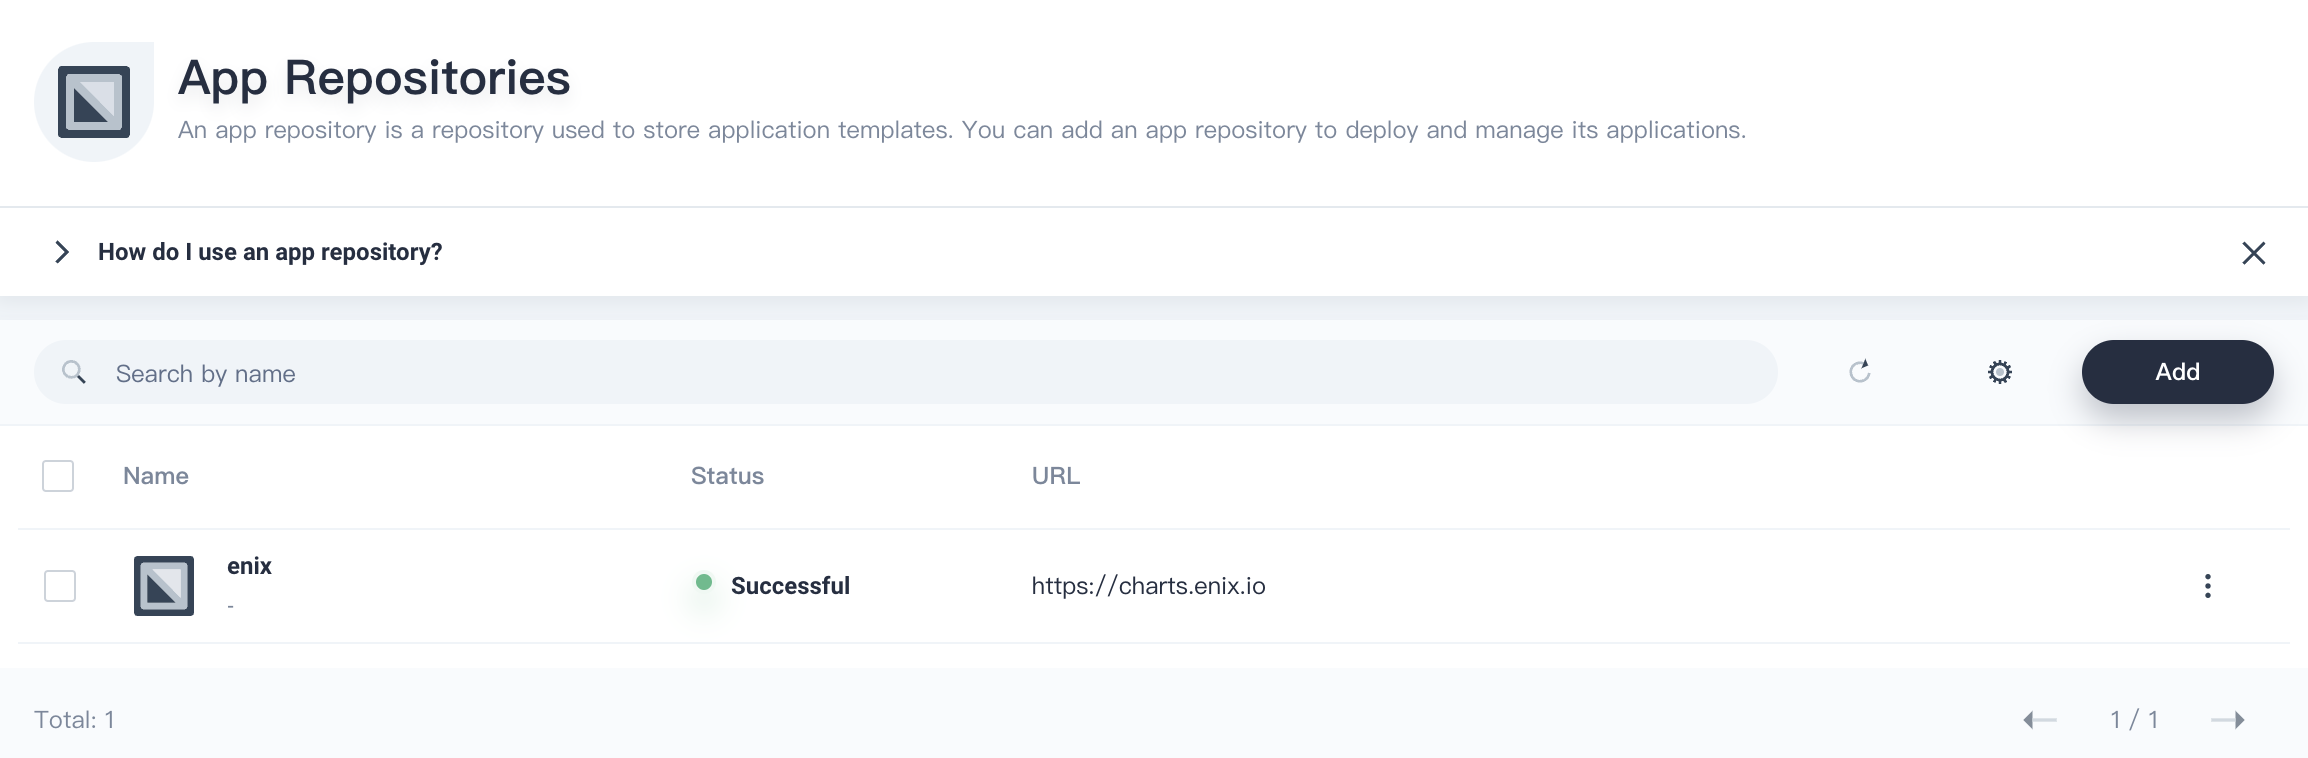
In App Repositories, you can view the created app repository.
Deploy x509-certificate-exporter
After importing the app repository of x509-certificate-exporter, you can use the app template to deploy x509-certificate-exporter.
Log out of the KubeSphere web console and log in to the console as user
project-regular. Click the project you created to go to the project page. Go to Apps under Application Workloads, and click Create.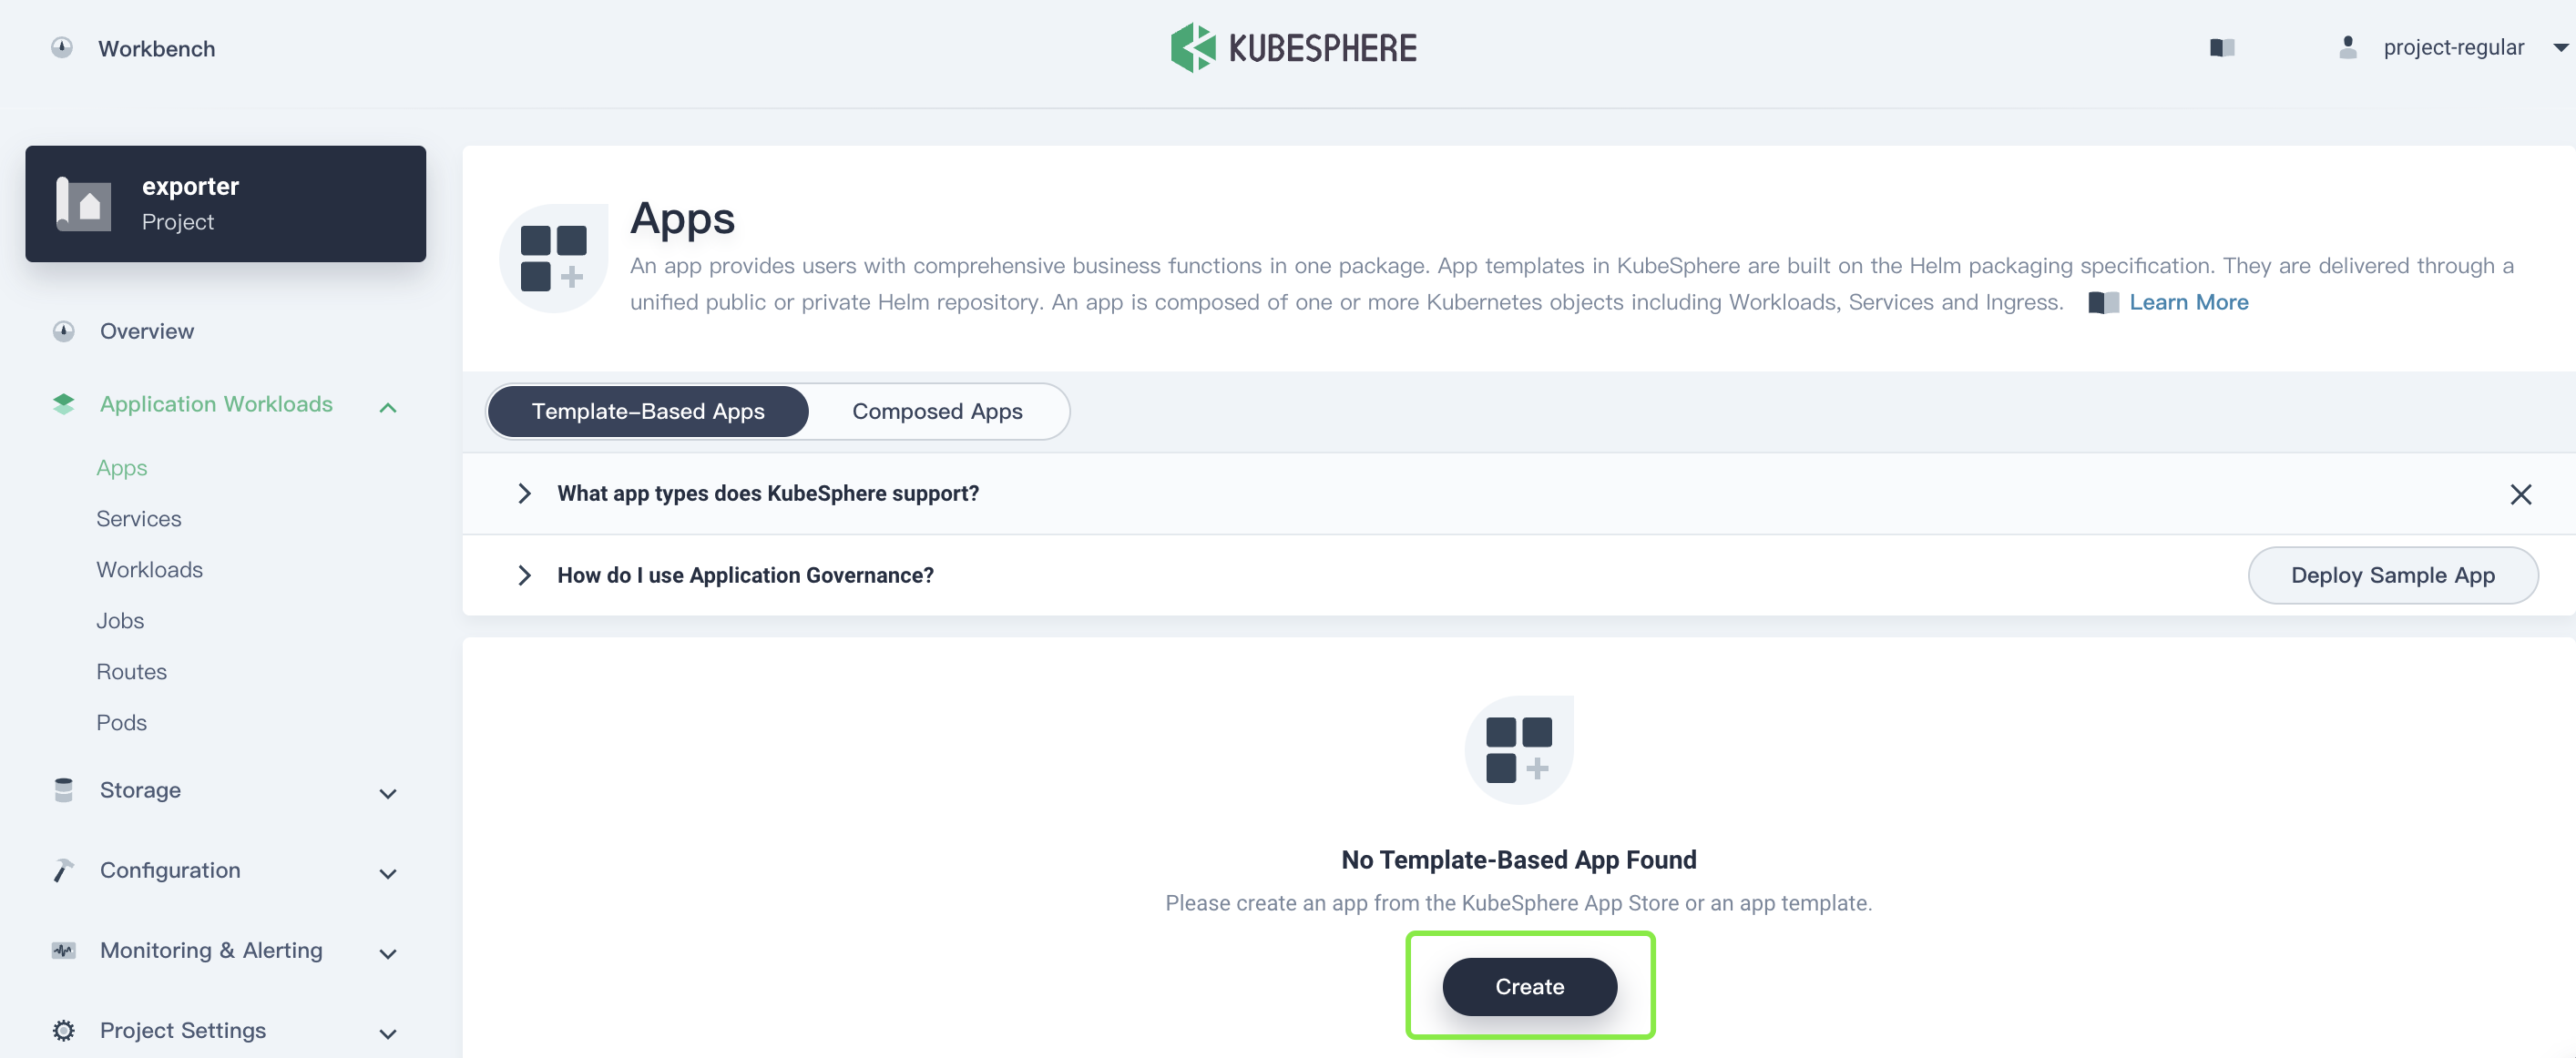
In the displayed dialog box, select From App Template.
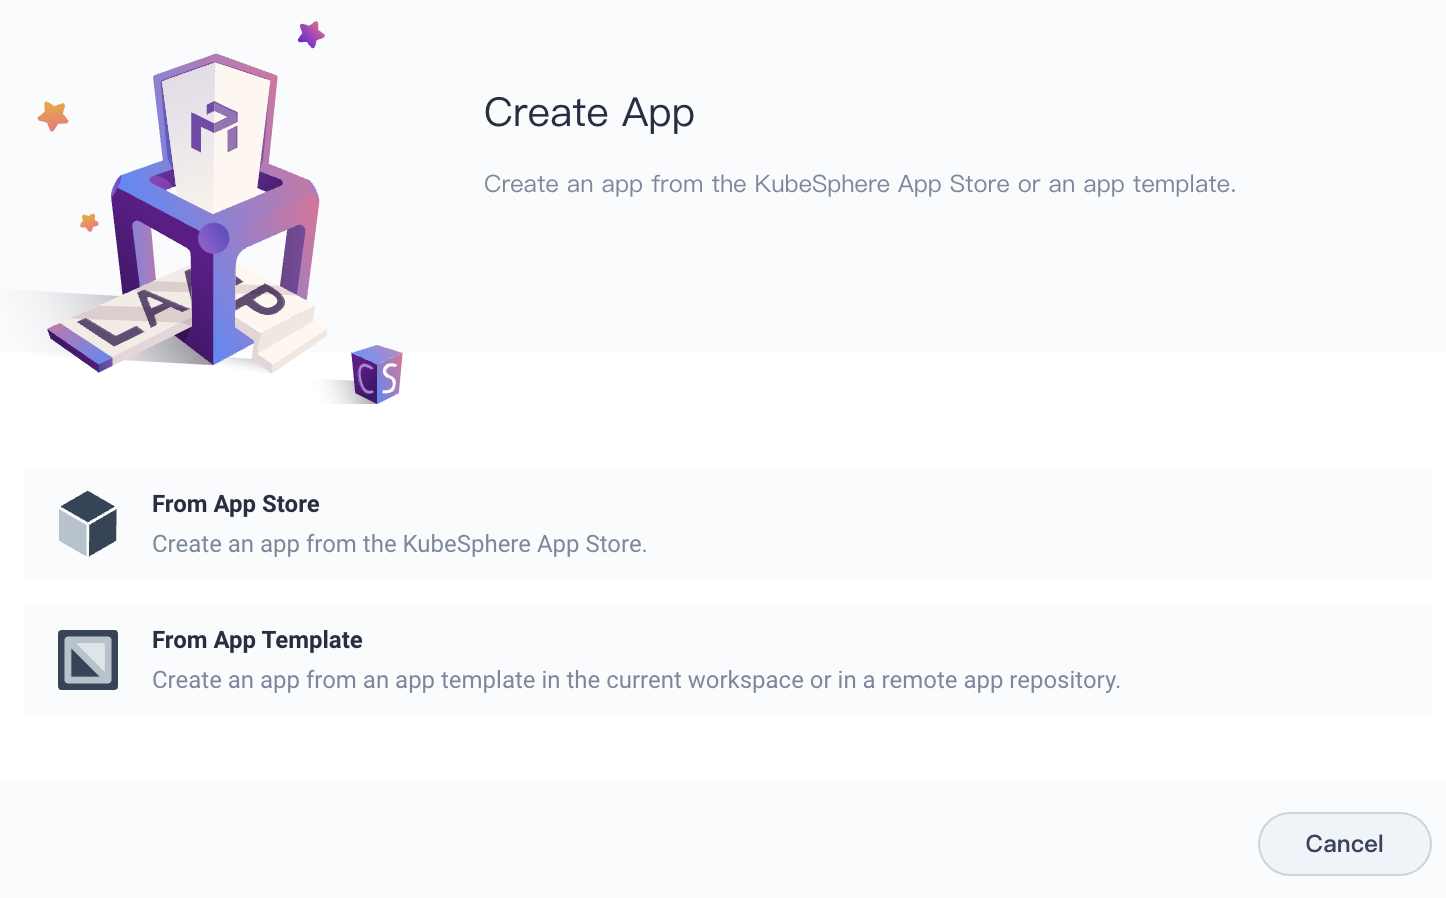
From App Store: Chooses a built-in app or app uploaded as Helm charts.
From App Template: Chooses an app from a private app repository or the current workspace.
In the drop-down list, select private app repository
enixyou just uploaded.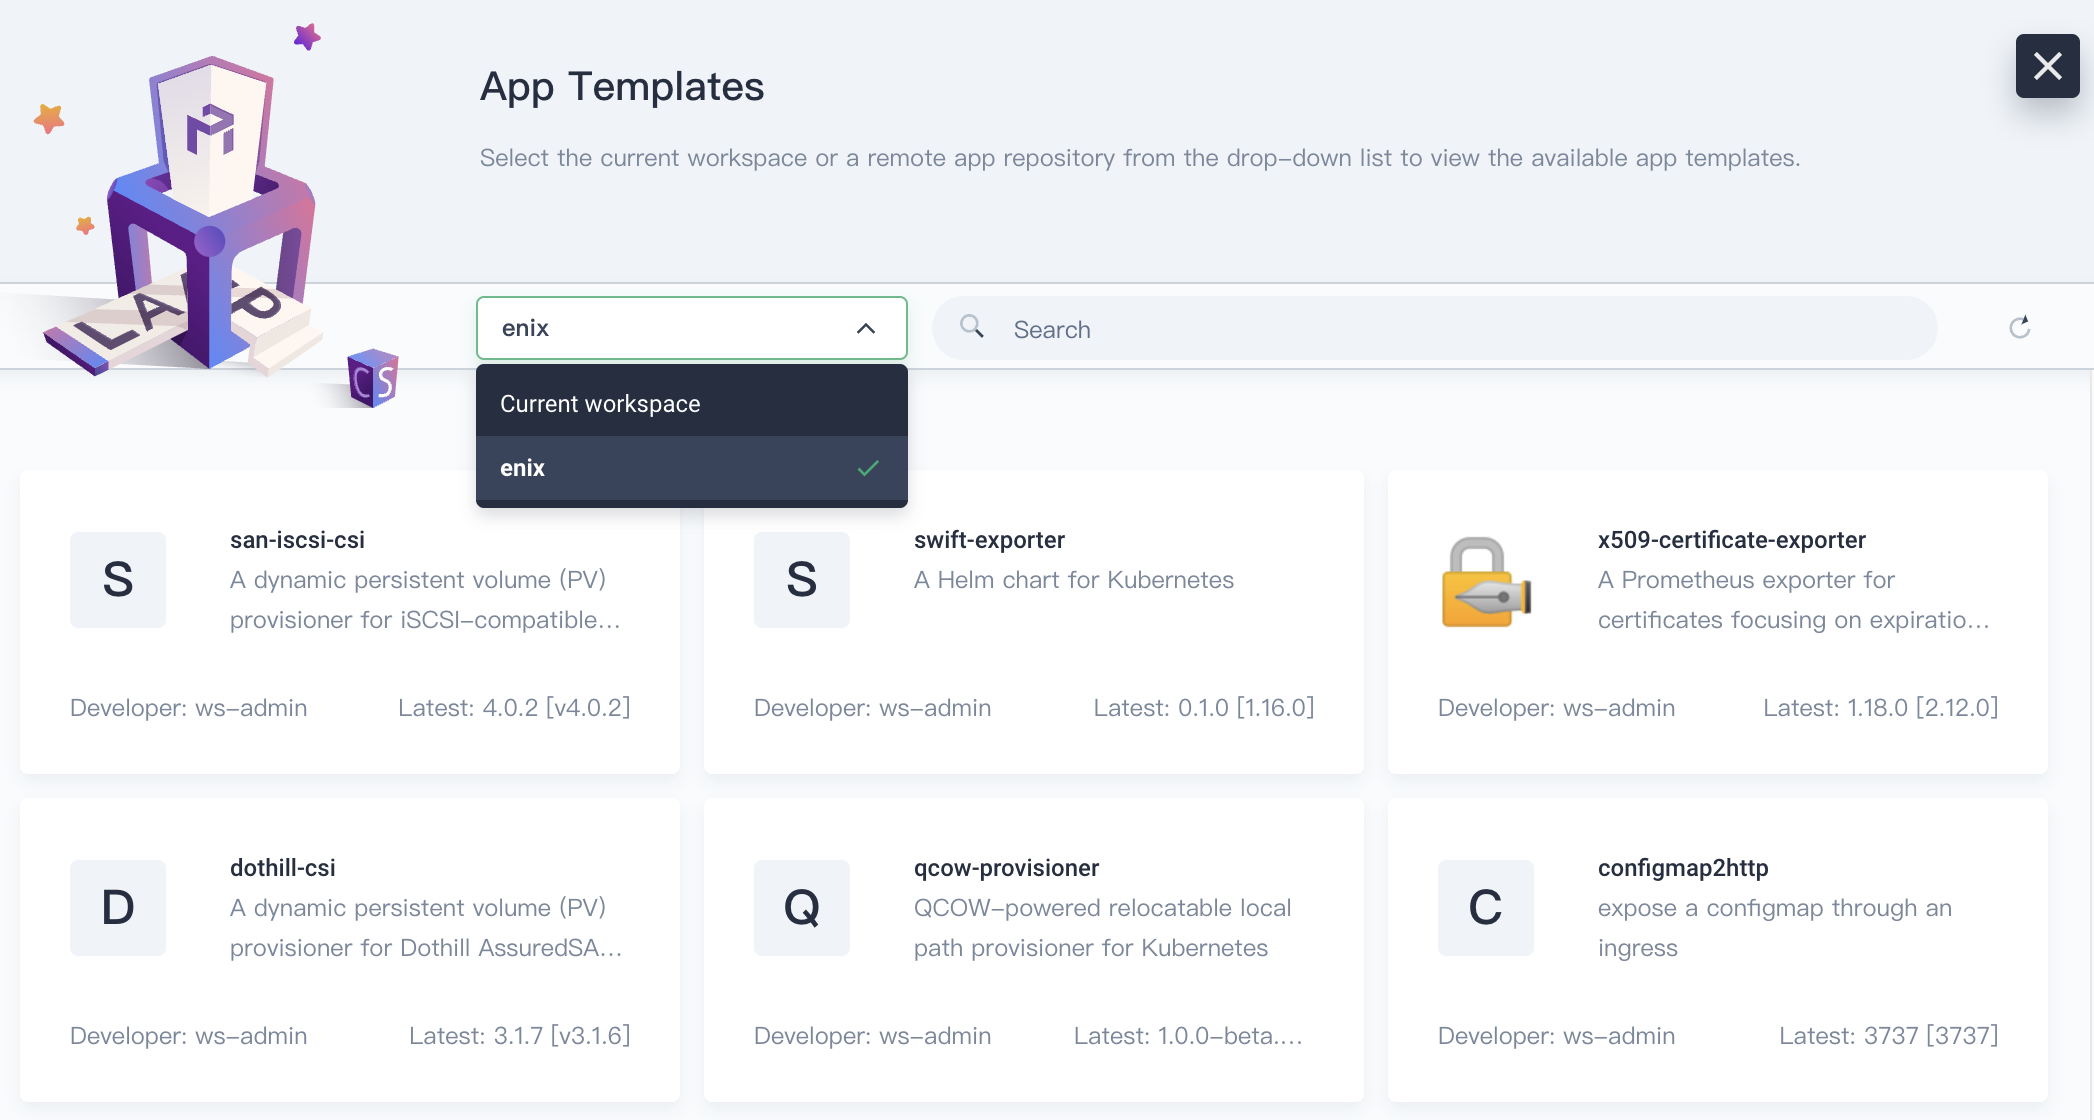
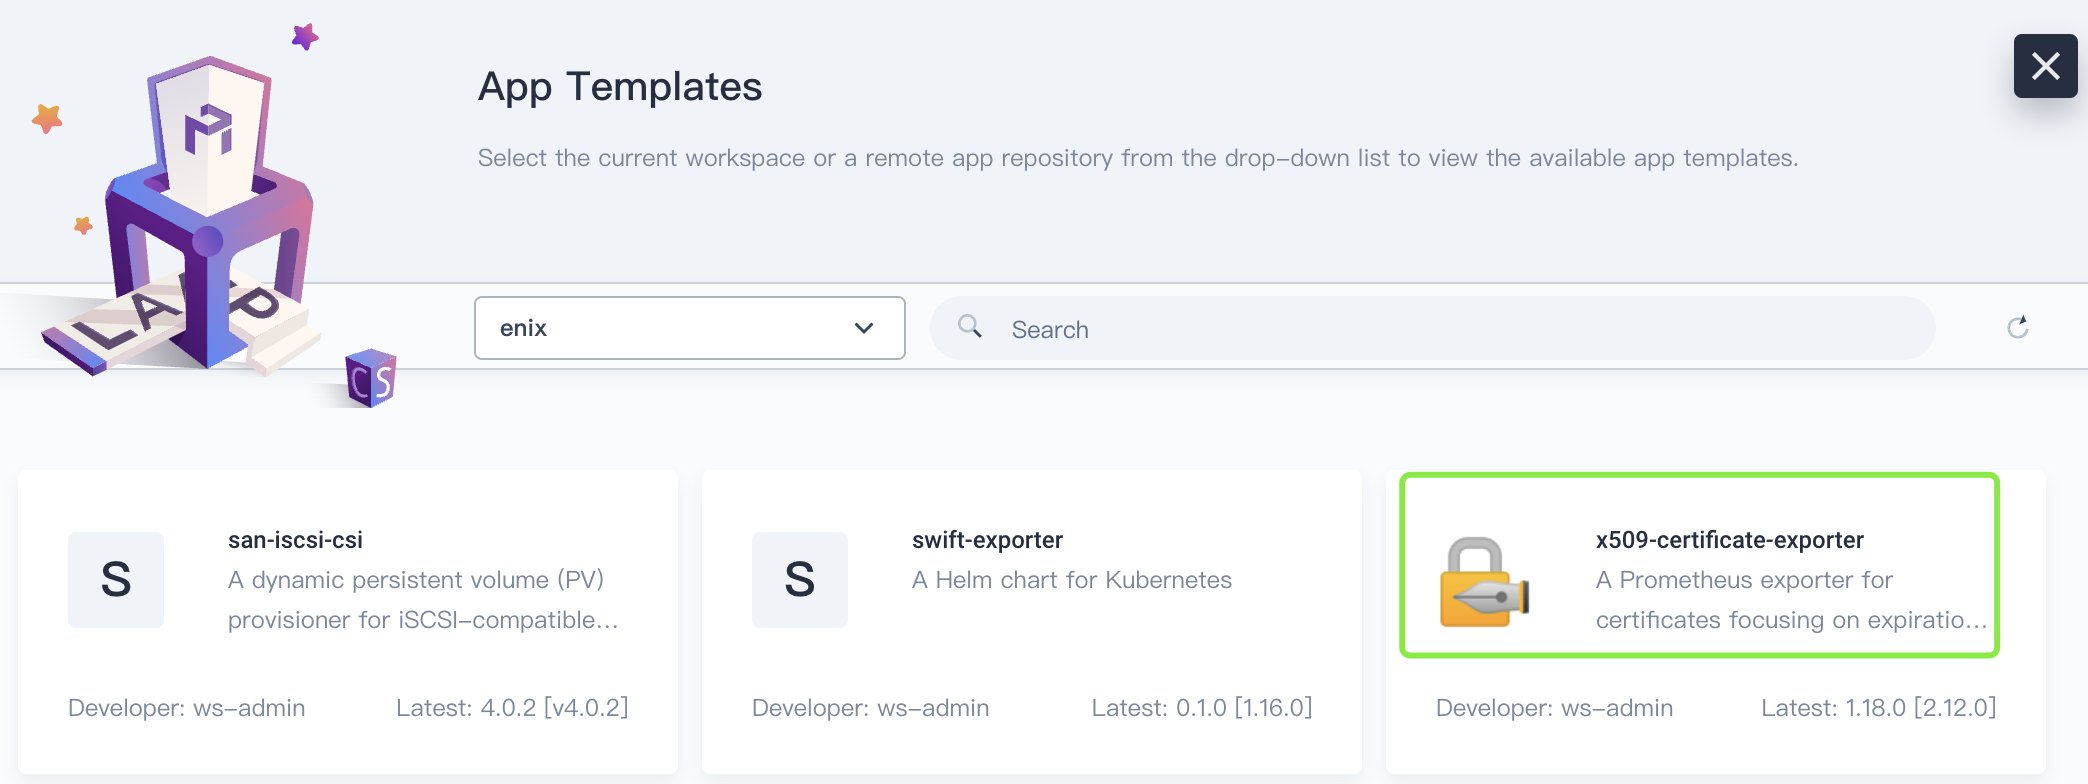
Select x509-certificate-exporter for deployment.
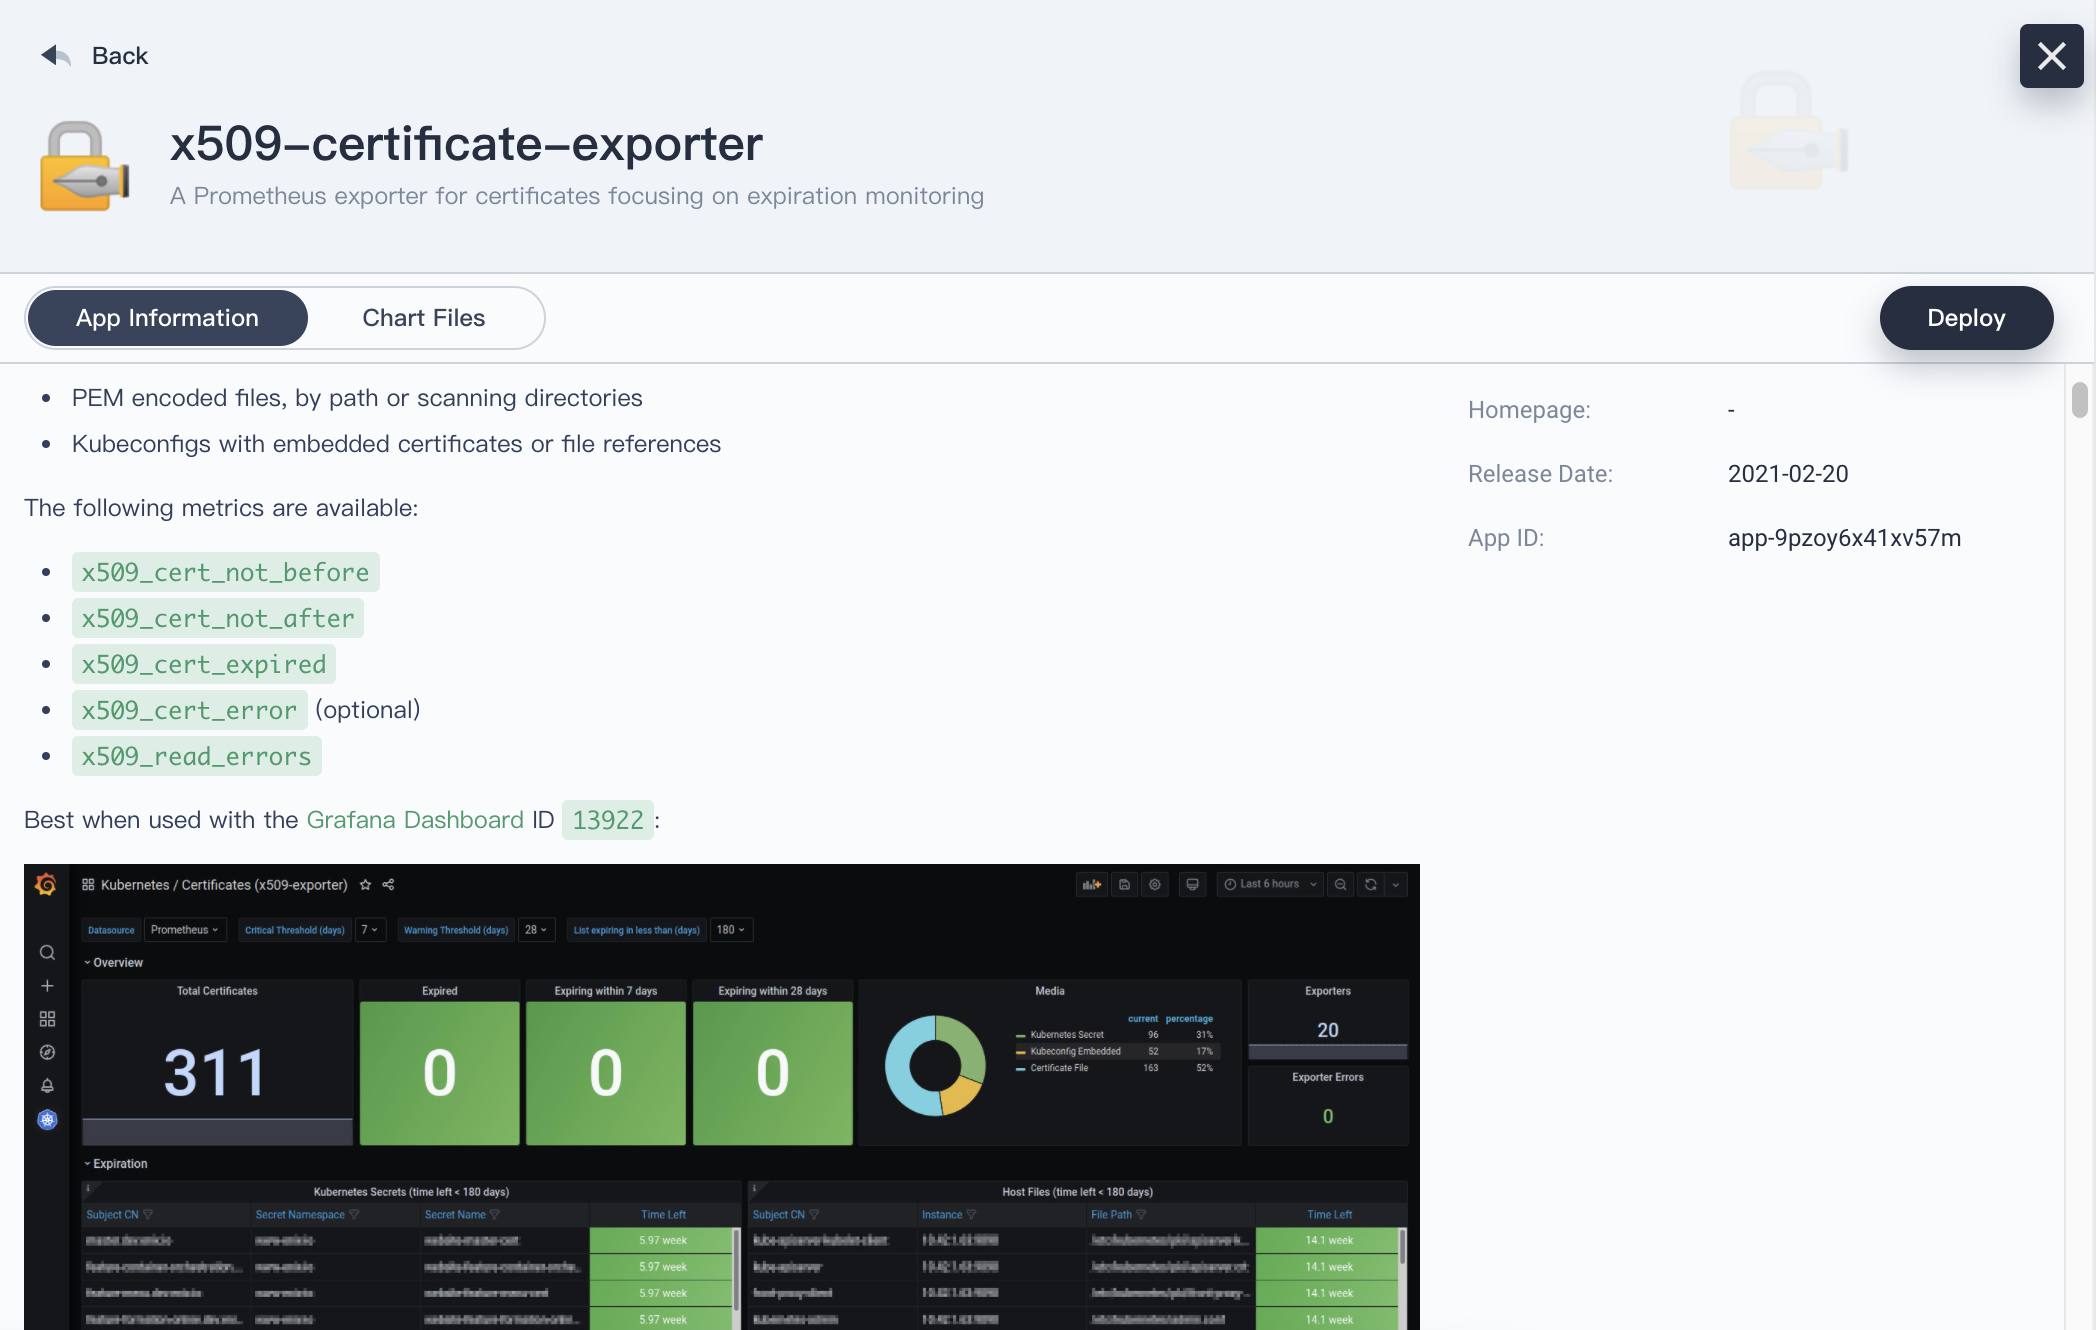
In the drop-down list of Version, select an app version, and then click Deploy. Meantime, you can view the app information and manifest.
Set an app name, confirm the app version and deployment location, and click Next.
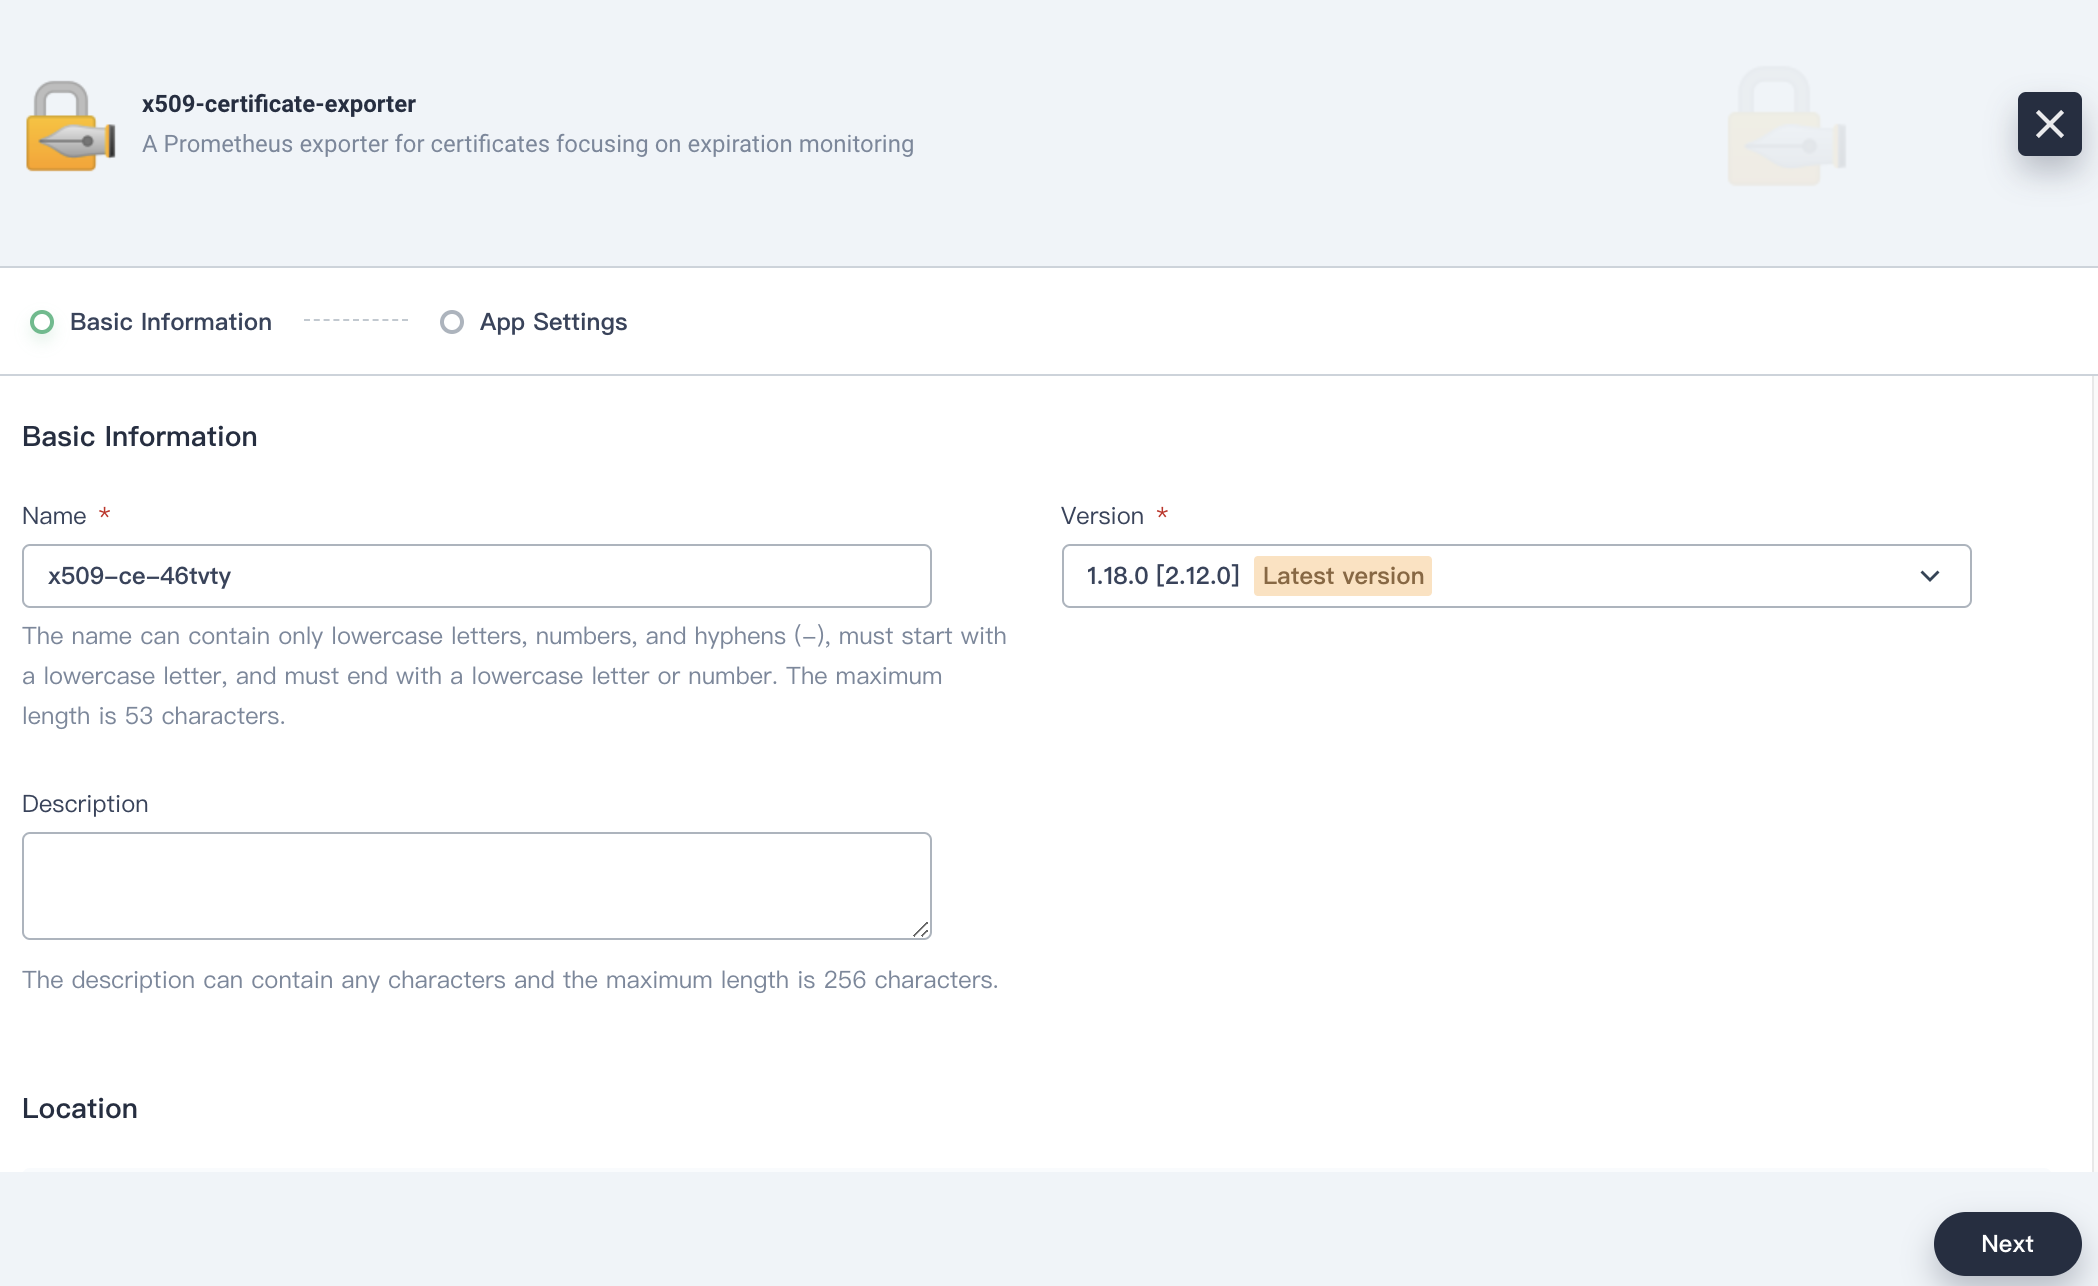
In App Settings, you need to manually edit the manifest and specify the path to the certificate file.

  daemonSets:
    master:
      nodeSelector:
        node-role.kubernetes.io/master: ''
      tolerations:
        - effect: NoSchedule
          key: node-role.kubernetes.io/master
          operator: Exists
      watchFiles:
        - /var/lib/kubelet/pki/kubelet-client-current.pem
        - /etc/kubernetes/pki/apiserver.crt
        - /etc/kubernetes/pki/apiserver-kubelet-client.crt
        - /etc/kubernetes/pki/ca.crt
        - /etc/kubernetes/pki/front-proxy-ca.crt
        - /etc/kubernetes/pki/front-proxy-client.crt
      watchKubeconfFiles:
        - /etc/kubernetes/admin.conf
        - /etc/kubernetes/controller-manager.conf
        - /etc/kubernetes/scheduler.conf
    nodes:
      tolerations:
        - effect: NoSchedule
          key: node-role.kubernetes.io/ingress
          operator: Exists
      watchFiles:
        - /var/lib/kubelet/pki/kubelet-client-current.pem
        - /etc/kubernetes/pki/ca.crt
Two
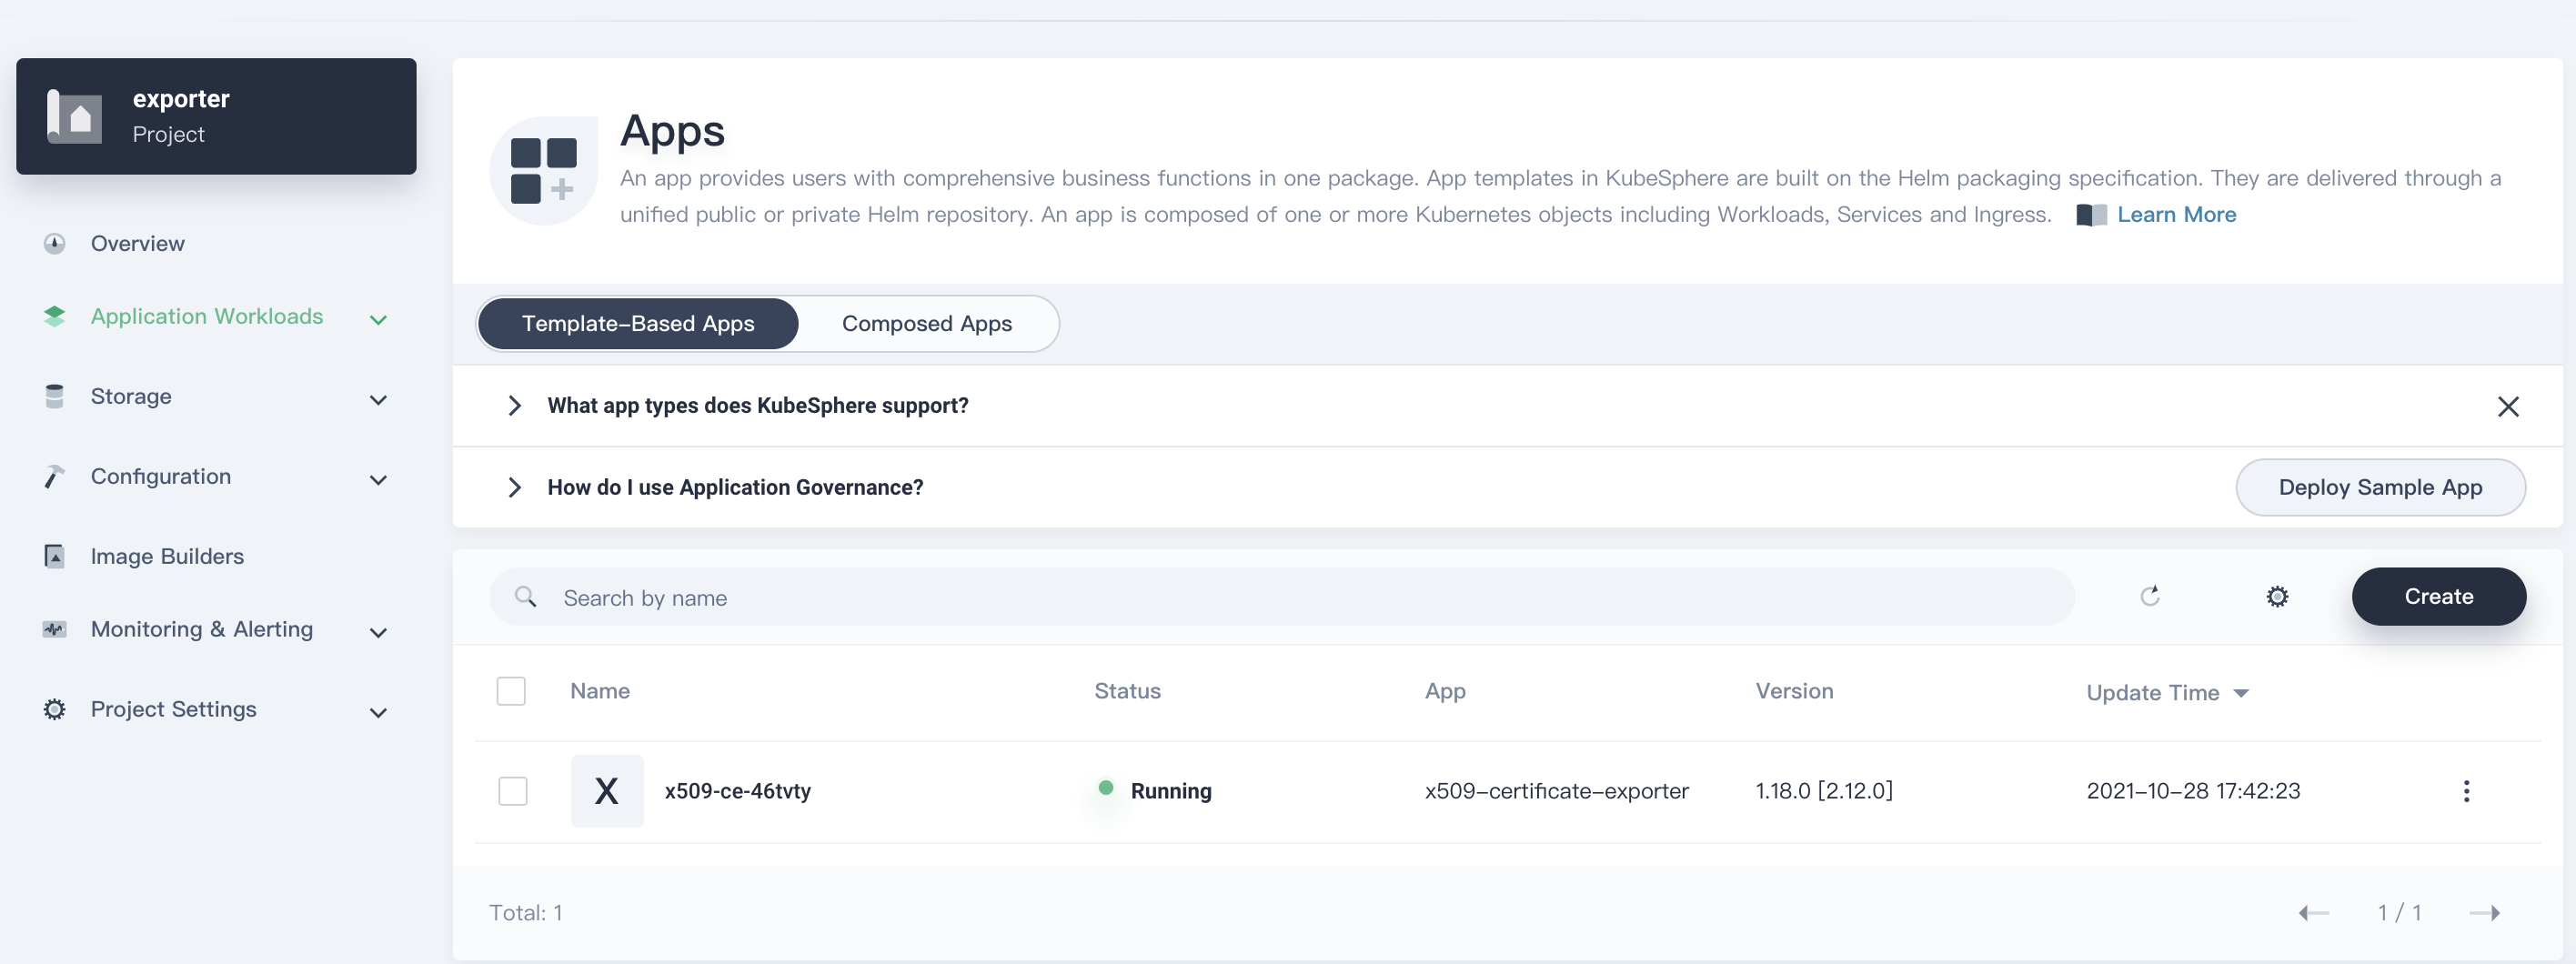
DaemonSetsare created, where the master runs on the controller node and the nodes run on the compute node.$ kubectl -n exporter get ds NAME DESIRED CURRENT READY UP-TO-DATE AVAILABLE NODE SELECTOR AGE x509-x509-certificate-exporter-master 1 1 1 1 1 node-role.kubernetes.io/master= 3d14h x509-x509-certificate-exporter-nodes 3 3 3 3 3 <none> 3d14hHere are how the parameters are defined:
- watchFiles: Specifies the path to the certificate file.
- watchKubeconfFiles: Specifies the path to the kubeconfig file.

Click Install and wait until the app is created successfully and runs.
Integrate the Monitoring System
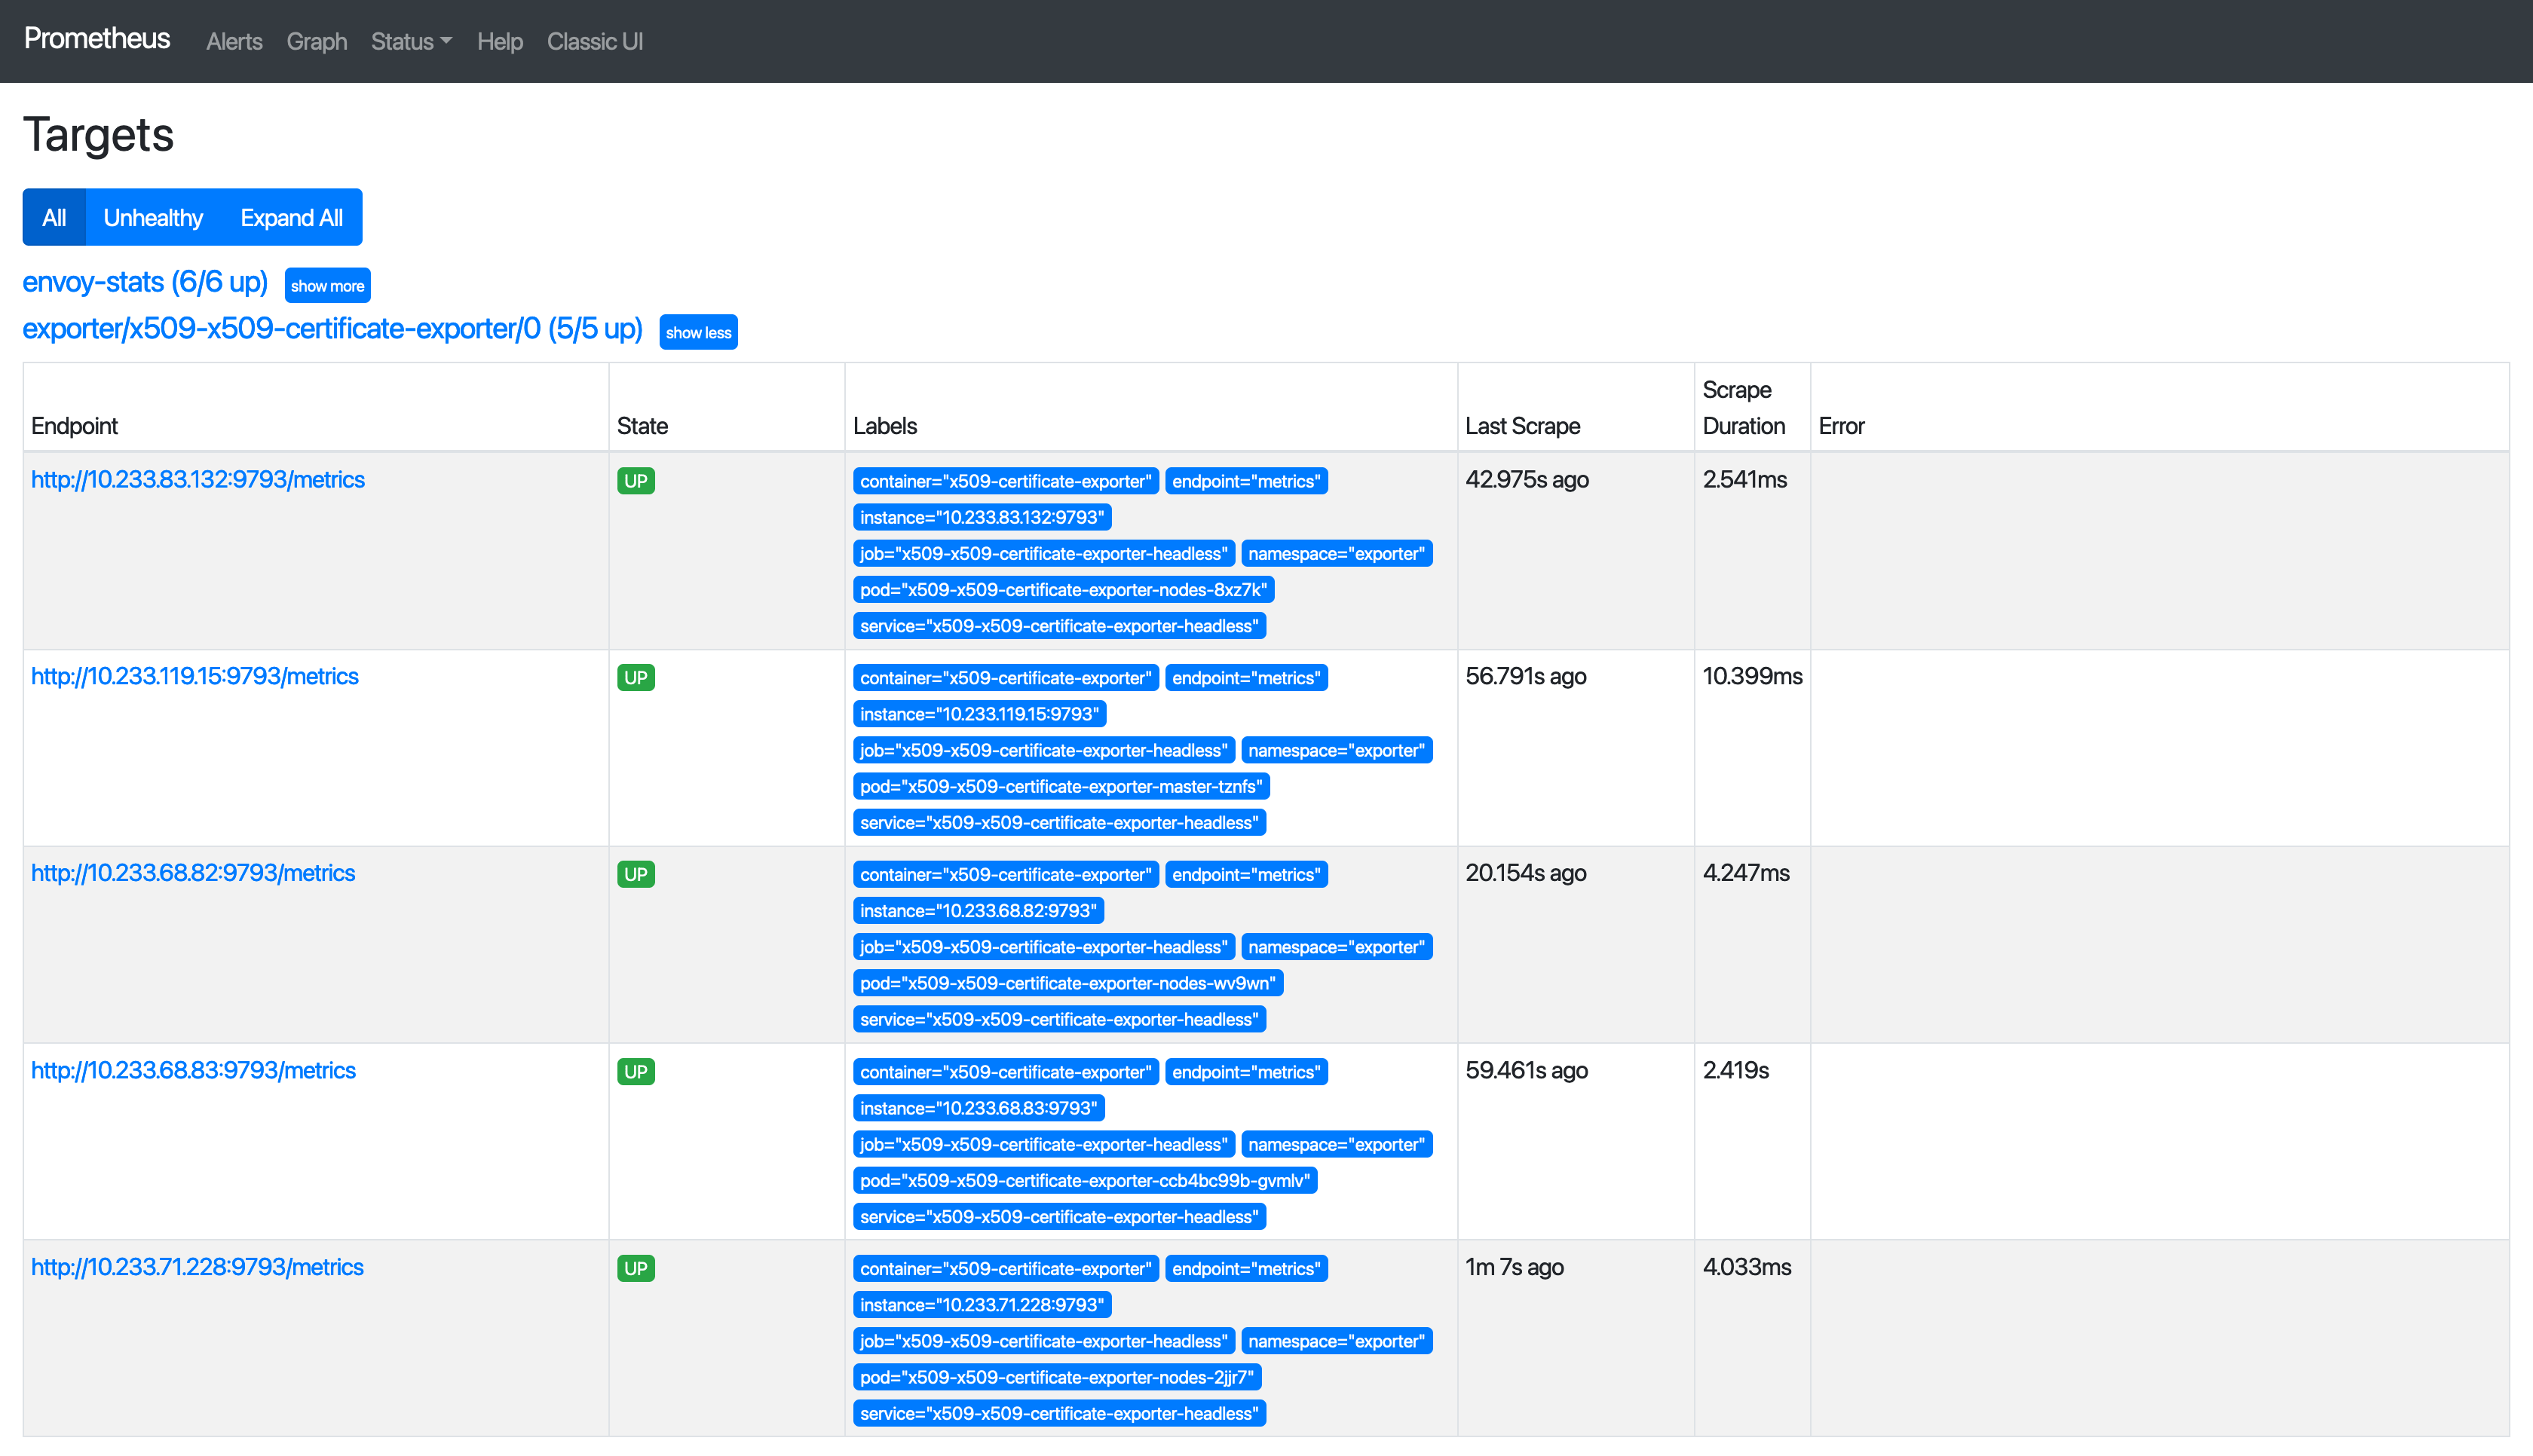
After you deploy the app using the app template, a ServiceMonitor will also be created along with two DaemonSets.
$ kubectl -n exporter get servicemonitor
NAME                             AGE
x509-x509-certificate-exporter   3d15h
Open the web UI of Prometheus, and you can see that the corresponding Targets are ready.
x509-certificate-exporter officially provides a Grafana Dashboard, as shown in the following figure.
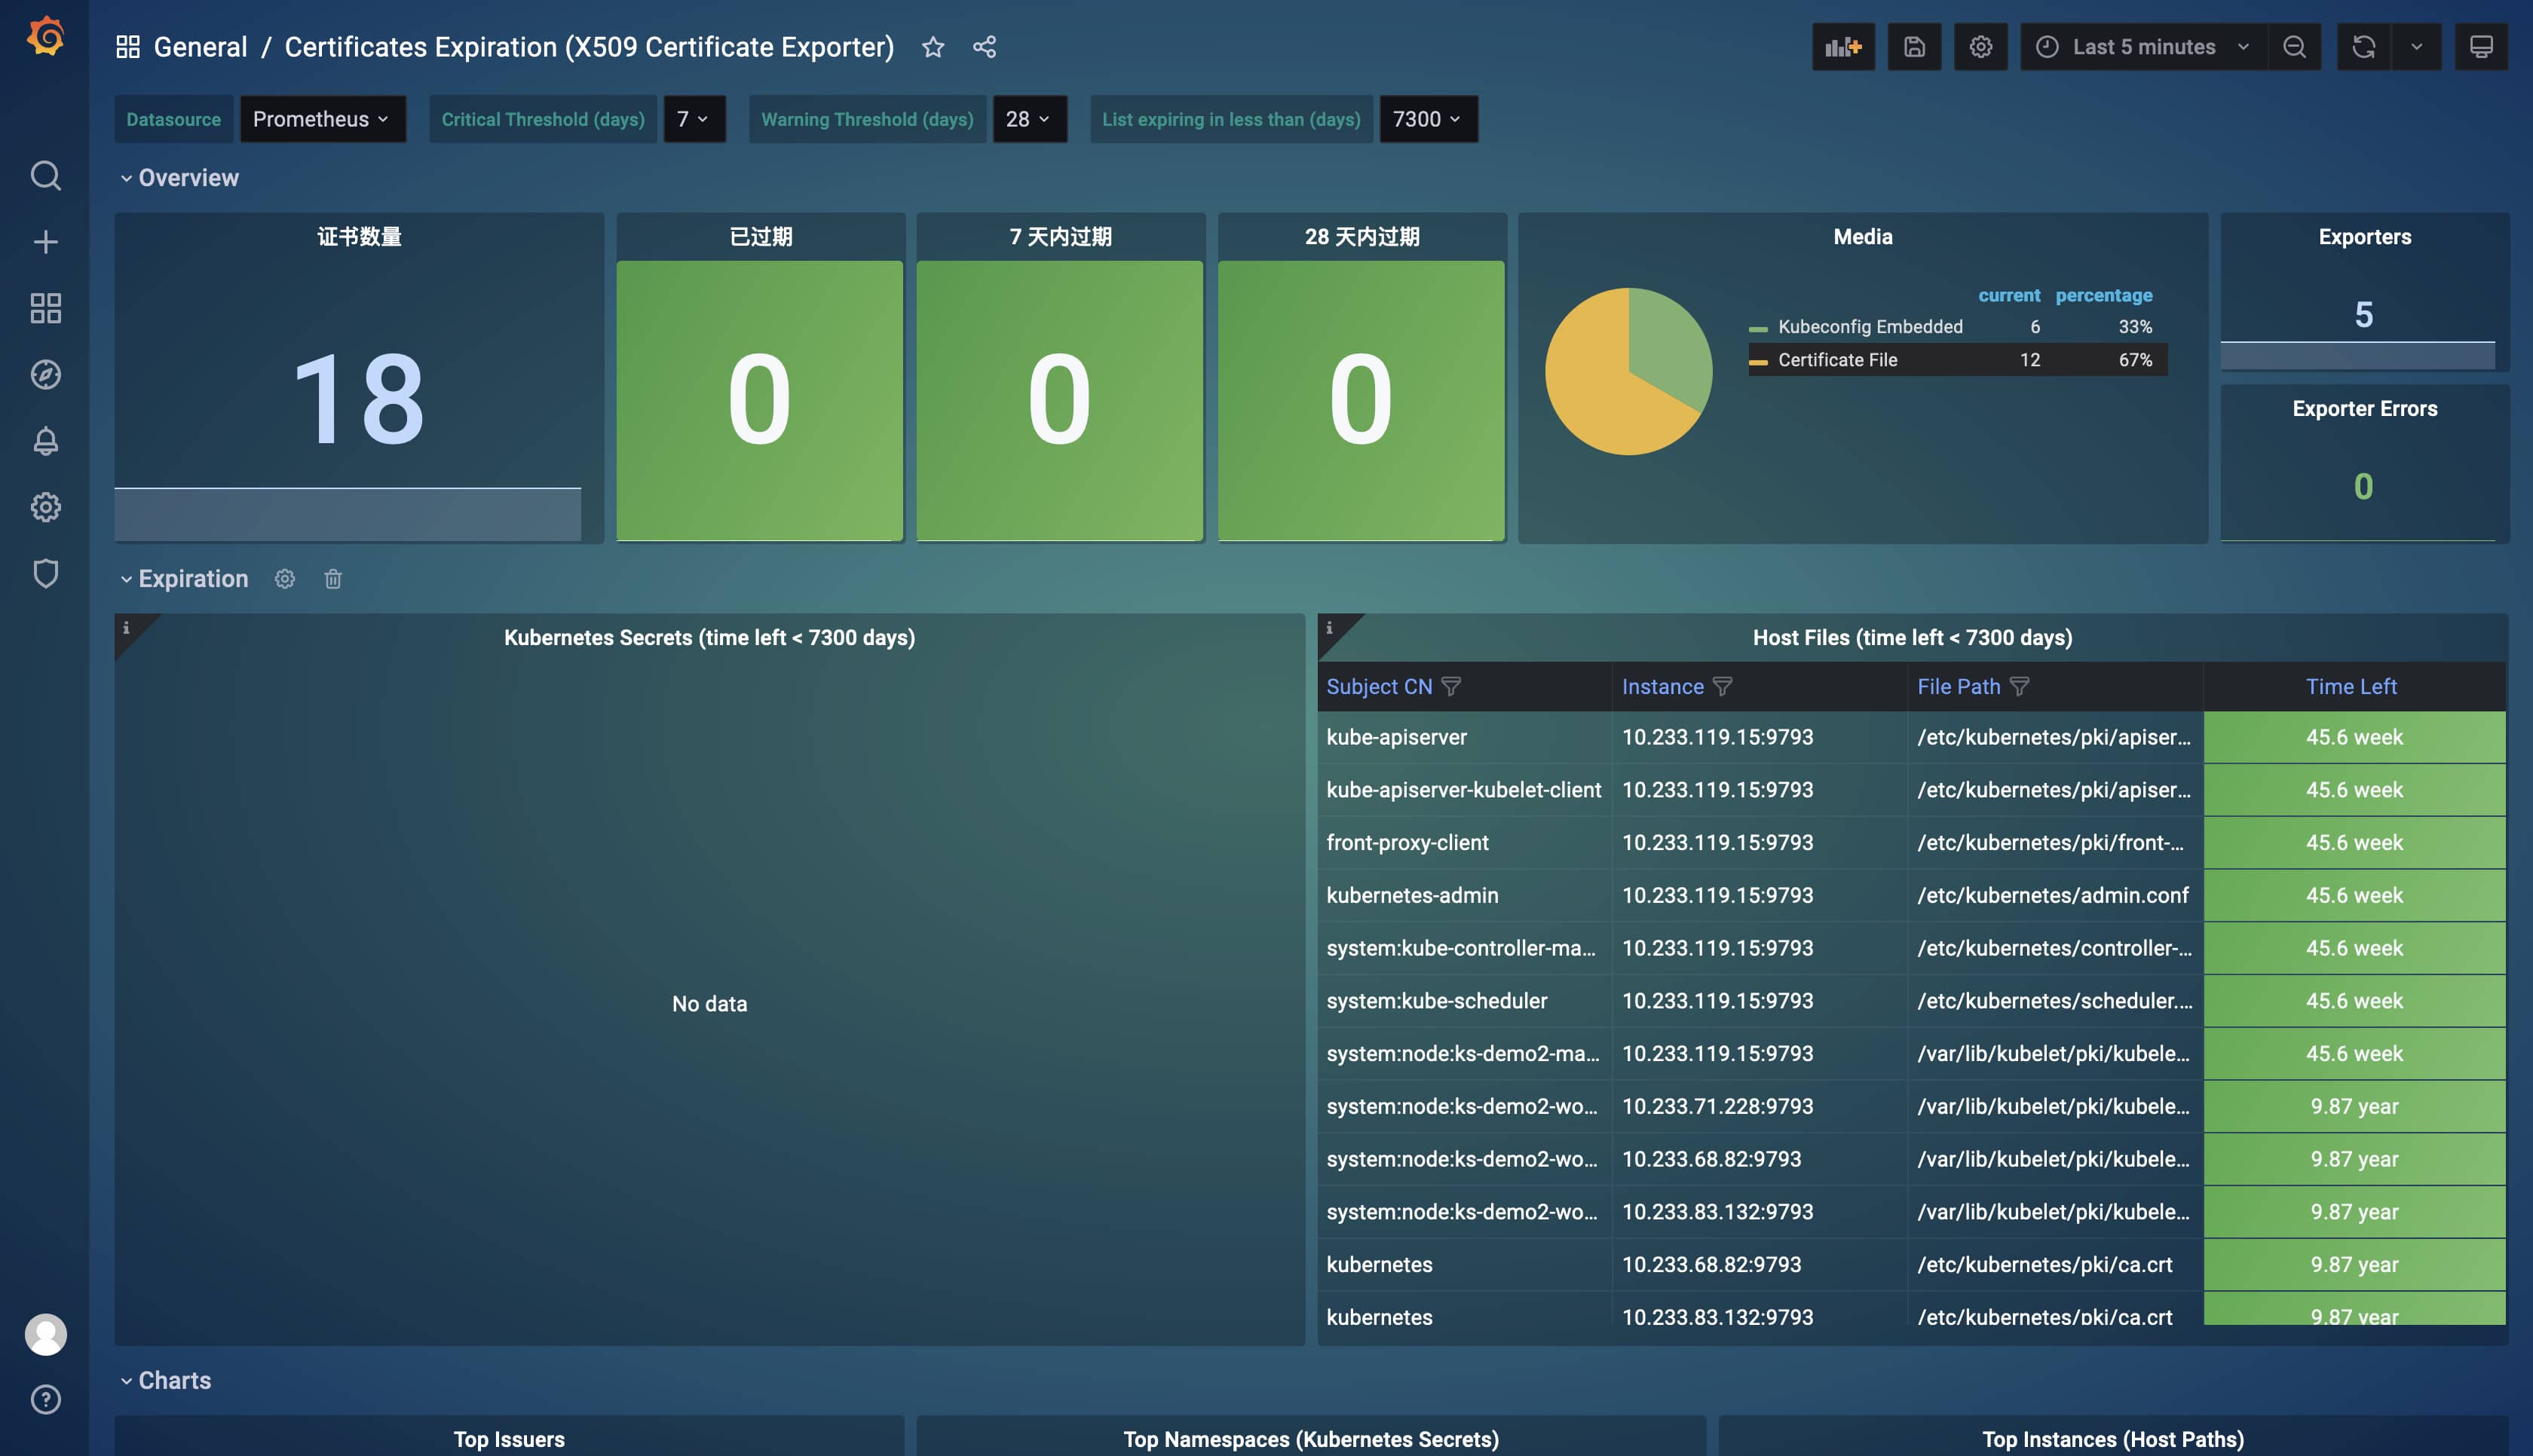
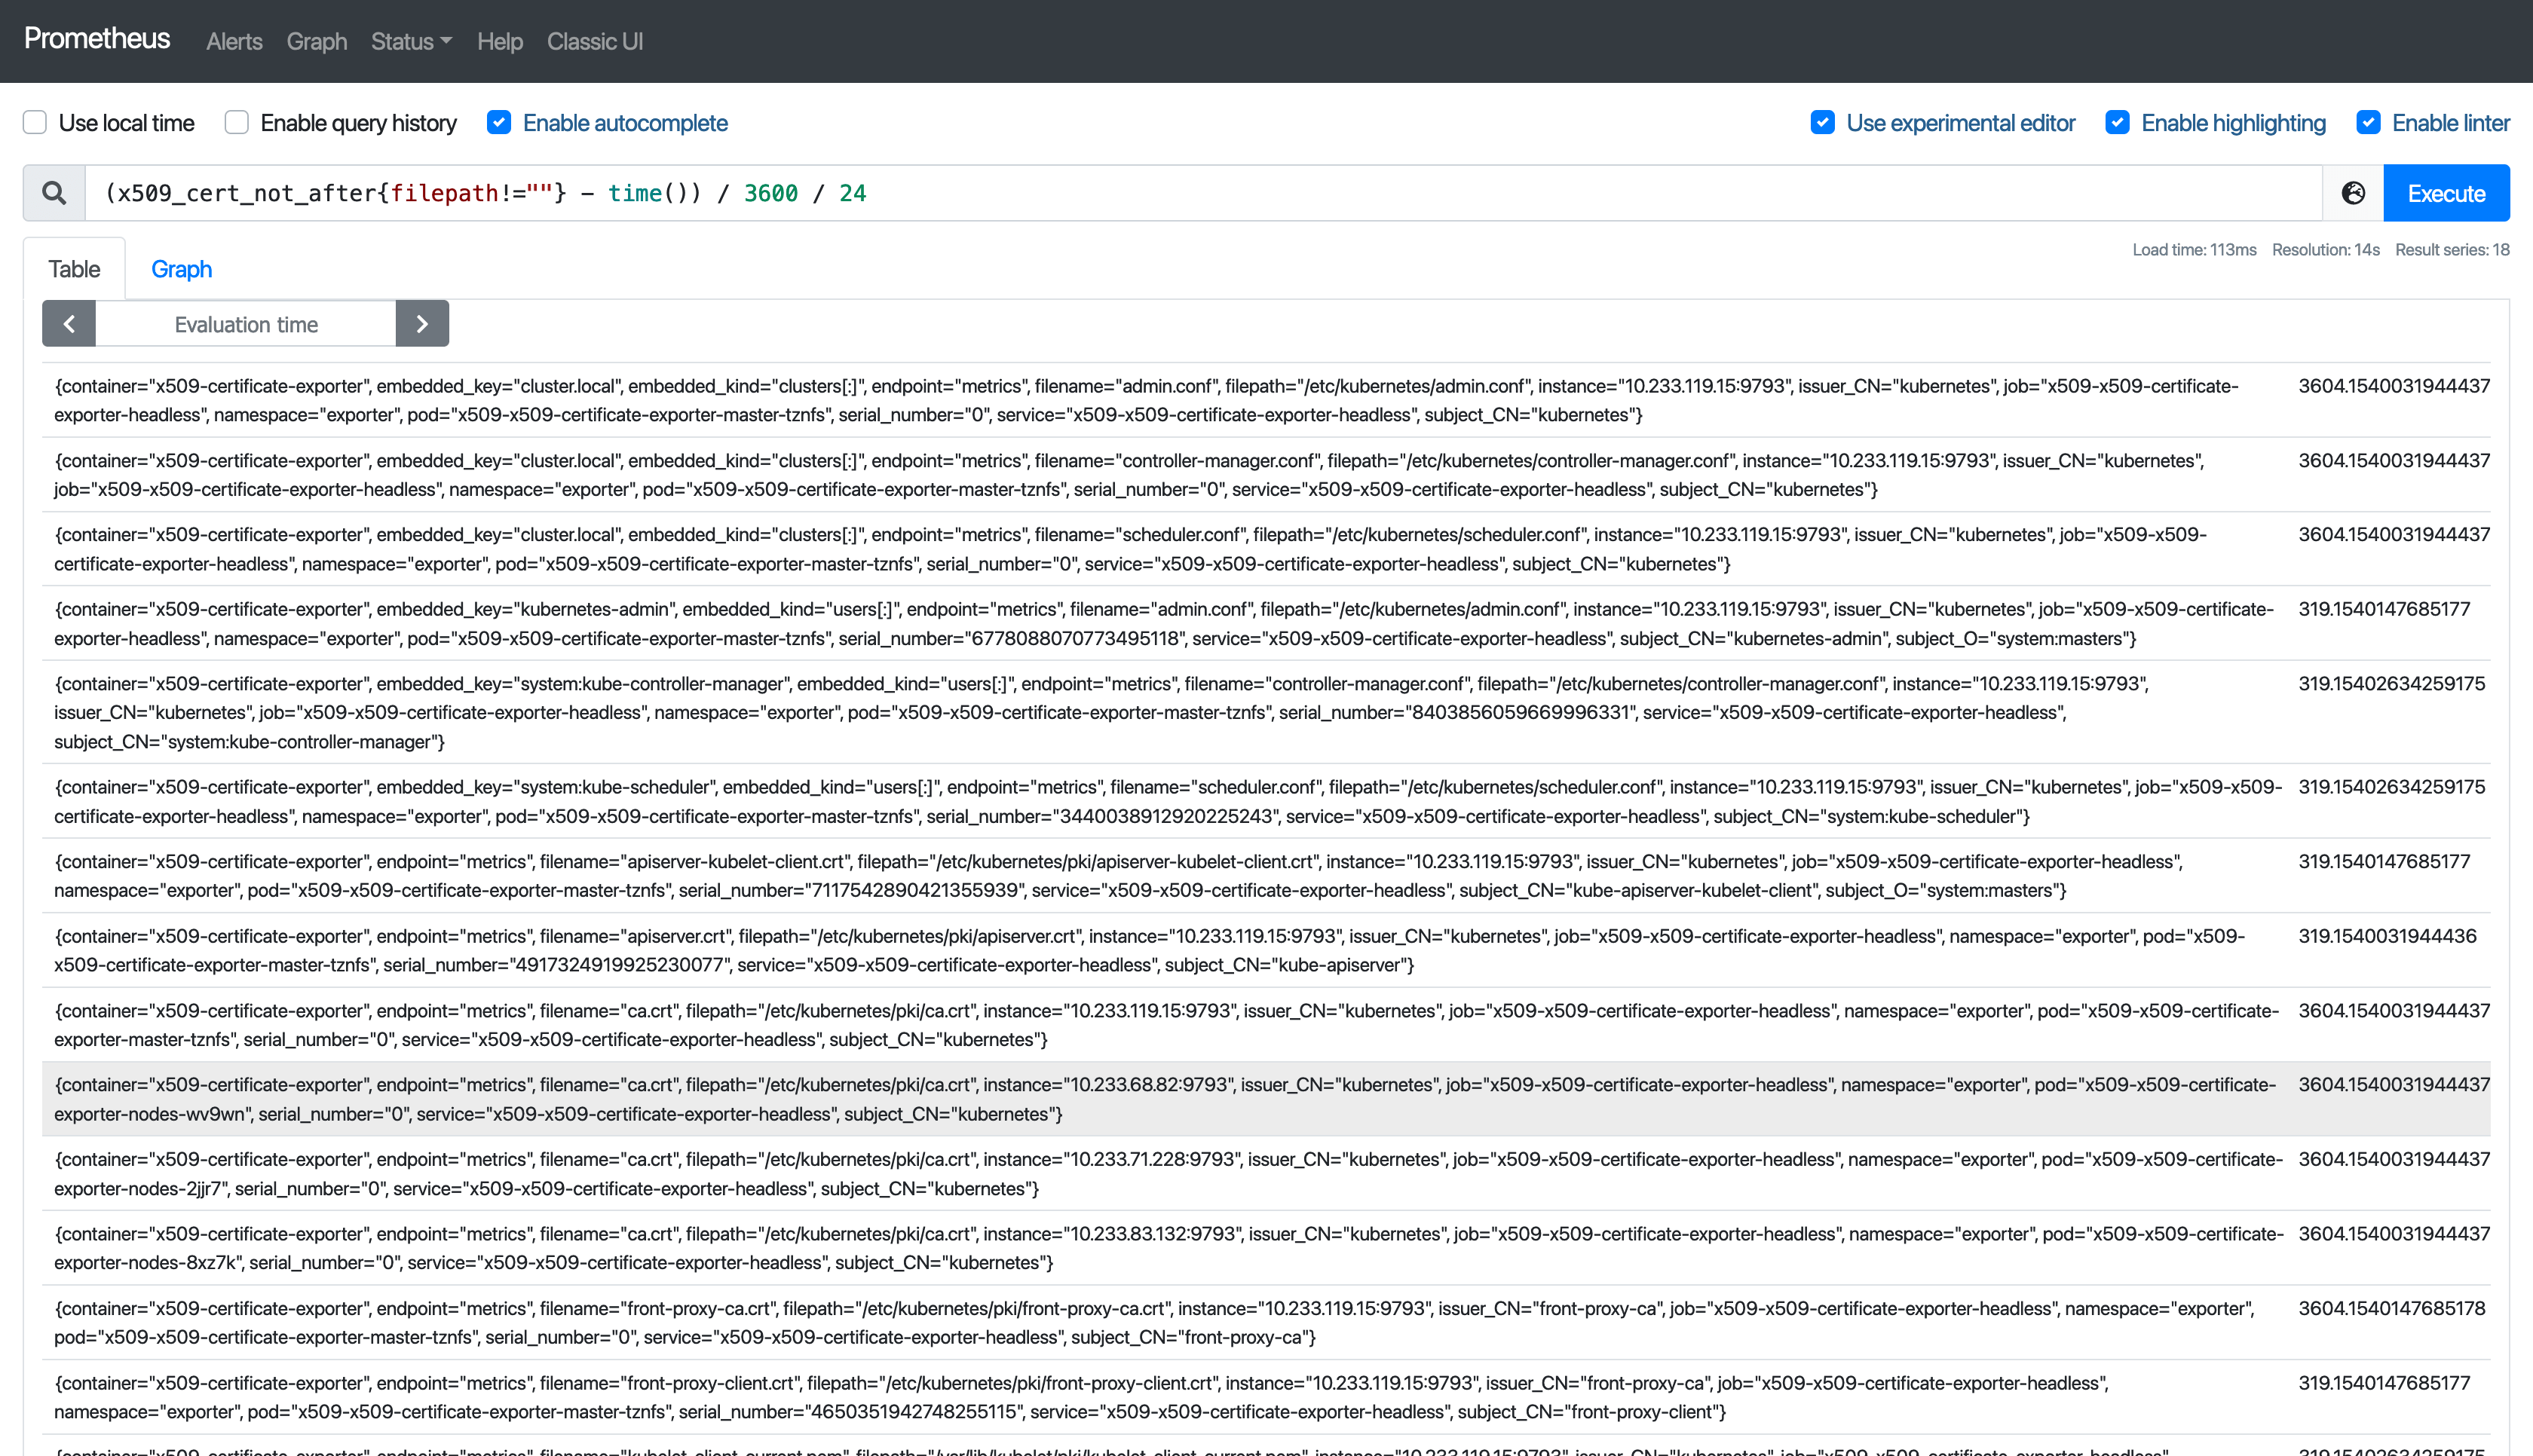
It can be seen that all metrics are crystal clear. Generally, we only need to focus on certificates that have expired and are about to expire. Suppose you want to know validity of a certificate, use the (x509_cert_not_after{filepath!=""} - time()) / 3600 / 24 expression.
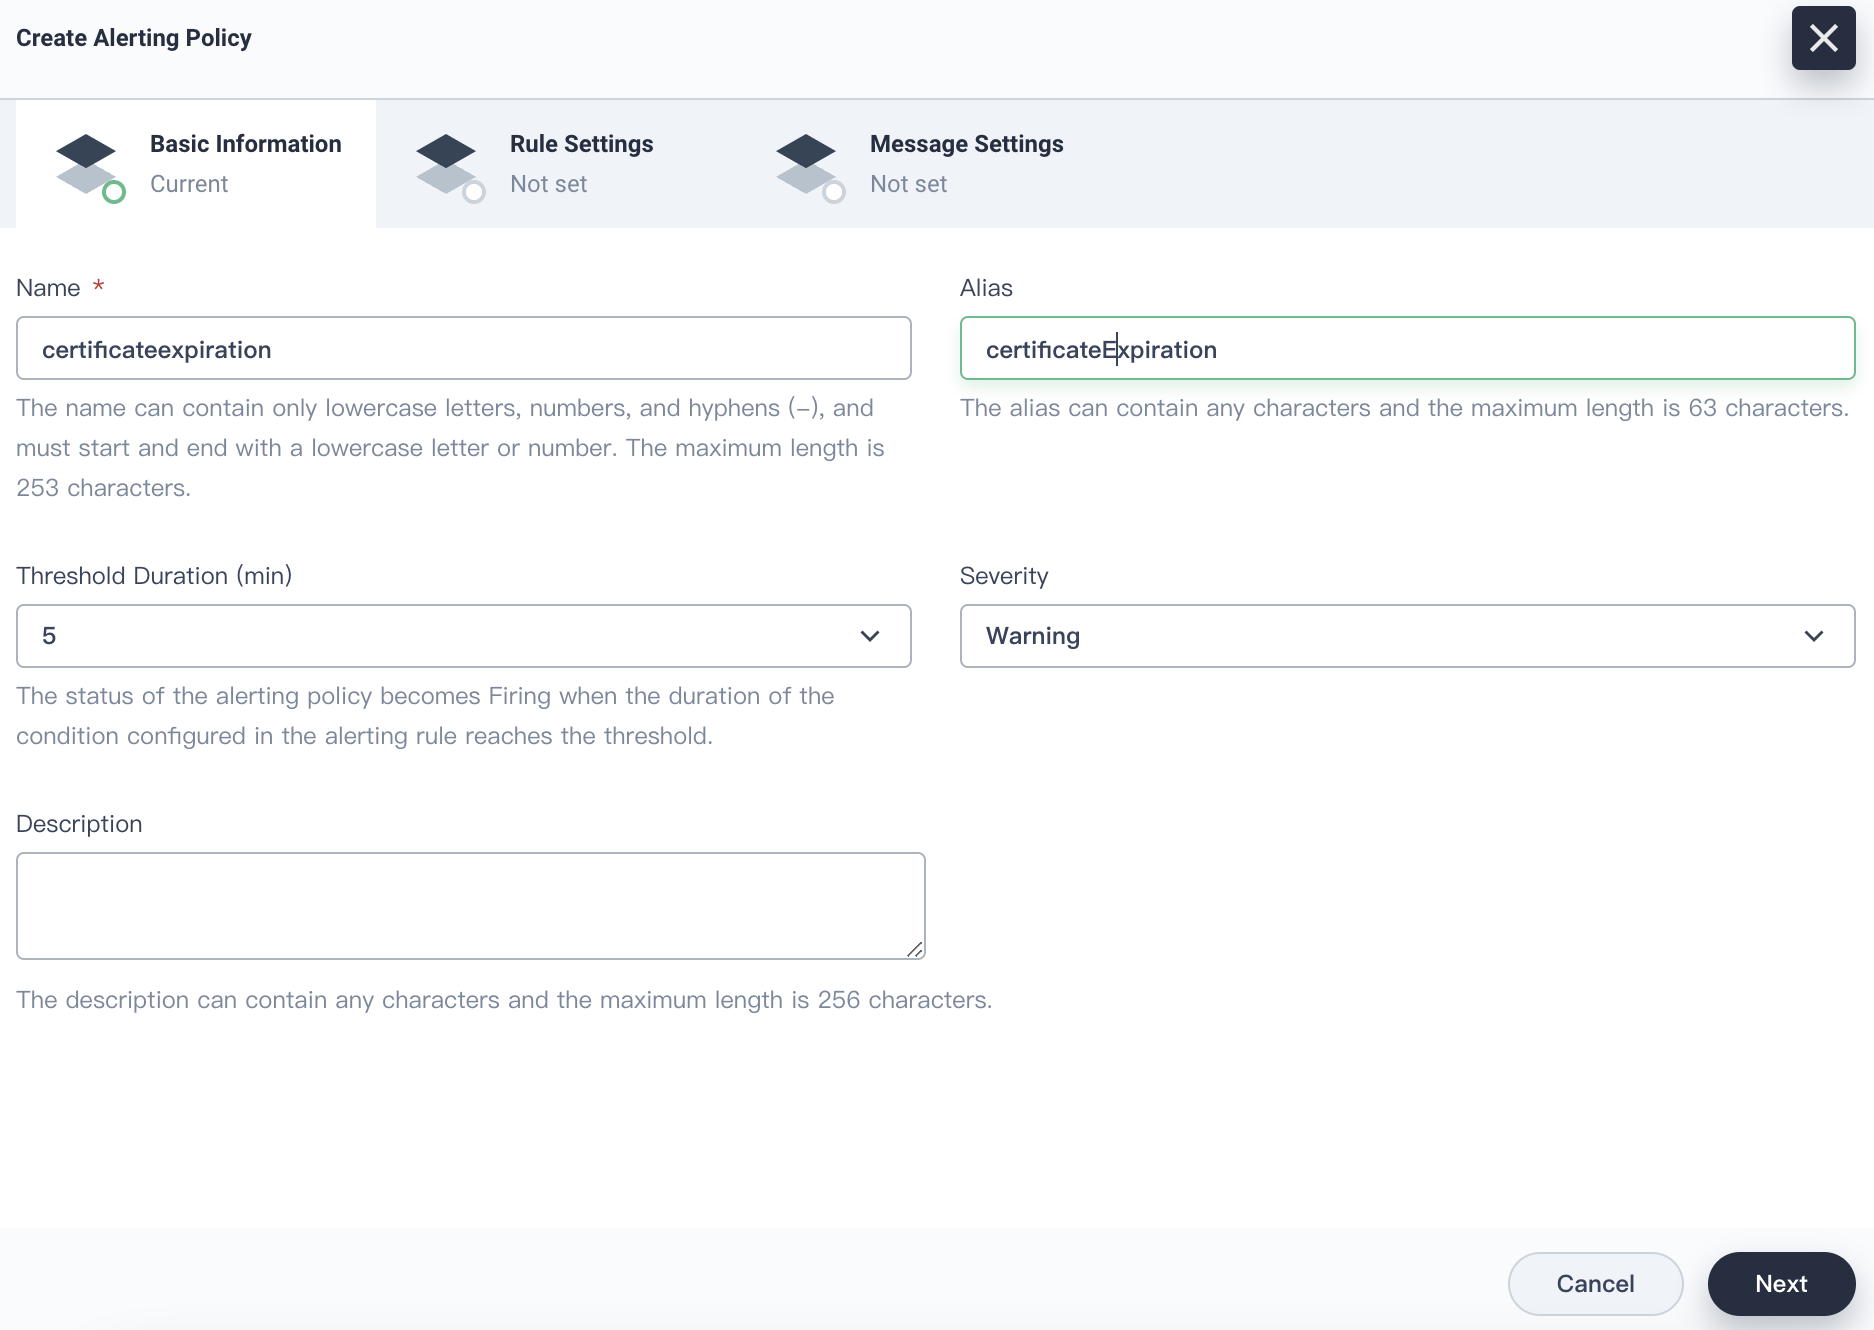
Additionally, you can create alerting policies so that the O&M personnel can receive notifications when a certificate is about to expire and update the certificate in time. To create an alerting policy, perform the following steps:
- Go to Alerting Policies under Monitoring & Alerting, and click Create.

- Enter a name for the alerting policy, set the severity, and click Next.
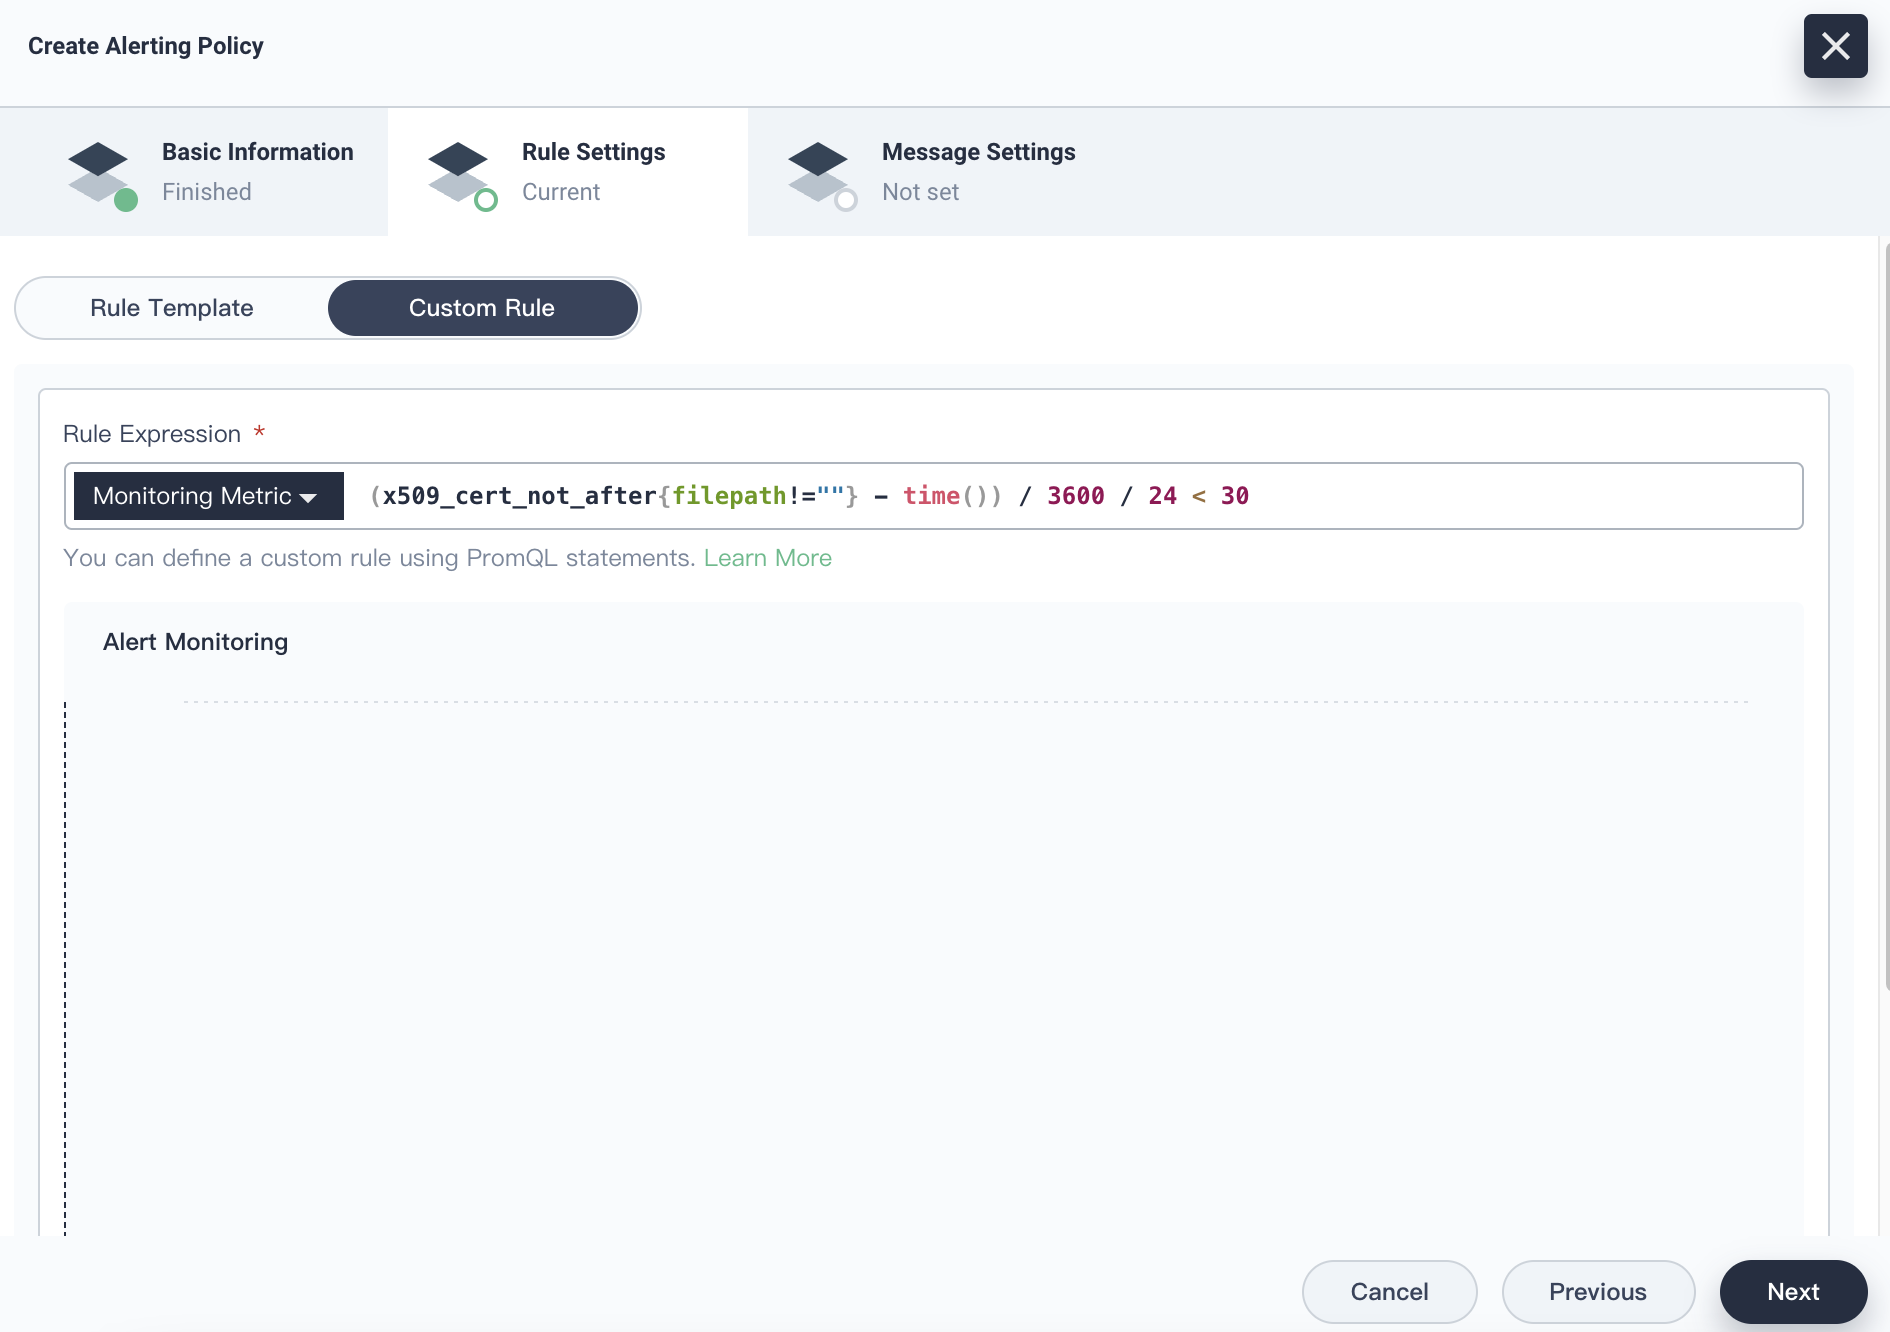
- Click the Custom Rule tab, and enter
(x509_cert_not_after{filepath!=""} - time()) / 3600 / 24 < 30for Rule Expression.
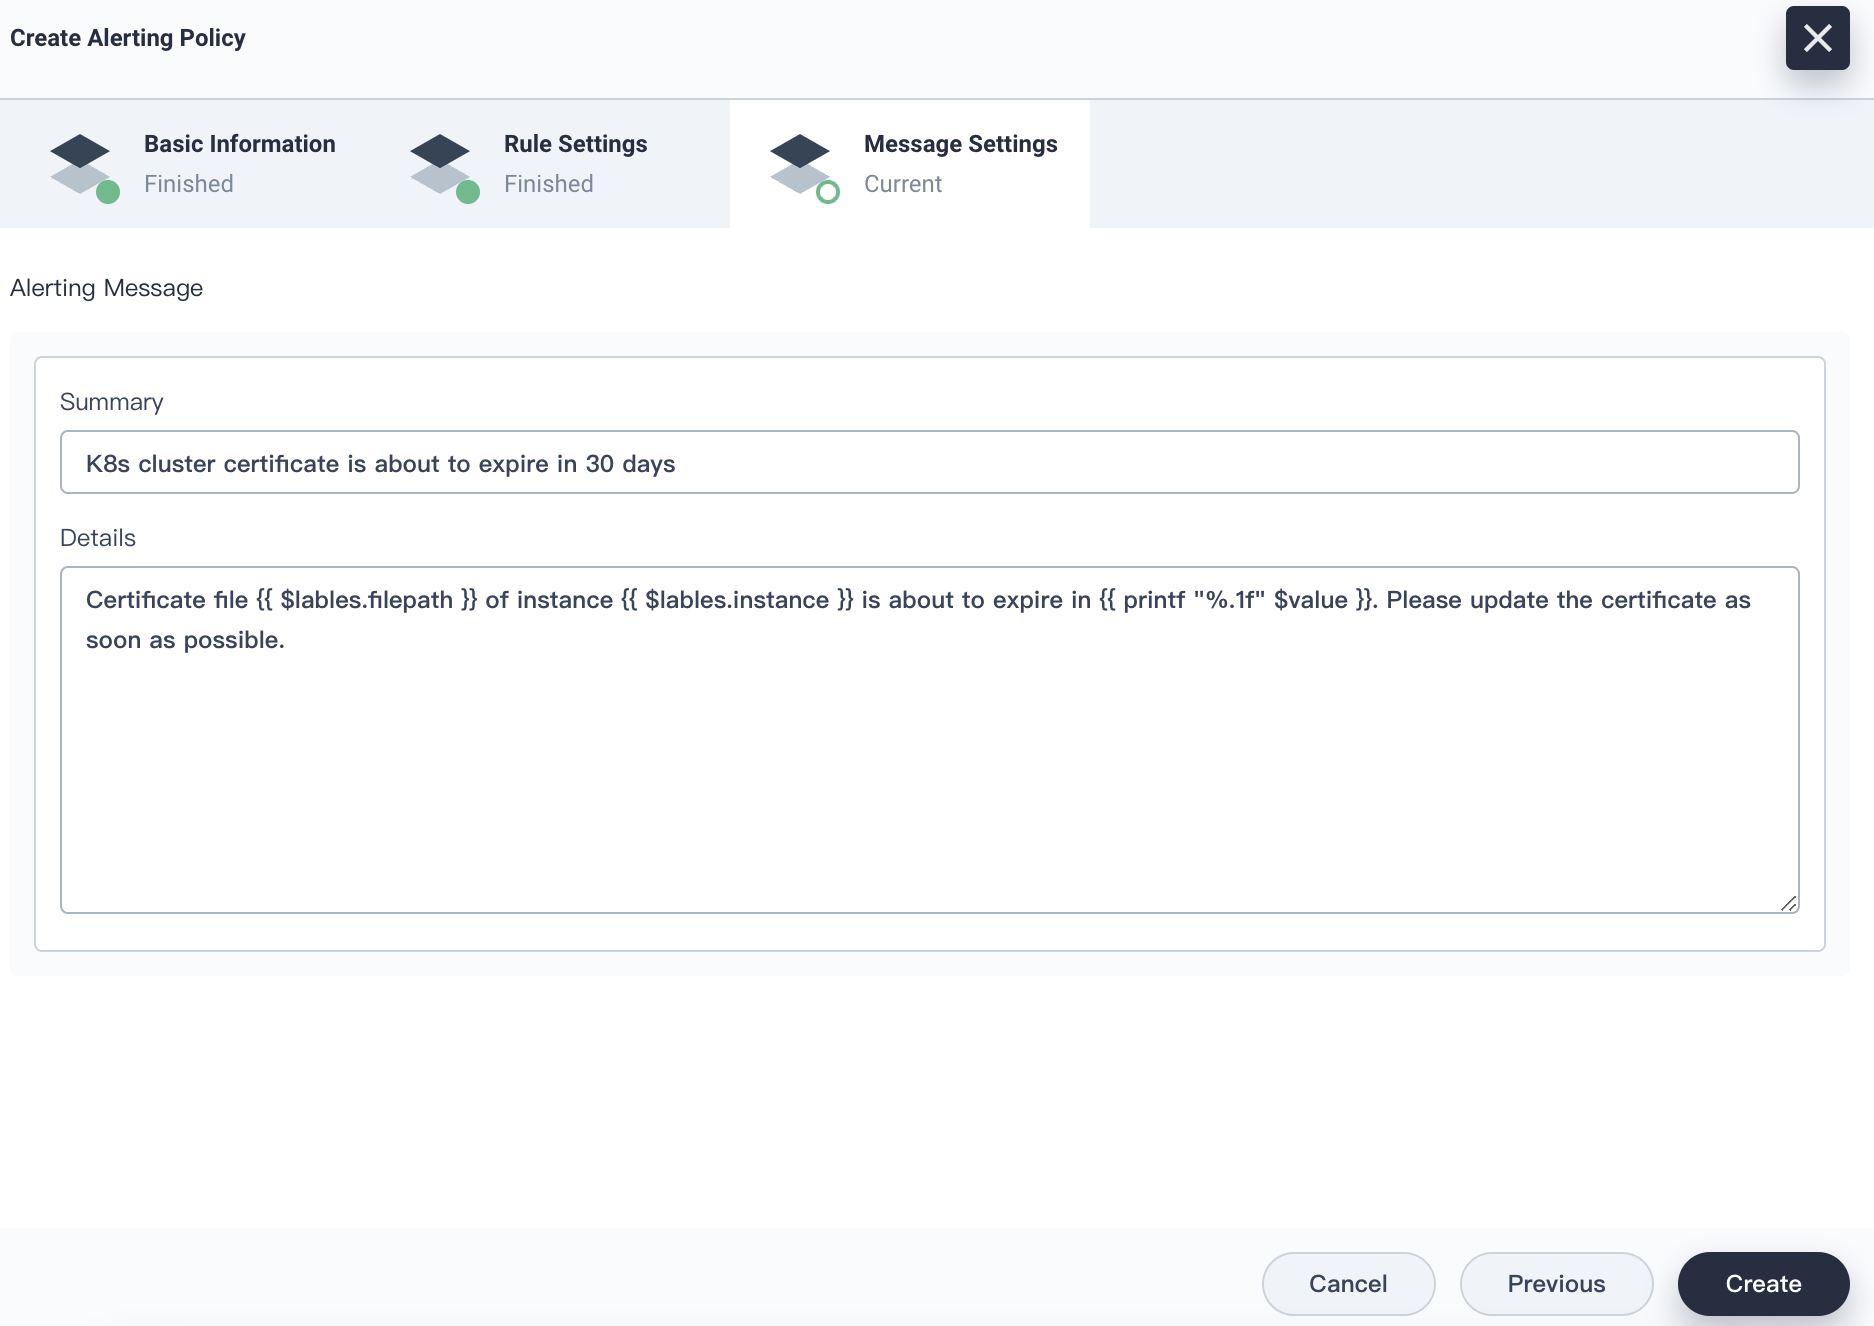
- Click Next. On the Message Settings page, fill in the summary and details of the alert.
- Click Create, and the alerting policy is created.
Summary
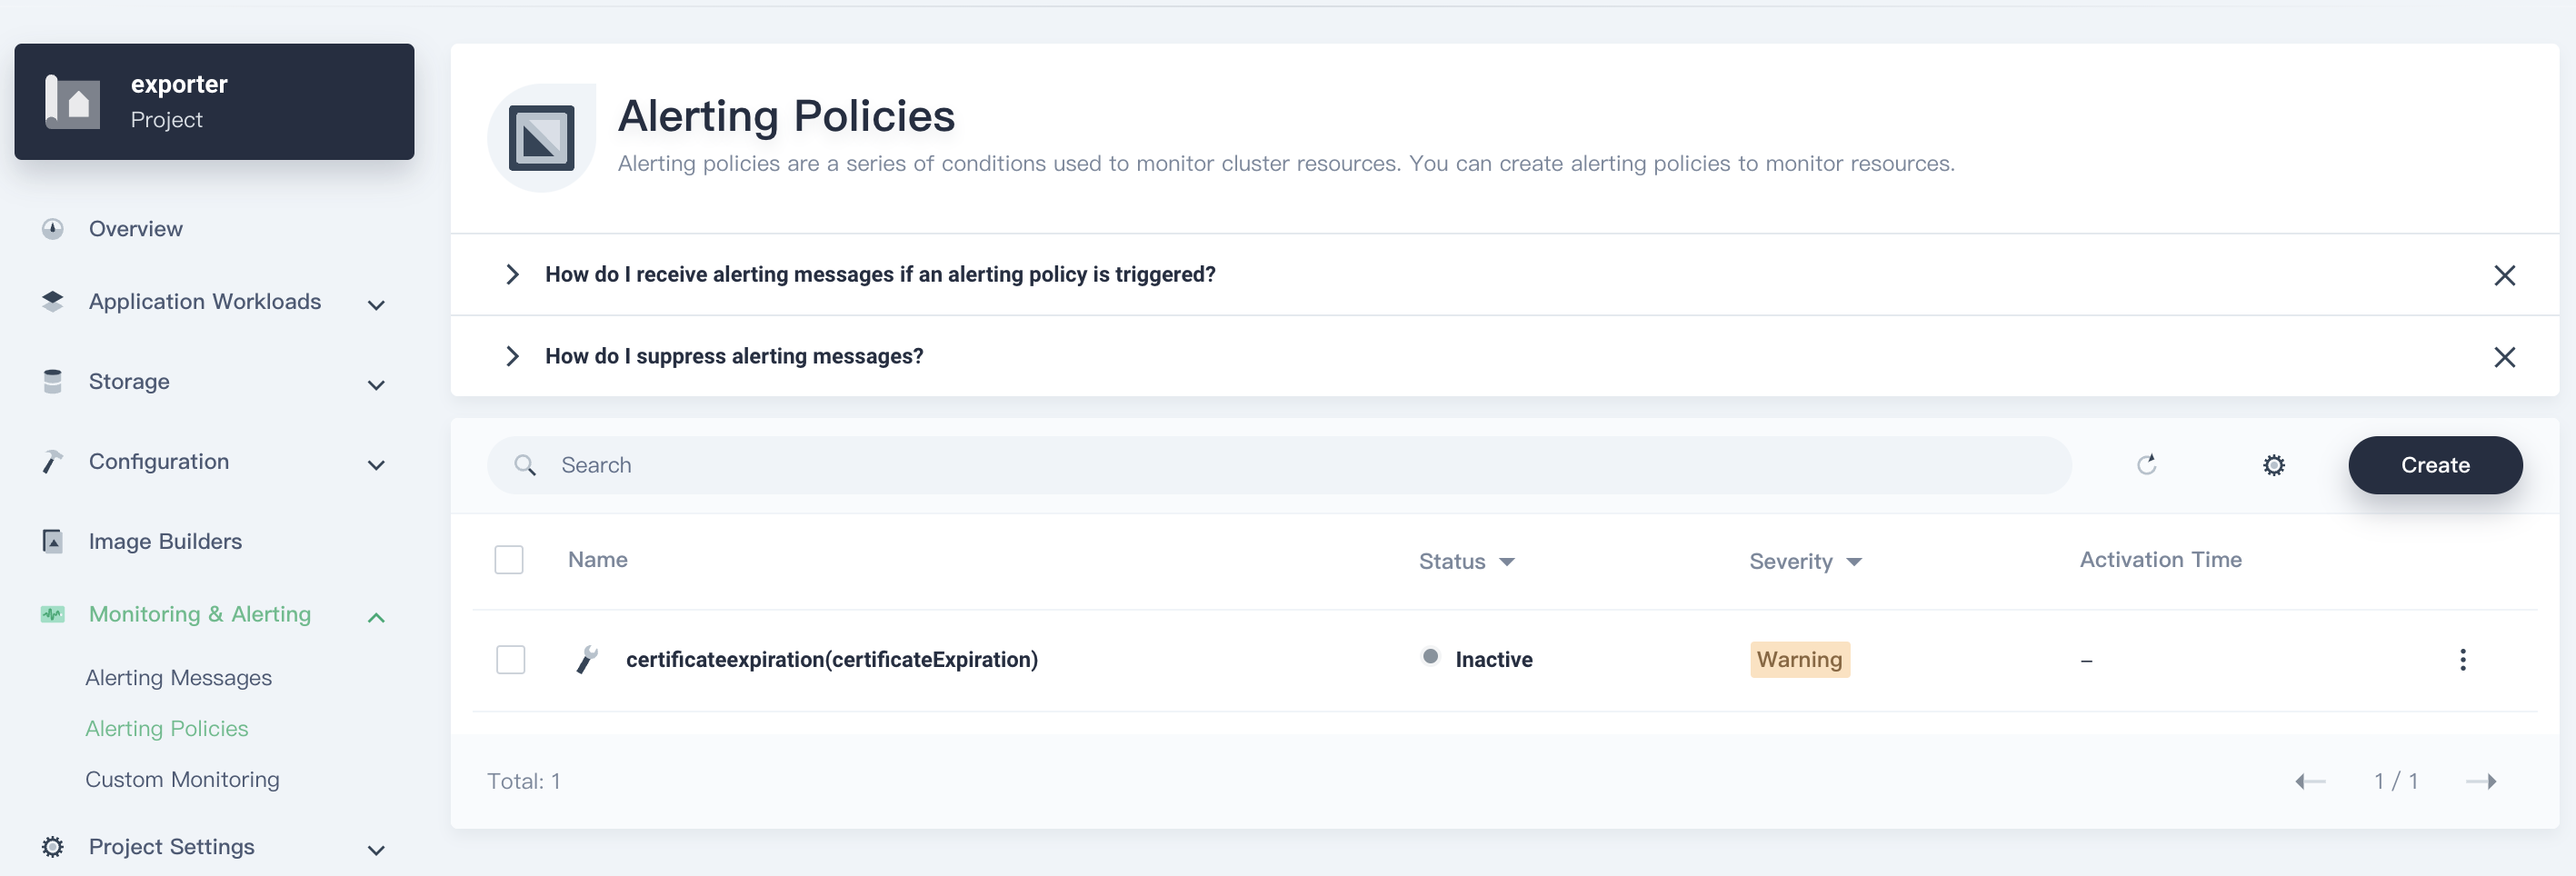
KubeSphere 3.1 has supported the built-in alerting policies for certificate expiration. To view the policies, go to Alerting Policies, click Bulit-in Policies, and enter expir in the search box.
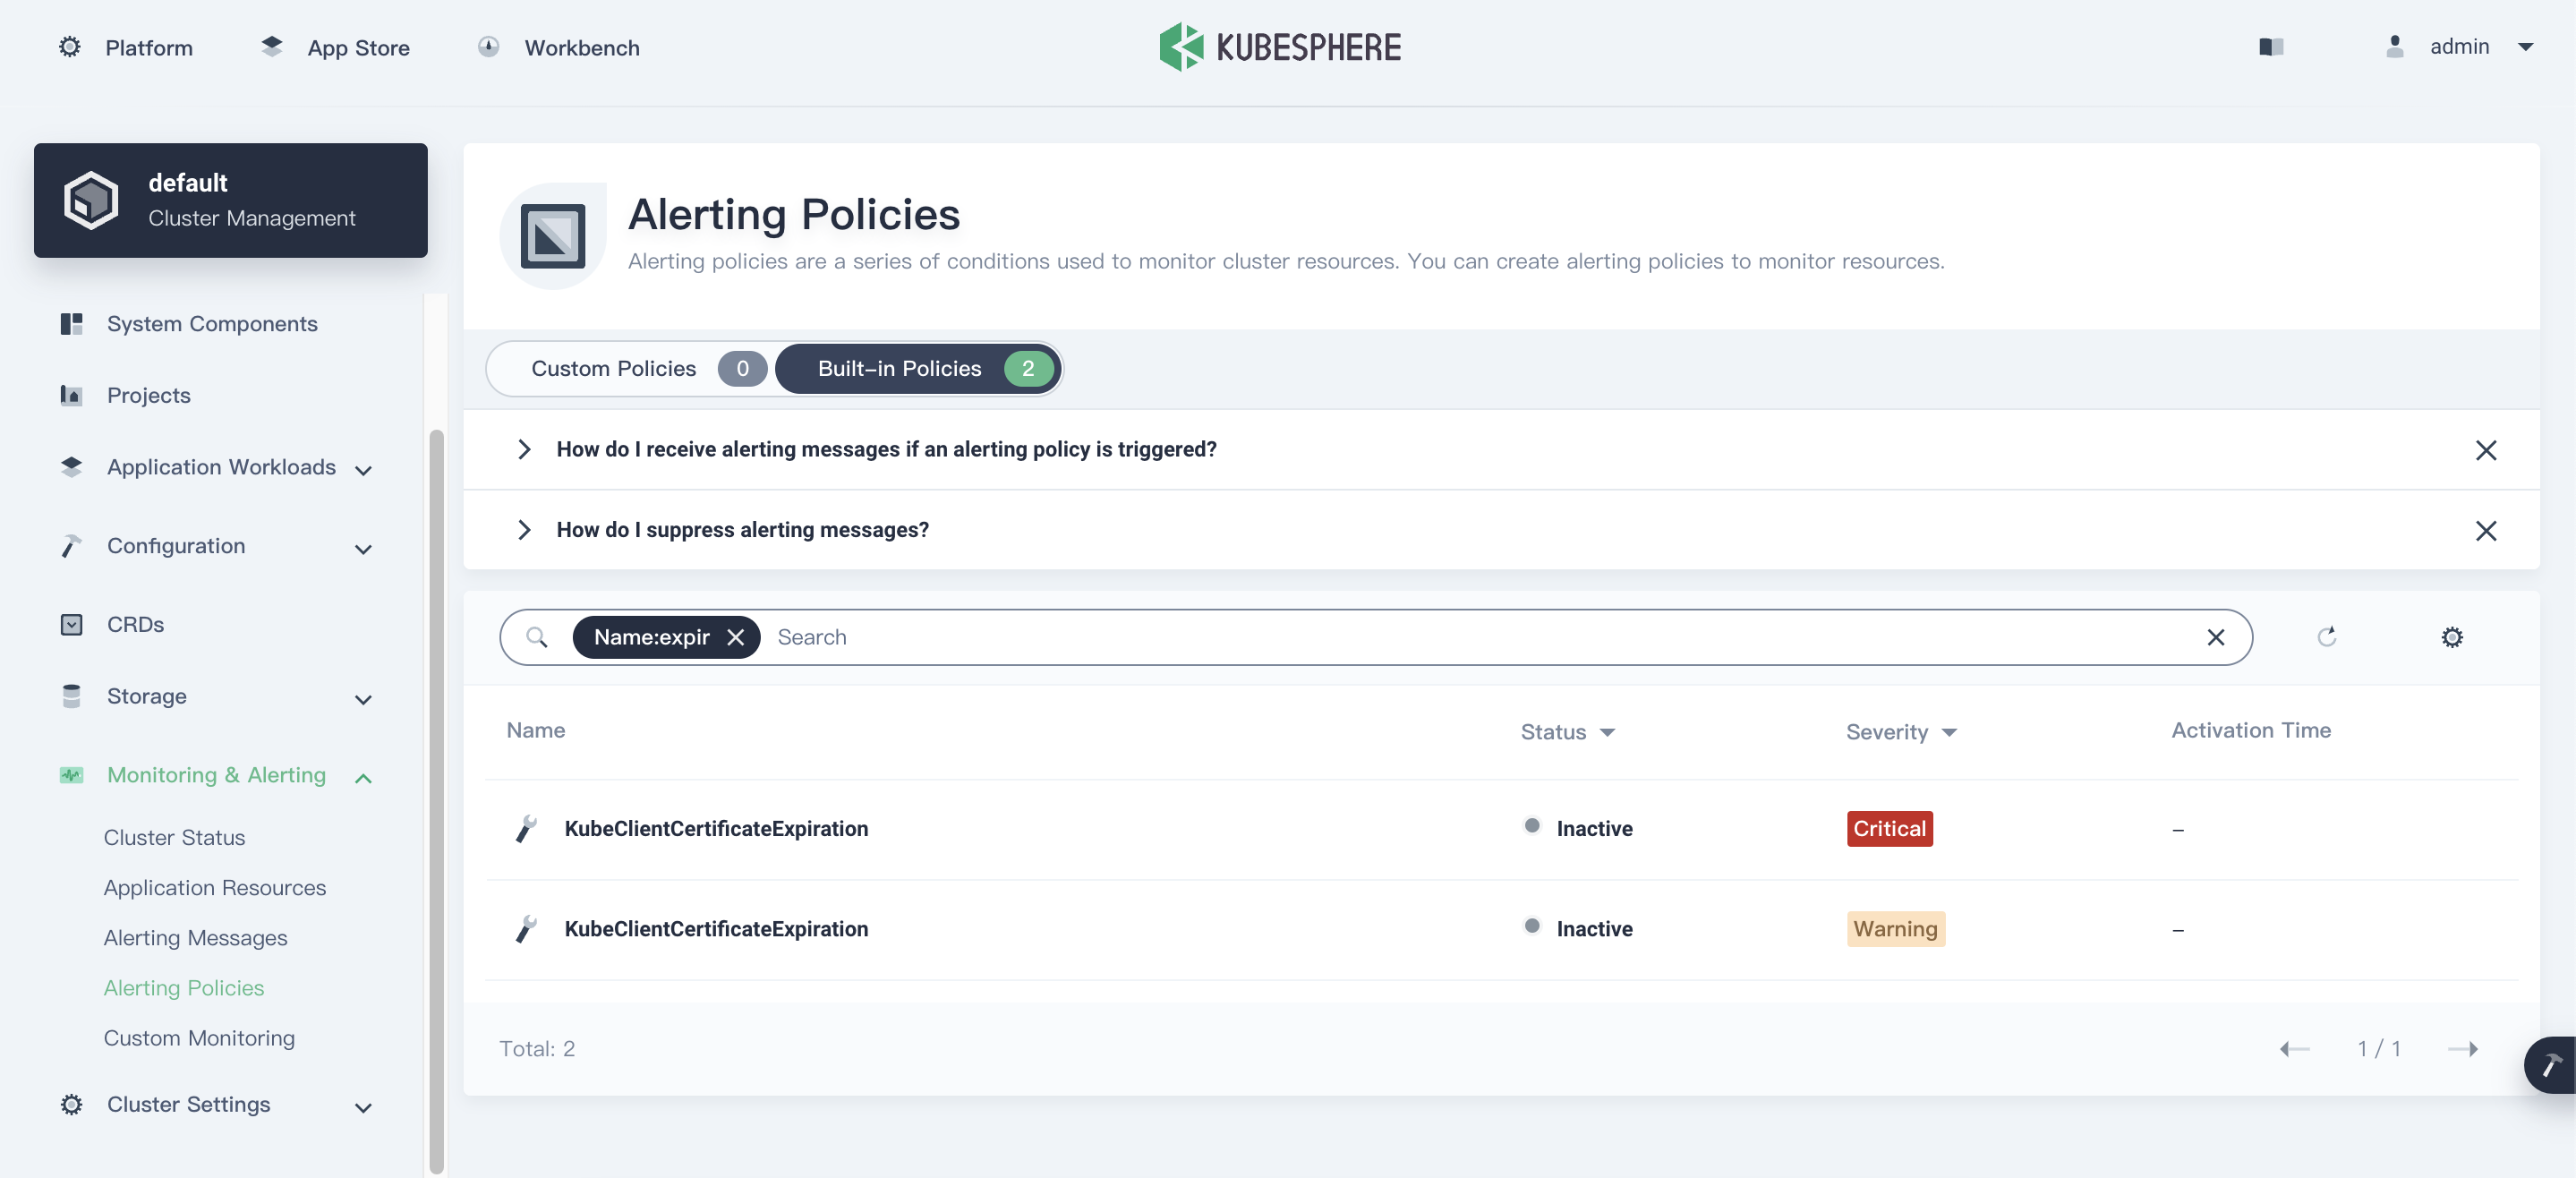
Click the alerting policy name to view its rule expression.
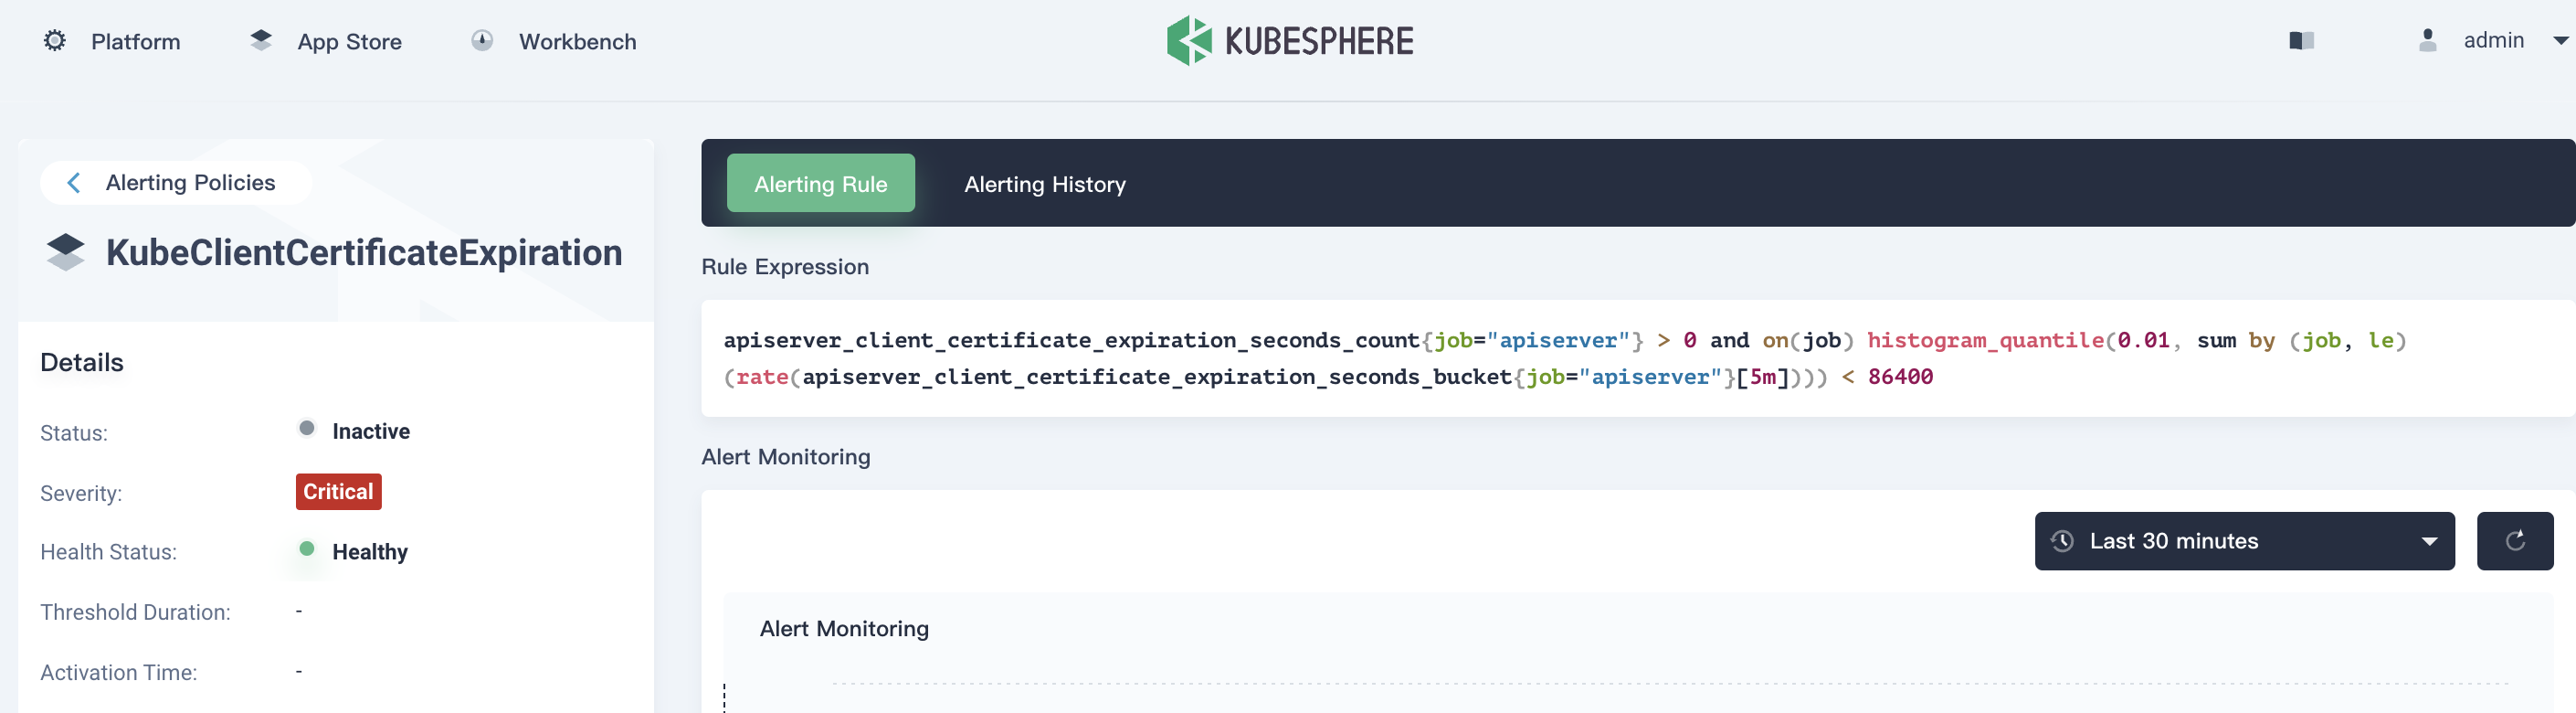
Metrics in the rule expression is exposed by the API Server component, and does not contain certificates of all components of the cluster. To monitor certificates of all components, it is recommended that you create a custom alerting policy on KubeSphere while deploying x509-certificate-exporter. Trust me, you will be hassle-free from certificate expiration.
