


Air-gapped Installation on Kubernetes
The air-gapped installation is almost the same as the online installation except that you must create a local registry to host Docker images. This tutorial demonstrates how to install KubeSphere on Kubernetes in an air-gapped environment.
Before you follow the steps below, read Prerequisites first.
Step 1: Prepare a Private Image Registry
You can use Harbor or any other private image registries. This tutorial uses Docker registry as an example with self-signed certificates (If you have your own private image registry, you can skip this step).
Use self-signed certificates
Generate your own certificate by executing the following commands:
mkdir -p certsopenssl req \ -newkey rsa:4096 -nodes -sha256 -keyout certs/domain.key \ -x509 -days 36500 -out certs/domain.crtMake sure you specify a domain name in the field
Common Namewhen you are generating your own certificate. For instance, the field is set todockerhub.kubekey.localin this example.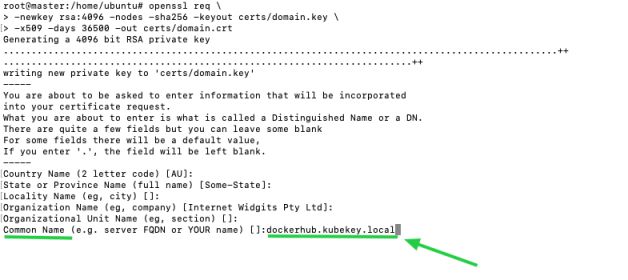
Start the Docker registry
Run the following commands to start the Docker registry:
docker run -d \
  --restart=always \
  --name registry \
  -v "$(pwd)"/certs:/certs \
  -v /mnt/registry:/var/lib/registry \
  -e REGISTRY_HTTP_ADDR=0.0.0.0:443 \
  -e REGISTRY_HTTP_TLS_CERTIFICATE=/certs/domain.crt \
  -e REGISTRY_HTTP_TLS_KEY=/certs/domain.key \
  -p 443:443 \
  registry:2
Note
Docker uses
/var/lib/docker as the default directory where all Docker related files, including images, are stored. It is recommended you add additional storage volumes with at least 100G mounted to /var/lib/docker and /mnt/registry respectively. See fdisk command for reference.Configure the registry
Add an entry to
/etc/hoststo map the hostname (i.e. the registry domain name; in this case, it isdockerhub.kubekey.local) to the private IP address of your machine as below.# docker registry 192.168.0.2 dockerhub.kubekey.localExecute the following commands to copy the certificate to a specified directory and make Docker trust it.
mkdir -p /etc/docker/certs.d/dockerhub.kubekey.localcp certs/domain.crt /etc/docker/certs.d/dockerhub.kubekey.local/ca.crtNote
The path of the certificate is related to the domain name. When you copy the path, use your actual domain name if it is different from the one set above.To verify whether the private registry is effective, you can copy an image to your local machine first, and use
docker pushanddocker pullto test it.
Step 2: Prepare Installation Images
As you install KubeSphere in an air-gapped environment, you need to prepare an image package containing all the necessary images in advance.
Download the image list file
images-list.txtfrom a machine that has access to the Internet through the following command:curl -L -O https://github.com/kubesphere/ks-installer/releases/download/v3.4.1/images-list.txtNote
This file lists images under##+modulenamebased on different modules. You can add your own images to this file following the same rule. To view the complete file, see Appendix.Download
offline-installation-tool.sh.curl -L -O https://github.com/kubesphere/ks-installer/releases/download/v3.4.1/offline-installation-tool.shMake the
.shfile executable.chmod +x offline-installation-tool.shYou can execute the command
./offline-installation-tool.sh -hto see how to use the script:root@master:/home/ubuntu# ./offline-installation-tool.sh -h Usage: ./offline-installation-tool.sh [-l IMAGES-LIST] [-d IMAGES-DIR] [-r PRIVATE-REGISTRY] [-v KUBERNETES-VERSION ] Description: -b : save kubernetes' binaries. -d IMAGES-DIR : the dir of files (tar.gz) which generated by `docker save`. default: ./kubesphere-images -l IMAGES-LIST : text file with list of images. -r PRIVATE-REGISTRY : target private registry:port. -s : save model will be applied. Pull the images in the IMAGES-LIST and save images as a tar.gz file. -v KUBERNETES-VERSION : download kubernetes' binaries. default: v1.22.12 -h : usage messagePull images in
offline-installation-tool.sh../offline-installation-tool.sh -s -l images-list.txt -d ./kubesphere-imagesNote
You can choose to pull images as needed. For example, you can delete##k8s-imagesand related images under it inimages-list.textas you already have a Kubernetes cluster.
Step 3: Push Images to Your Private Registry
Transfer your packaged image file to your local machine and execute the following command to push it to the registry.
./offline-installation-tool.sh -l images-list.txt -d ./kubesphere-images -r dockerhub.kubekey.local
Note
The domain name is
dockerhub.kubekey.local in the command. Make sure you use your own registry address.Step 4: Download Deployment Files
Similar to installing KubeSphere on an existing Kubernetes cluster in an online environment, you also need to download cluster-configuration.yaml and kubesphere-installer.yaml first.
Execute the following commands to download these two files and transfer them to your machine that serves as the taskbox for installation.
curl -L -O https://github.com/kubesphere/ks-installer/releases/download/v3.4.1/cluster-configuration.yaml
curl -L -O https://github.com/kubesphere/ks-installer/releases/download/v3.4.1/kubesphere-installer.yaml
Edit
cluster-configuration.yamlto add your private image registry. For example,dockerhub.kubekey.localis the registry address in this tutorial, then use it as the value of.spec.local_registryas below:spec: persistence: storageClass: "" authentication: jwtSecret: "" local_registry: dockerhub.kubekey.local # Add this line manually; make sure you use your own registry address.Note
You can enable pluggable components in this YAML file to explore more features of KubeSphere. Refer to Enable Pluggle Components for more details.Save
cluster-configuration.yamlafter you finish editing. Replaceks-installerwith your own registry address with the following command:sed -i "s#^\s*image: kubesphere.*/ks-installer:.*# image: dockerhub.kubekey.local/kubesphere/ks-installer:v3.4.1#" kubesphere-installer.yamlWarning
dockerhub.kubekey.localis the registry address in the command. Make sure you use your own registry address.
Step 5: Start Installation
Execute the following commands after you make sure that all steps above are completed.
kubectl apply -f kubesphere-installer.yaml
kubectl apply -f cluster-configuration.yaml
Step 6: Verify Installation
When the installation finishes, you can see the content as follows:
#####################################################
###              Welcome to KubeSphere!           ###
#####################################################

Console: http://192.168.0.2:30880
Account: admin
Password: P@88w0rd

NOTES:
  1. After logging into the console, please check the
     monitoring status of service components in
     the "Cluster Management". If any service is not
     ready, please wait patiently until all components
     are ready.
  2. Please modify the default password after login.

#####################################################
https://kubesphere.io             20xx-xx-xx xx:xx:xx
#####################################################
Now, you will be able to access the web console of KubeSphere through http://{IP}:30880 with the default account and password admin/P@88w0rd.
Note
To access the console, make sure port 30880 is opened in your security group.

Appendix
Image list of KubeSphere 3.4
##kubesphere-images
kubesphere/ks-installer:v3.4.1
kubesphere/ks-apiserver:v3.4.1
kubesphere/ks-console:v3.4.1
kubesphere/ks-controller-manager:v3.4.1
kubesphere/kubectl:v1.20.0
kubesphere/kubefed:v0.8.1
kubesphere/tower:v0.2.1
minio/minio:RELEASE.2019-08-07T01-59-21Z
minio/mc:RELEASE.2019-08-07T23-14-43Z
csiplugin/snapshot-controller:v4.0.0
kubesphere/nginx-ingress-controller:v1.3.1
mirrorgooglecontainers/defaultbackend-amd64:1.4
kubesphere/metrics-server:v0.4.2
redis:5.0.14-alpine
haproxy:2.0.25-alpine
alpine:3.14
osixia/openldap:1.3.0
kubesphere/netshoot:v1.0
##kubeedge-images
kubeedge/cloudcore:v1.13.0
kubesphere/iptables-manager:v1.13.0
kubesphere/edgeservice:v0.3.0
##gatekeeper-images
openpolicyagent/gatekeeper:v3.5.2
##openpitrix-images
kubesphere/openpitrix-jobs:v3.3.2
##kubesphere-devops-images
kubesphere/devops-apiserver:ks-v3.4.1
kubesphere/devops-controller:ks-v3.4.1
kubesphere/devops-tools:ks-v3.4.1
kubesphere/ks-jenkins:v3.4.0-2.319.3-1
jenkins/inbound-agent:4.10-2
kubesphere/builder-base:v3.2.2
kubesphere/builder-nodejs:v3.2.0
kubesphere/builder-maven:v3.2.0
kubesphere/builder-maven:v3.2.1-jdk11
kubesphere/builder-python:v3.2.0
kubesphere/builder-go:v3.2.0
kubesphere/builder-go:v3.2.2-1.16
kubesphere/builder-go:v3.2.2-1.17
kubesphere/builder-go:v3.2.2-1.18
kubesphere/builder-base:v3.2.2-podman
kubesphere/builder-nodejs:v3.2.0-podman
kubesphere/builder-maven:v3.2.0-podman
kubesphere/builder-maven:v3.2.1-jdk11-podman
kubesphere/builder-python:v3.2.0-podman
kubesphere/builder-go:v3.2.0-podman
kubesphere/builder-go:v3.2.2-1.16-podman
kubesphere/builder-go:v3.2.2-1.17-podman
kubesphere/builder-go:v3.2.2-1.18-podman
kubesphere/s2ioperator:v3.2.1
kubesphere/s2irun:v3.2.0
kubesphere/s2i-binary:v3.2.0
kubesphere/tomcat85-java11-centos7:v3.2.0
kubesphere/tomcat85-java11-runtime:v3.2.0
kubesphere/tomcat85-java8-centos7:v3.2.0
kubesphere/tomcat85-java8-runtime:v3.2.0
kubesphere/java-11-centos7:v3.2.0
kubesphere/java-8-centos7:v3.2.0
kubesphere/java-8-runtime:v3.2.0
kubesphere/java-11-runtime:v3.2.0
kubesphere/nodejs-8-centos7:v3.2.0
kubesphere/nodejs-6-centos7:v3.2.0
kubesphere/nodejs-4-centos7:v3.2.0
kubesphere/python-36-centos7:v3.2.0
kubesphere/python-35-centos7:v3.2.0
kubesphere/python-34-centos7:v3.2.0
kubesphere/python-27-centos7:v3.2.0
quay.io/argoproj/argocd:v2.3.3
quay.io/argoproj/argocd-applicationset:v0.4.1
ghcr.io/dexidp/dex:v2.30.2
redis:6.2.6-alpine
##kubesphere-monitoring-images
jimmidyson/configmap-reload:v0.7.1
prom/prometheus:v2.39.1
kubesphere/prometheus-config-reloader:v0.55.1
kubesphere/prometheus-operator:v0.55.1
kubesphere/kube-rbac-proxy:v0.11.0
kubesphere/kube-state-metrics:v2.6.0
prom/node-exporter:v1.3.1
prom/alertmanager:v0.23.0
thanosio/thanos:v0.31.0
grafana/grafana:8.3.3
kubesphere/kube-rbac-proxy:v0.11.0
kubesphere/notification-manager-operator:v2.3.0
kubesphere/notification-manager:v2.3.0
kubesphere/notification-tenant-sidecar:v3.2.0
##kubesphere-logging-images
kubesphere/elasticsearch-curator:v5.7.6
kubesphere/opensearch-curator:v0.0.5
kubesphere/elasticsearch-oss:6.8.22
opensearchproject/opensearch:2.6.0
opensearchproject/opensearch-dashboards:2.6.0
kubesphere/fluentbit-operator:v0.14.0
docker:19.03
kubesphere/fluent-bit:v1.9.4
kubesphere/log-sidecar-injector:v1.2.0
elastic/filebeat:6.7.0
kubesphere/kube-events-operator:v0.6.0
kubesphere/kube-events-exporter:v0.6.0
kubesphere/kube-events-ruler:v0.6.0
kubesphere/kube-auditing-operator:v0.2.0
kubesphere/kube-auditing-webhook:v0.2.0
##istio-images
istio/pilot:1.14.6
istio/proxyv2:1.14.6
jaegertracing/jaeger-operator:1.29
jaegertracing/jaeger-agent:1.29
jaegertracing/jaeger-collector:1.29
jaegertracing/jaeger-query:1.29
jaegertracing/jaeger-es-index-cleaner:1.29
kubesphere/kiali-operator:v1.50.1
kubesphere/kiali:v1.50
##example-images
busybox:1.31.1
nginx:1.14-alpine
joosthofman/wget:1.0
nginxdemos/hello:plain-text
wordpress:4.8-apache
mirrorgooglecontainers/hpa-example:latest
fluent/fluentd:v1.4.2-2.0
perl:latest
kubesphere/examples-bookinfo-productpage-v1:1.16.2
kubesphere/examples-bookinfo-reviews-v1:1.16.2
kubesphere/examples-bookinfo-reviews-v2:1.16.2
kubesphere/examples-bookinfo-details-v1:1.16.2
kubesphere/examples-bookinfo-ratings-v1:1.16.3
##weave-scope-images
weaveworks/scope:1.13.0
Feedback
Was this page Helpful?
Receive the latest news, articles and updates from KubeSphere
Thanks for the feedback. If you have a specific question about how to use KubeSphere, ask it on Slack. Open an issue in the GitHub repo if you want to report a problem or suggest an improvement.
 Previous

What’s on this Page