Use Pipeline Templates
KubeSphere offers a graphical editing panel where the stages and steps of a Jenkins pipeline can be defined through interactive operations. KubeSphere 3.3 provides built-in pipeline templates, such as Node.js, Maven, and Golang, to help users quickly create pipelines. Additionally, KubeSphere 3.3 also supports customization of pipeline templates to meet diversified needs of enterprises.
This section describes how to use pipeline templates on KubeSphere.
Prerequisites
You have a workspace, a DevOps project and a user (
project-regular) invited to the DevOps project with theoperatorrole. If they are not ready yet, please refer to Create Workspaces, Projects, Users and Roles.You need to enable the KubeSphere DevOps system.
You need to create a pipeline.
Use a Built-in Pipeline Template
The following takes Node.js as an example to show how to use a built-in pipeline template. Steps for using Maven and Golang pipeline templates are alike.
Log in to the KubeSphere console as
project-regular. In the navigation pane on the left, click DevOps Projects.On the DevOps Projects page, click the DevOps project you created.
In the navigation pane on the left, click Pipelines.
On the pipeline list on the right, click the created pipeline to go to its details page.
On the right pane, click Edit Pipeline.
On the Create Pipeline dialog box, click Node.js, and then click Next.
On the Parameter Settings tab, set the parameters based on the actual situation, and then click Create.
Parameter Meaning GitURL URL of the project repository to clone GitRevision Revision to check out from NodeDockerImage Docker image version of Node.js InstallScript Shell script for installing dependencies TestScript Shell script for testing BuildScript Shell script for building a project ArtifactsPath Path where the artifacts reside On the left pane, the system has preset several steps, and you can add more steps and parallel stages.
Click a specific step. On the right pane, you can perform the following operations:
- Change the stage name.
- Delete a stage.
- Set the agent type.
- Add conditions.
- Edit or delete a task.
- Add steps or nested steps.
Note
You can also customize the stages and steps in the pipeline templates based on your needs. For more information about how to use the graphical editing panel, refer to Create a Pipeline Using Graphical Editing Panels.On the Agent area on the left, select an agent type, and click OK. The default value is kubernetes.
The following table explains the agent types.
Agent Type Description any Uses the default base pod template to create a Jenkins agent to run pipelines. node Uses a pod template with the specific label to create a Jenkins agent to run pipelines. Available labels include base, java, nodejs, maven, go, and more. kubernetes Use a yaml file to customize a standard Kubernetes pod template to create a jenkins agent to run pipelines. On the pipeline details page, you can view the created pipeline template. Click Run to run the pipeline.
Legacy Built-in Pipeline Templates
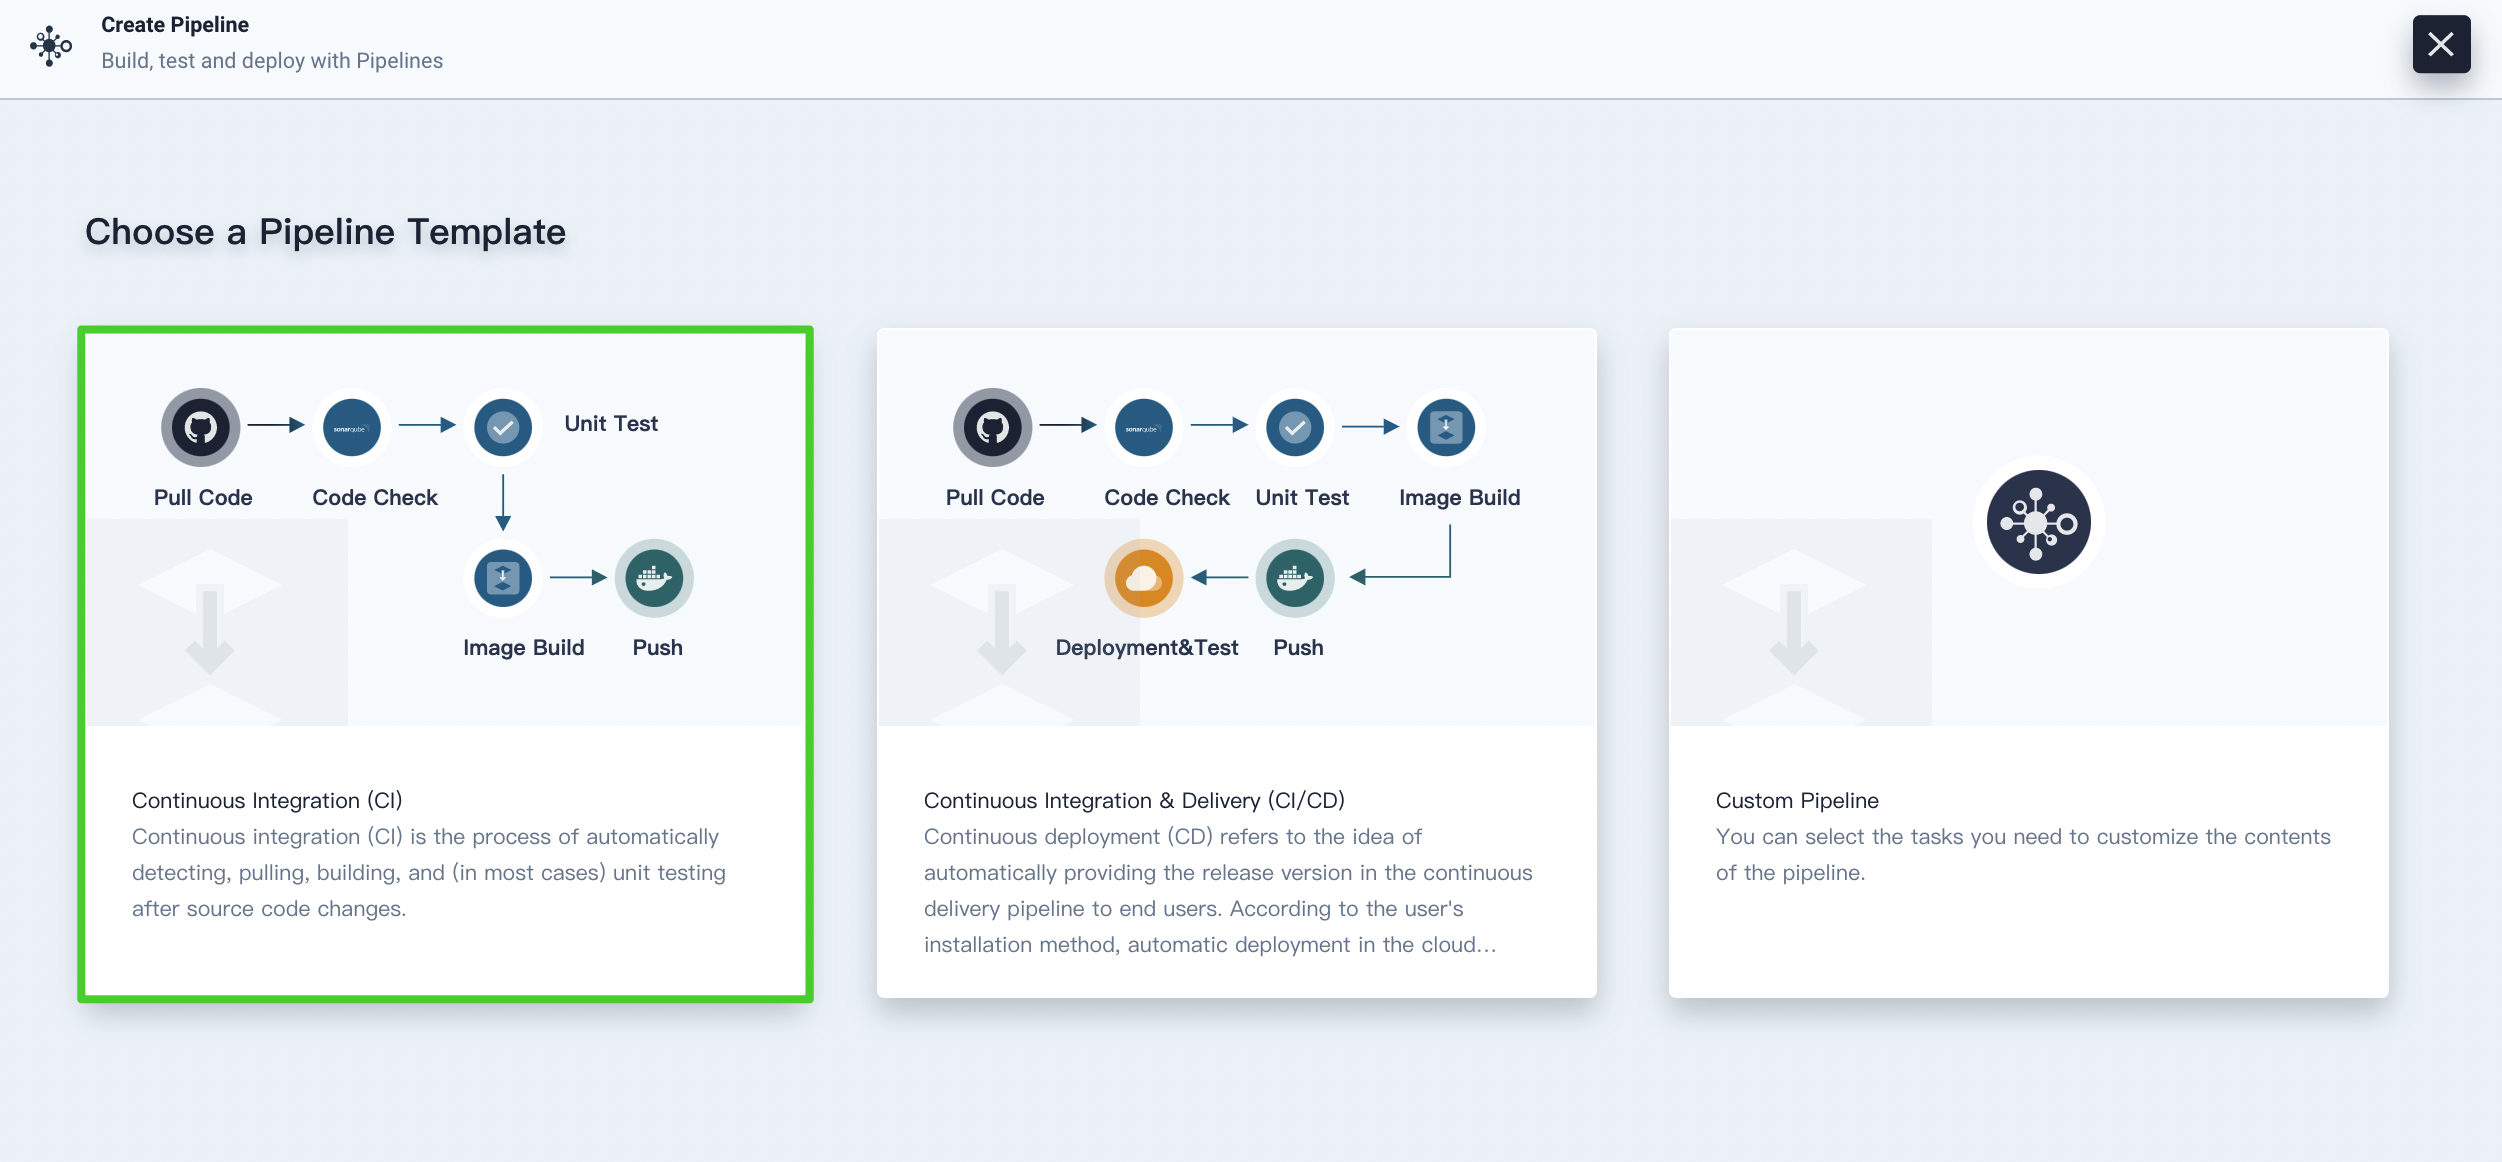
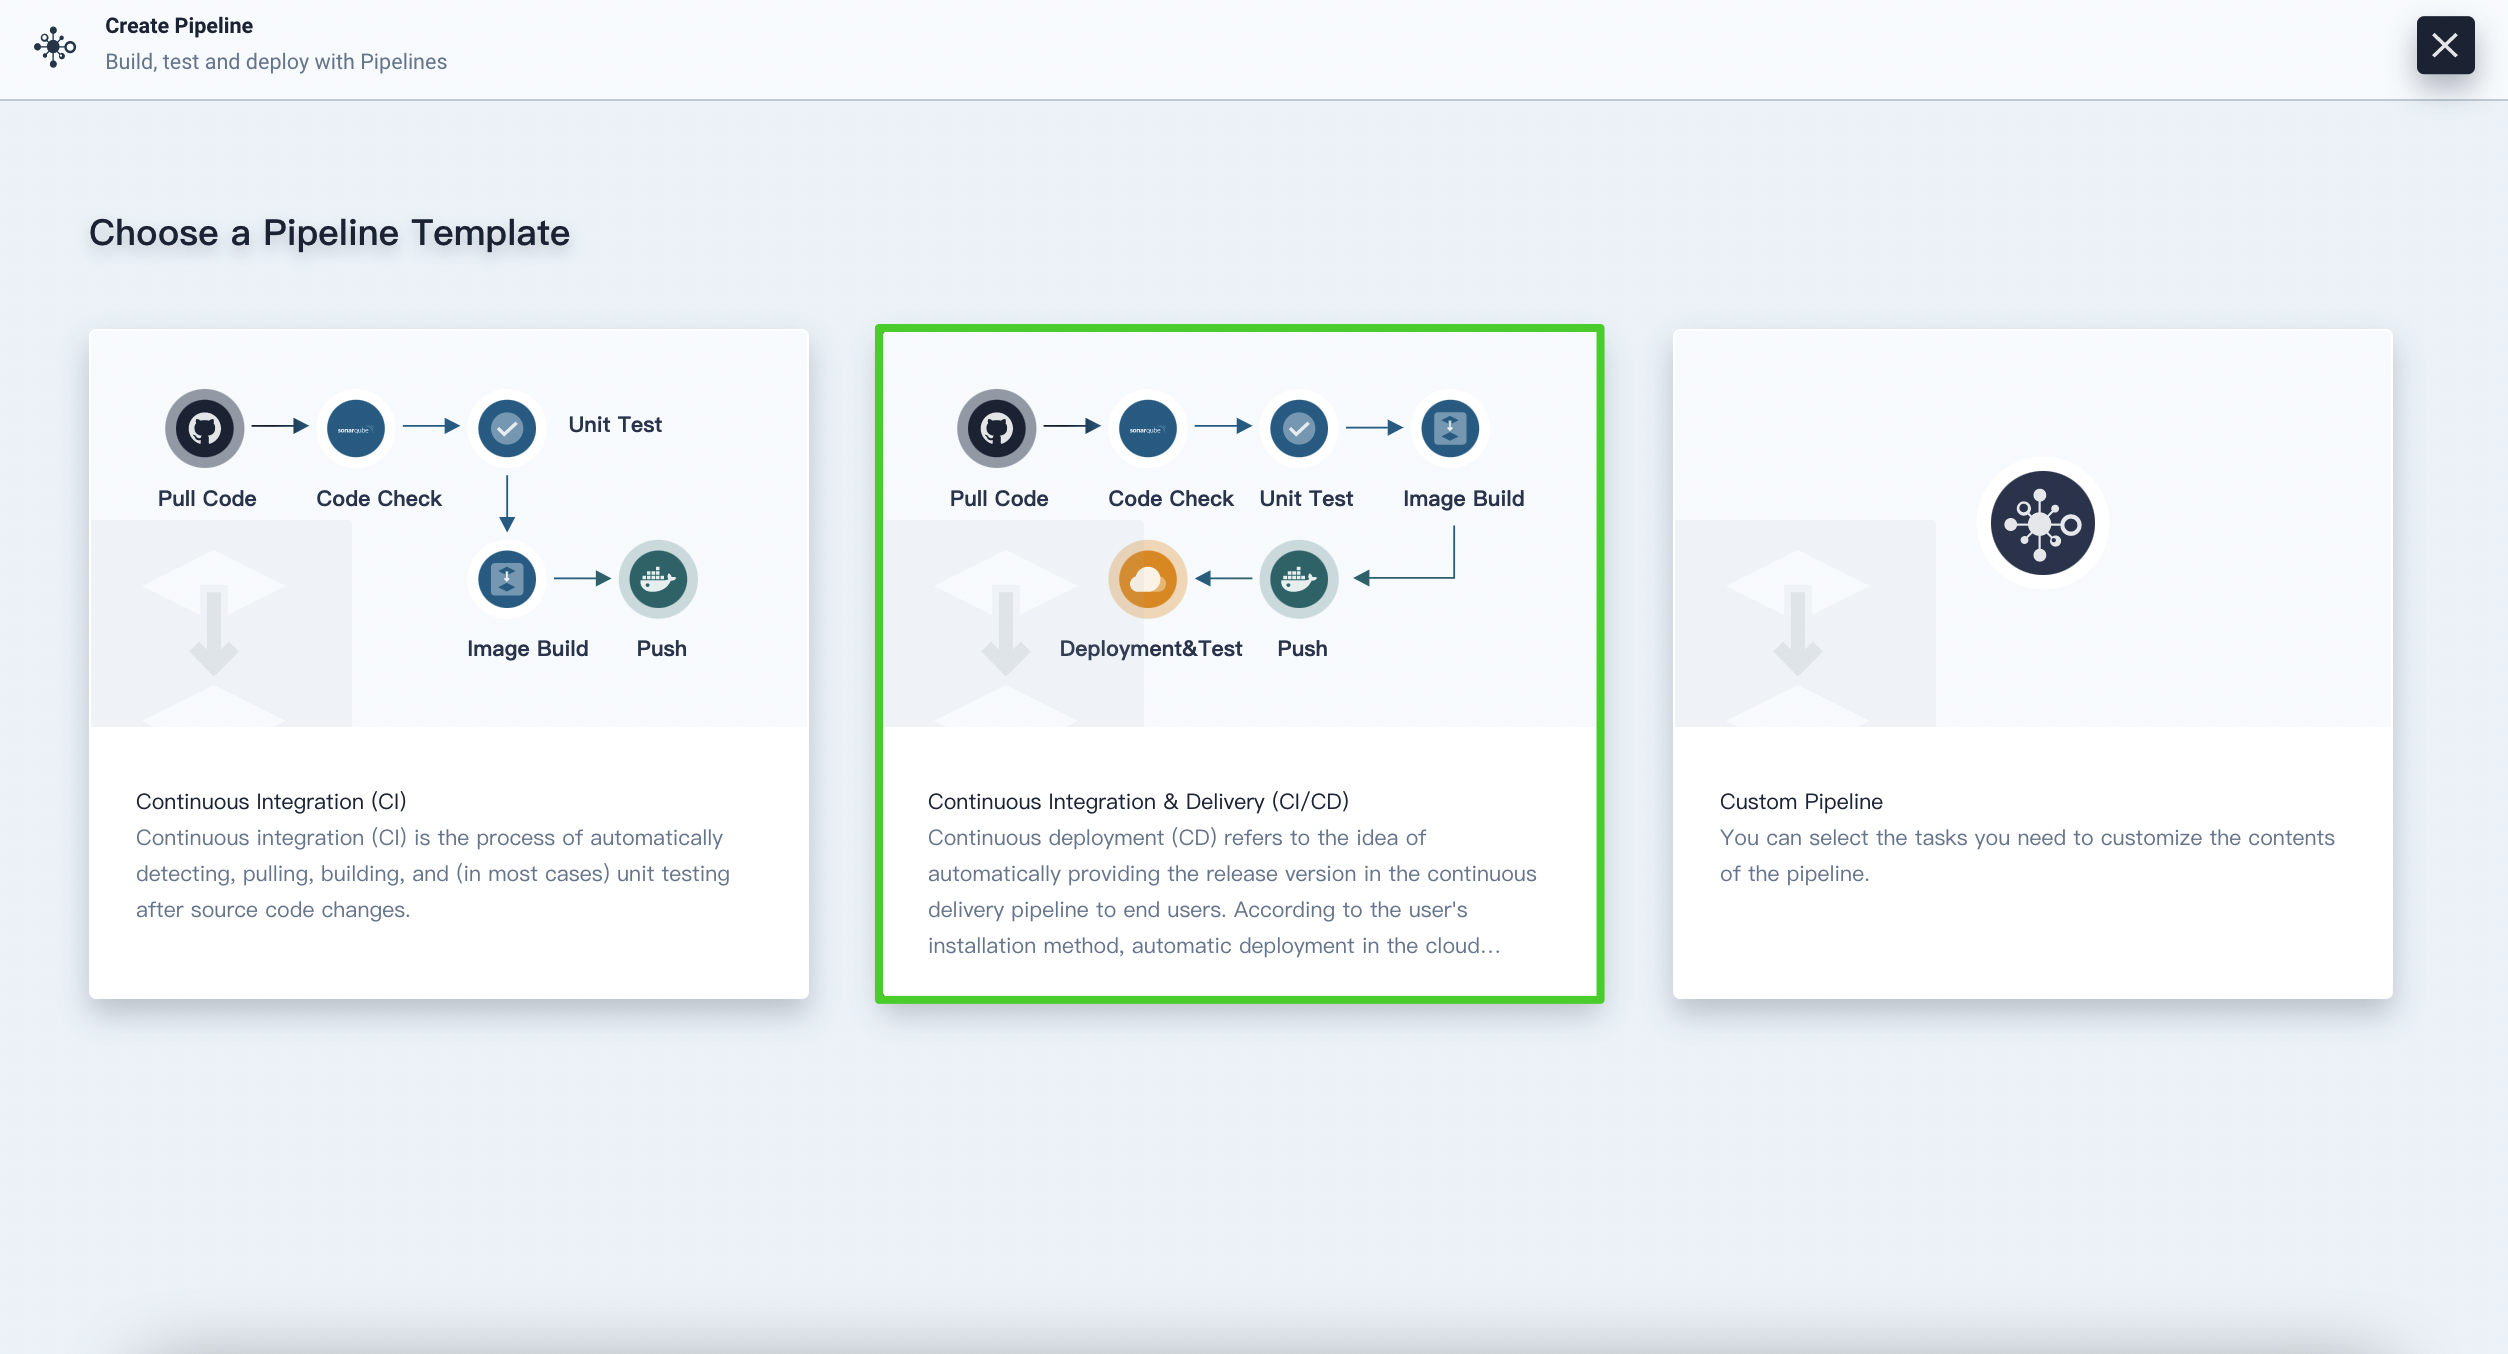
In earlier versions, KubeSphere also provides the CI and CI & CD pipeline templates. However, as the two templates are hardly customizable, you are advised to use the Node.js, Maven, or Golang pipeline template, or directly customize a template based on your needs. The following briefly introduces the CI and CI & CD pipeline templates.
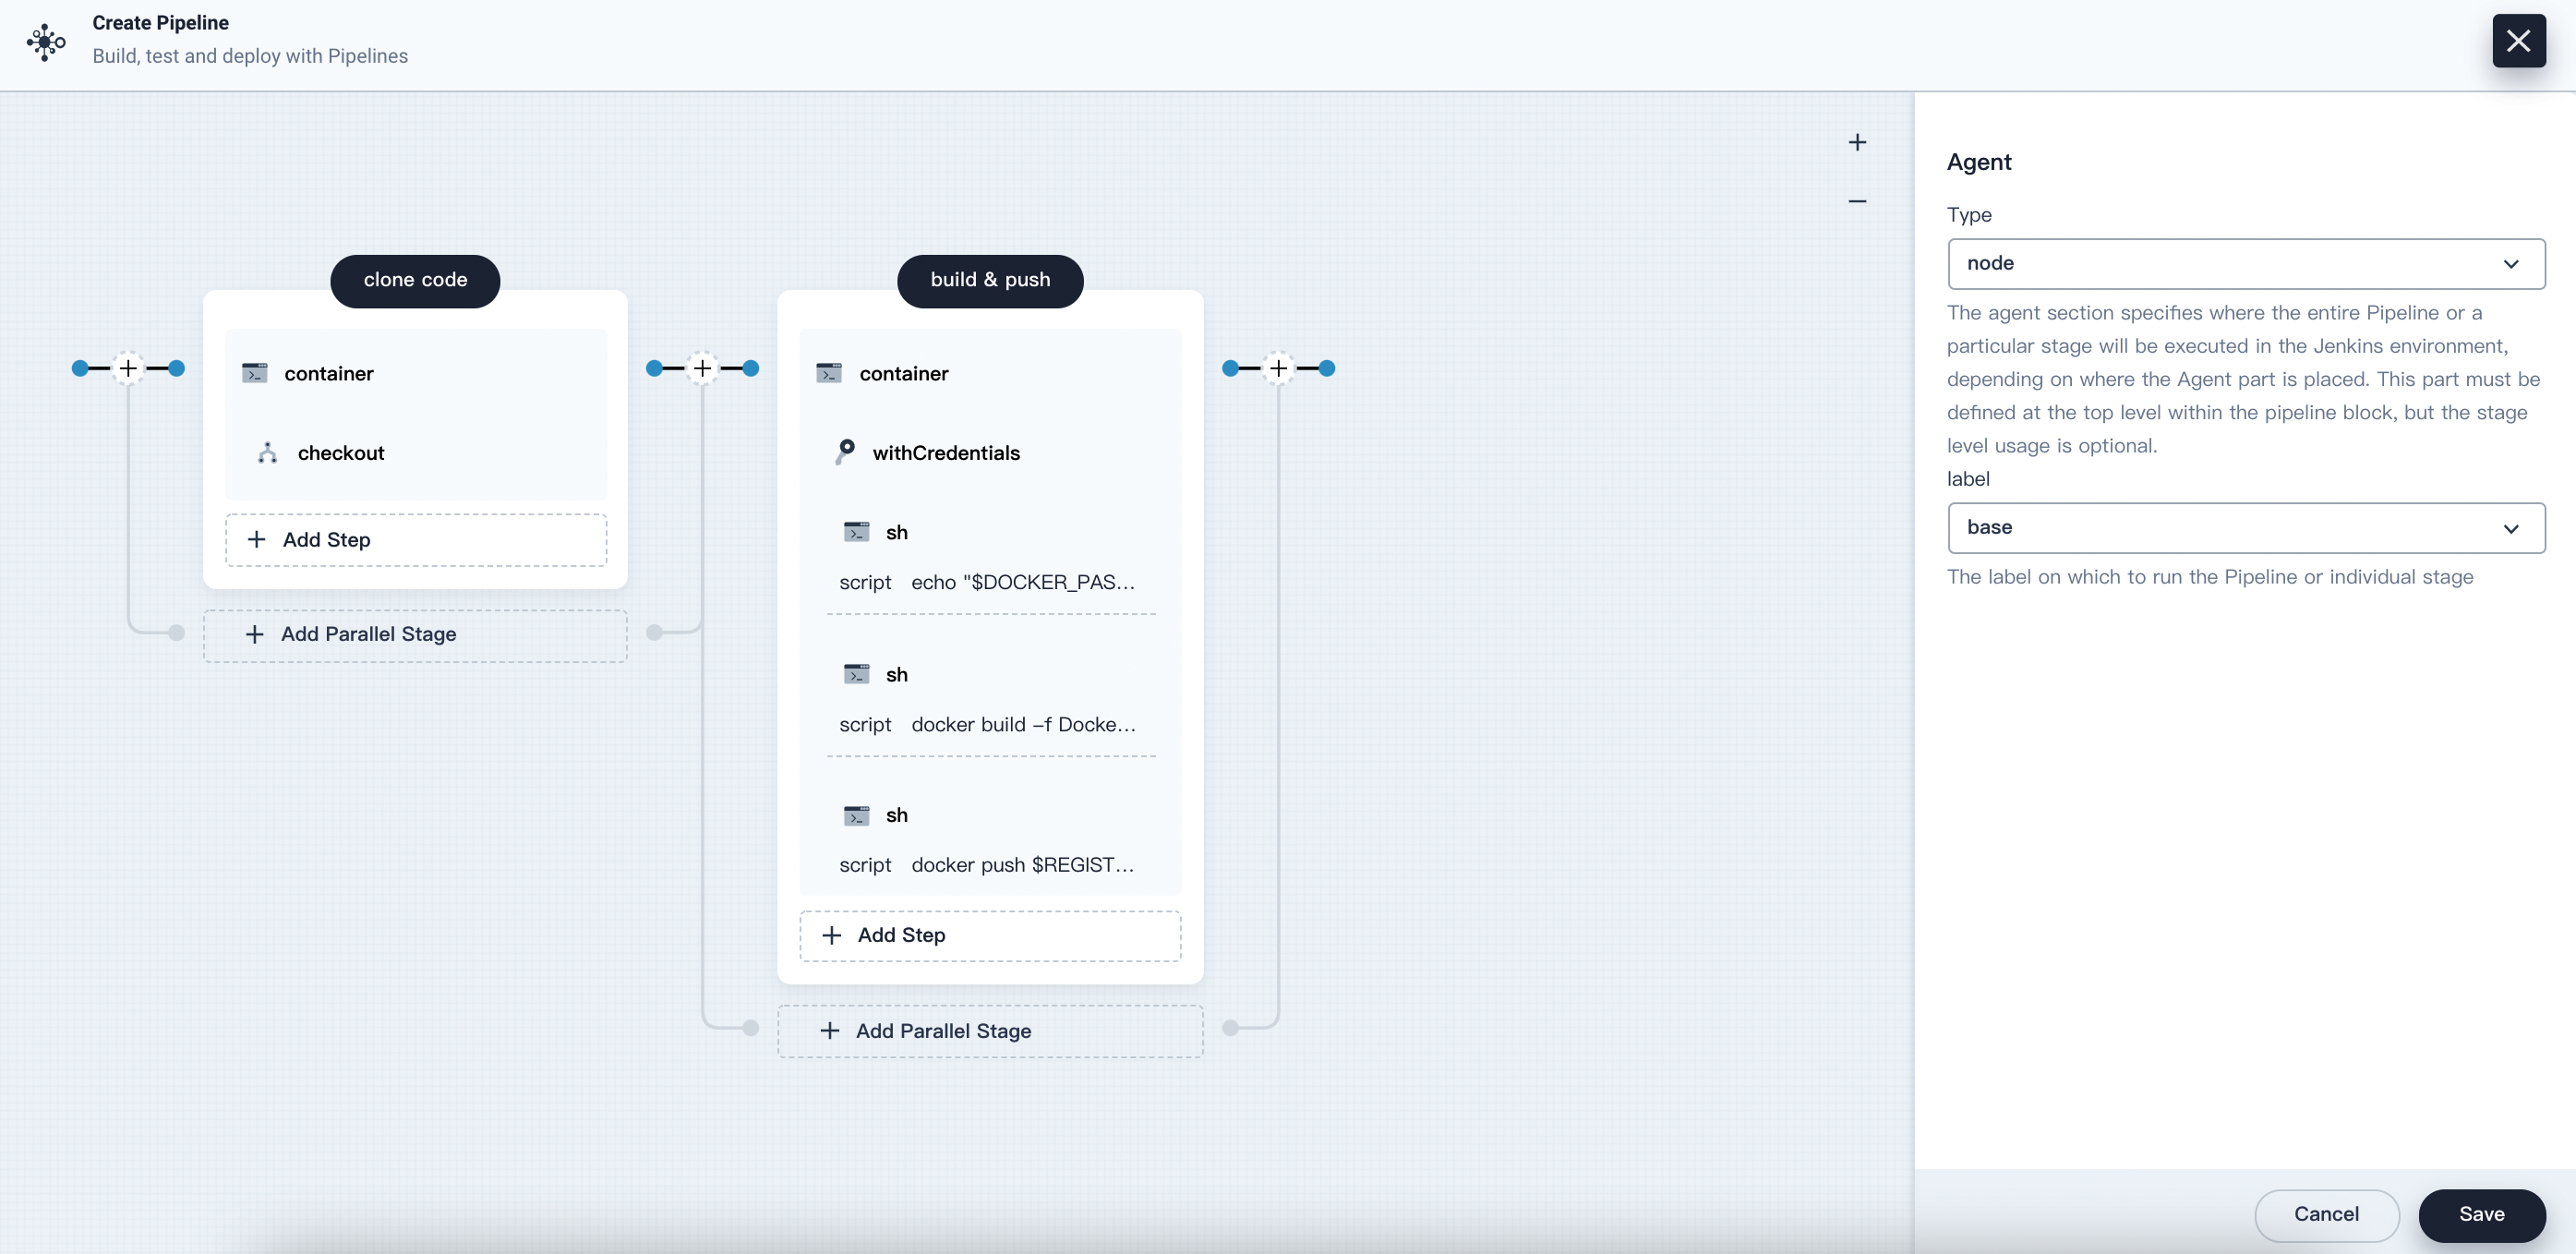
CI pipeline template


The CI pipeline template contains two stages. The clone code stage checks out code and the build & push stage builds an image and pushes it to Docker Hub. You need to create credentials for your code repository and your Docker Hub registry in advance, and then set the URL of your repository and these credentials in corresponding steps. After you finish editing, the pipeline is ready to run.
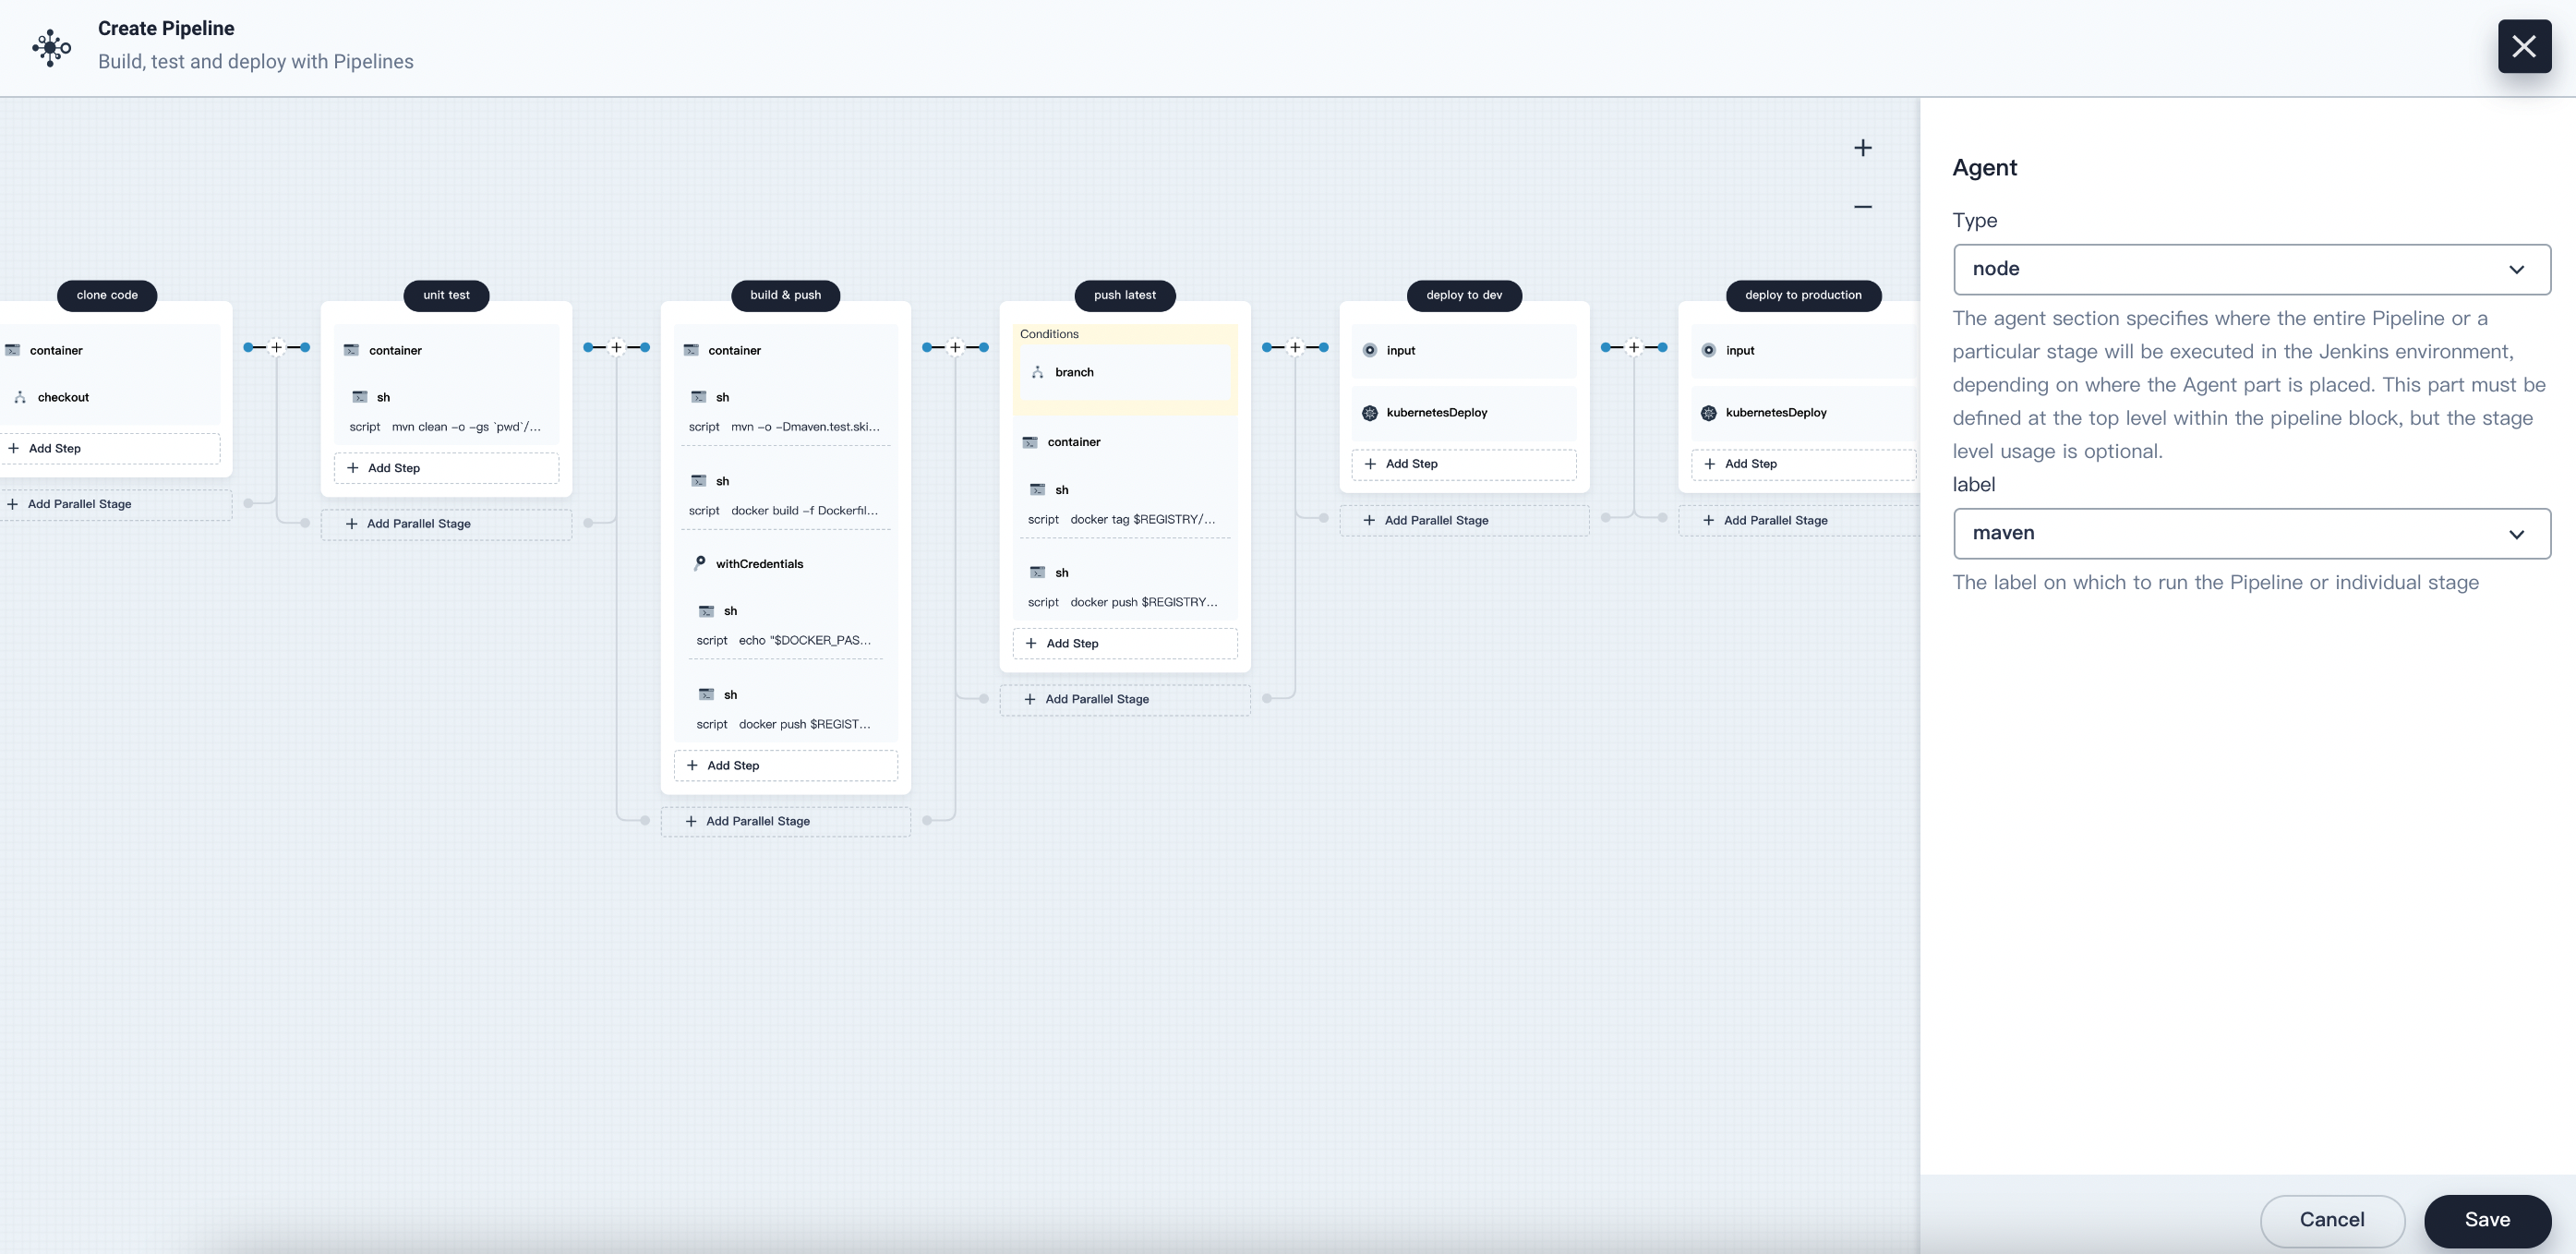
CI & CD pipeline template


The CI & CD pipeline template contains six stages. For more information about each stage, refer to Create a Pipeline Using a Jenkinsfile, where you can find similar stages and the descriptions. You need to create credentials for your code repository, your Docker Hub registry, and the kubeconfig of your cluster in advance, and then set the URL of your repository and these credentials in corresponding steps. After you finish editing, the pipeline is ready to run.
Feedback
Was this page Helpful?
Receive the latest news, articles and updates from KubeSphere
Thanks for the feedback. If you have a specific question about how to use KubeSphere, ask it on Slack. Open an issue in the GitHub repo if you want to report a problem or suggest an improvement.


 Previous
