


KubeSphere 介绍
KubeSphere 是在 Kubernetes 之上构建的面向云原生应用的系统,完全开源,支持多云与多集群管理,提供全栈的 IT 自动化运维能力,简化企业的 DevOps 工作流。它的架构可以非常方便地使第三方应用与云原生生态组件进行即插即用 (plug-and-play) 的集成。
作为全栈的多租户容器平台,KubeSphere 提供了运维友好的向导式操作界面,帮助企业快速构建一个强大和功能丰富的容器云平台。KubeSphere 为用户提供构建企业级 Kubernetes 环境所需的多项功能,例如多云与多集群管理、Kubernetes 资源管理、DevOps、应用生命周期管理、微服务治理(服务网格)、日志查询与收集、服务与网络、多租户管理、监控告警、事件与审计查询、存储管理、访问权限控制、GPU 支持、网络策略、镜像仓库管理以及安全管理等。
Apache APISIX 介绍
Apache APISIX 是一款开源的高性能、动态云原生网关,由深圳支流科技有限公司于 2019 年捐赠给 Apache 基金会,当前已经成为 Apache 基金会的顶级开源项目,也是 GitHub 上最活跃的网关项目。Apache APISIX 当前已经覆盖了 API 网关,LB,Kubernetes Ingress,Service Mesh 等多种场景。
前置条件
将现有 Kubernetes 集群已纳入 KubeSphere 管理。
部署 Apache APISIX 和 Apache APISIX Ingress Controller
我们可以参考 KubeSphere 的文档启用 KubeSphere 的 AppStore,或者使用使用 Apache APISIX 的 Helm 仓库来进行部署。这里,我们直接使用 Apache APISIX 的 Helm 仓库进行部署。
执行以下命令即可添加 Apache APISIX 的 Helm repo,并完成部署。
➜  ~ helm repo add apisix https://charts.apiseven.com
"apisix" has been added to your repositories
➜  ~ helm repo add bitnami https://charts.bitnami.com/bitnami
"bitnami" has been added to your repositories
➜  ~ helm repo update
➜  ~ kubectl create ns apisix
namespace/apisix created
➜  ~ helm install apisix apisix/apisix --set gateway.type=NodePort --set ingress-controller.enabled=true --namespace apisix
W0827 18:19:58.504653  294386 warnings.go:70] apiextensions.k8s.io/v1beta1 CustomResourceDefinition is deprecated in v1.16+, unavailable in v1.22+; use apiextensions.k8s.io/v1 CustomResourceDefinition
NAME: apisix
LAST DEPLOYED: Fri Aug 27 18:20:00 2021
NAMESPACE: apisix
STATUS: deployed
REVISION: 1
TEST SUITE: None
NOTES:
1. Get the application URL by running these commands:
  export NODE_PORT=$(kubectl get --namespace apisix -o jsonpath="{.spec.ports[0].nodePort}" services apisix-gateway)
  export NODE_IP=$(kubectl get nodes --namespace apisix -o jsonpath="{.items[0].status.addresses[0].address}")
  echo http://$NODE_IP:$NODE_PORT
验证是否已经成功部署且运行:
➜  ~ kubectl -n apisix get pods
NAME                                         READY   STATUS    RESTARTS   AGE
apisix-77d7545d4d-cvdhs                      1/1     Running   0          4m7s
apisix-etcd-0                                1/1     Running   0          4m7s
apisix-etcd-1                                1/1     Running   0          4m7s
apisix-etcd-2                                1/1     Running   0          4m7s
apisix-ingress-controller-74c6b5fbdd-94ngk   1/1     Running   0          4m7s
可以看到相关的 Pod 均已正常运行。
部署示例项目
我们使用 kennethreitz/httpbin 作为示例项目进行演示。这里也直接在 KubeSphere 中完成部署。
选择服务 -- 无状态服务,创建即可。

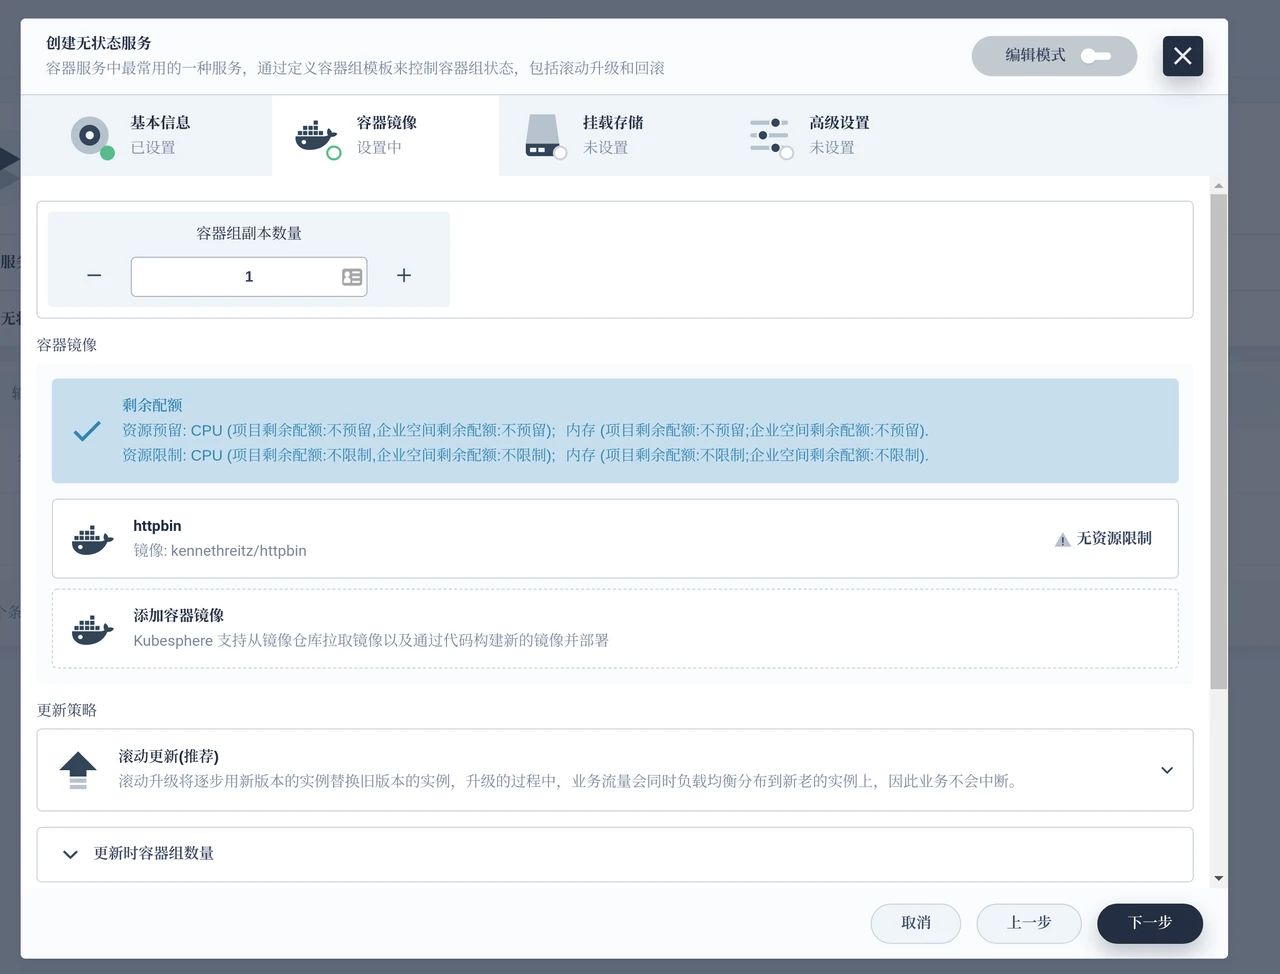
在 KubeSphere 的服务和负载界面即可看到部署成功,也可以直接在终端下查看是否已经部署成功。
➜  ~ kubectl get pods,svc -l app=httpbin
NAME                             READY   STATUS    RESTARTS   AGE
pod/httpbin-v1-7d6dc7d5f-5lcmg   1/1     Running   0          48s

NAME              TYPE        CLUSTER-IP   EXTERNAL-IP   PORT(S)   AGE
service/httpbin   ClusterIP   10.96.0.5    <none>        80/TCP    48s
使用 Apache APISIX 作为网关代理
我们先演示如何使用 Apache APISIX 作为网关代理 Kubernetes 集群中的服务。
root@apisix:~$ kubectl -n apisix exec -it `kubectl -n apisix get pods -l app.kubernetes.io/name=apisix -o name` -- bash
bash-5.1# curl httpbin.default/get
{
  "args": {},
  "headers": {
    "Accept": "*/*",
    "Host": "httpbin.default",
    "User-Agent": "curl/7.77.0"
  },
  "origin": "10.244.2.9",
  "url": "http://httpbin.default/get"
}
可以看到在 Apache APISIX 的 Pod 内可正常访问示例项目。接下来使用 Apache APISIX 对该示例项目进行代理。
这里我们使用 curl 调用 Apache APISIX 的 admin 接口,创建一条路由。将所有 host 头为 httpbin.org 的请求转发给 httpbin.default:80 这个实际的应用服务上。
bash-5.1# curl "http://127.0.0.1:9180/apisix/admin/routes/1" -H "X-API-KEY: edd1c9f034335f136f87ad84b625c8f1" -X PUT -d '
{
  "uri": "/get",
  "host": "httpbin.org",
  "upstream": {
    "type": "roundrobin",
    "nodes": {
      "httpbin.default:80": 1
    }
  }
}'
{"node":{"key":"\/apisix\/routes\/1","value":{"host":"httpbin.org","update_time":1630060883,"uri":"\/*","create_time":1630060883,"priority":0,"upstream":{"type":"roundrobin","pass_host":"pass","nodes":{"httpbin.default:80":1},"hash_on":"vars","scheme":"http"},"id":"1","status":1}},"action":"set"}
你会得到类似上面的输出,接下来验证是否代理成功:
bash-5.1# curl http://127.0.0.1:9080/get -H "HOST: httpbin.org"
{
  "args": {},
  "headers": {
    "Accept": "*/*",
    "Host": "httpbin.org",
    "User-Agent": "curl/7.77.0",
    "X-Forwarded-Host": "httpbin.org"
  },
  "origin": "127.0.0.1",
  "url": "http://httpbin.org/get"
}
得到上面的输出,说明已经通过 Apache APISIX 代理了示例项目的流量。接下来我们试试在集群外通过 Apache APISIX 访问示例项目。
root@apisix:~$ kubectl  -n apisix get svc -l app.kubernetes.io/name=apisix
NAME             TYPE        CLUSTER-IP     EXTERNAL-IP   PORT(S)        AGE
apisix-admin     ClusterIP   10.96.33.97    <none>        9180/TCP       22m
apisix-gateway   NodePort    10.96.126.83   <none>        80:31441/TCP   22m
在使用 Helm chart 部署的时候,默认会将 Apache APISIX 的端口通过 NodePort 的形式暴露出去。我们使用 Node IP + NodePort 的端口进行访问测试。
root@apisix:~$ curl http://172.18.0.5:31441/get -H "HOST: httpbin.org"
{
  "args": {},
  "headers": {
    "Accept": "*/*",
    "Host": "httpbin.org",
    "User-Agent": "curl/7.76.1",
    "X-Forwarded-Host": "httpbin.org"
  },
  "origin": "10.244.2.1",
  "url": "http://httpbin.org/get"
}
可以看到,在集群外已经可以通过 Apache APISIX 作为网关代理 Kubernetes 集群内的服务了。
使用 APISIX Ingress Controller 代理服务
我们可以直接在 KubeSphere 中添加应用路由(Ingress) ,Apache APISIX Ingress Controller 会自动将路由规则同步至 Apache APISIX 中,完成服务的代理。

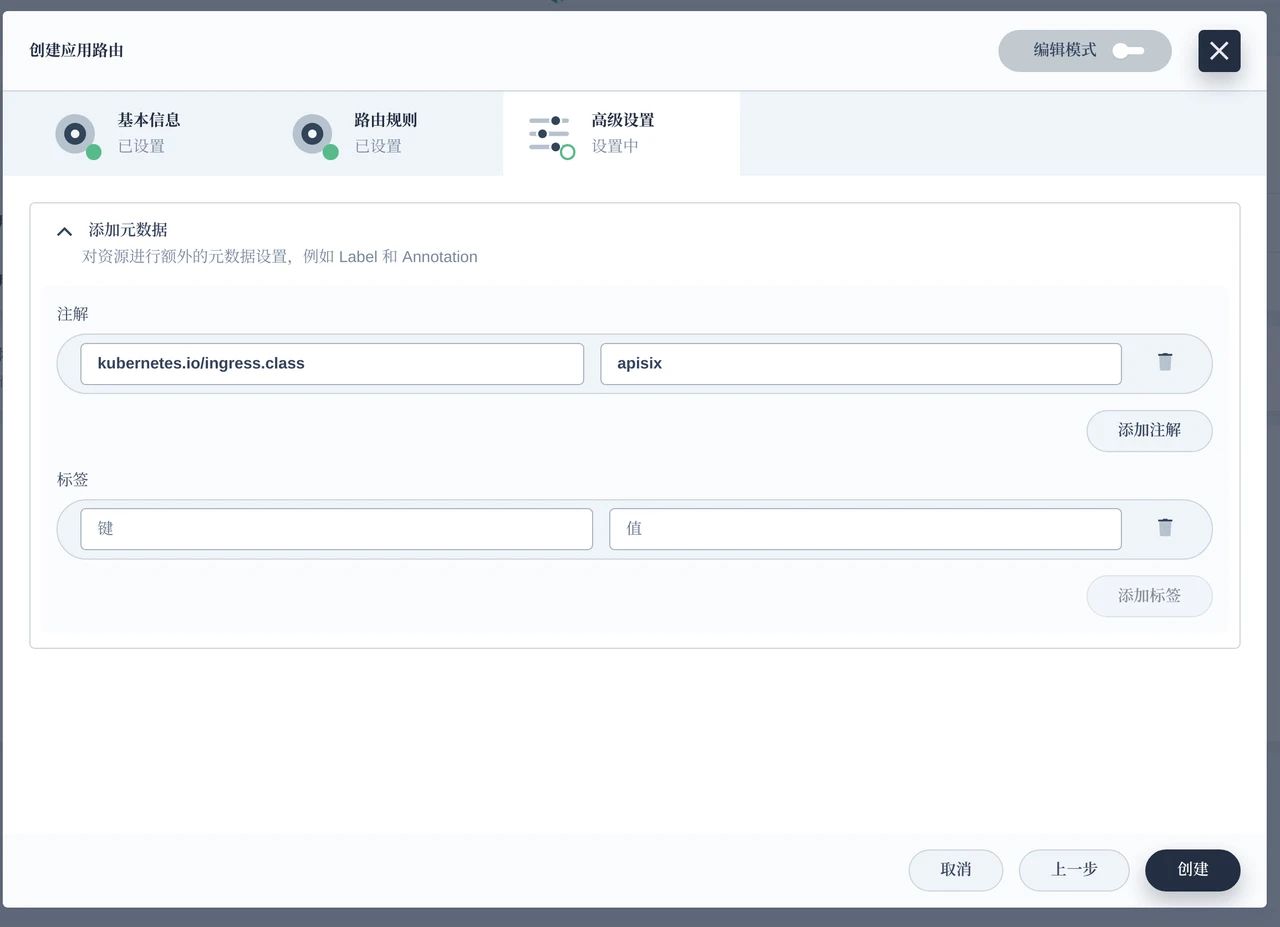
注意我们添加了 kubernetes.io/ingress.class: apisix 的 annotation 配置,用于支持集群内多 ingress-controller 的场景。
保存后,可看到如下界面:

在终端下测试是否代理成功:
root@apisix:~$ curl http://172.18.0.5:31441/get -H "HOST: http-ing.org"
{
  "args": {},
  "headers": {
    "Accept": "*/*",
    "Host": "http-ing.org",
    "User-Agent": "curl/7.76.1",
    "X-Forwarded-Host": "http-ing.org"
  },
  "origin": "10.244.2.1",
  "url": "http://http-ing.org/get"
}
可以看到也正常代理了。
除了以上方式外,Apache APISIX Ingress Controller 通过 CRD 的方式对 Kubernetes 进行了扩展,你也可以通过发布 ApisixRoute 等这种自定义资源来完成 Kubernetes 中服务的对外暴露。
总结
你可以在 KubeSphere 中使用 Apache APISIX 的官方 Helm 仓库直接部署 Apache APISIX 和 APISIX Ingress Controller 。并且 Apache APISIX 可通过作为网关,或者 APISIX Ingress Controller 的数据面来承载业务流量。
未来展望
Apache APISIX 已经与 KubeSphere 社区达成合作,你可以直接在 KubeSphere 自带的应用仓库中找到 Apache APISIX ,不需要手动添加 Helm 仓库。
