


在 Google GKE 上部署 KubeSphere

本指南将演示如何在 Google Kubernetes Engine 上部署 KubeSphere。
准备一个 GKE 集群
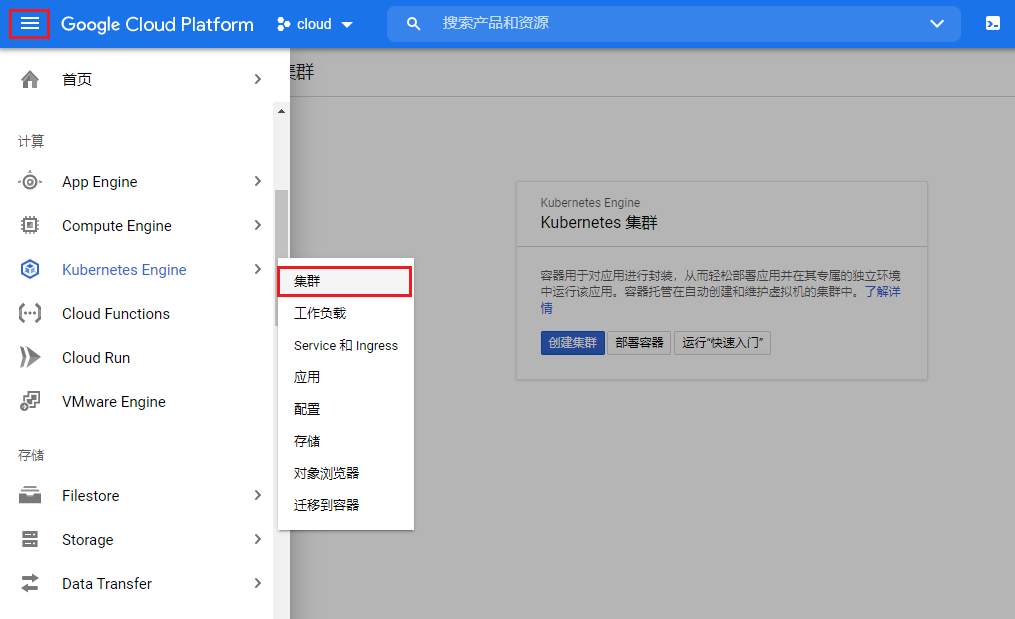
在 GKE 上创建一个标准的 Kubernetes 集群是安装 KubeSphere 的前提条件,转到导航菜单然后参考下图创建集群。
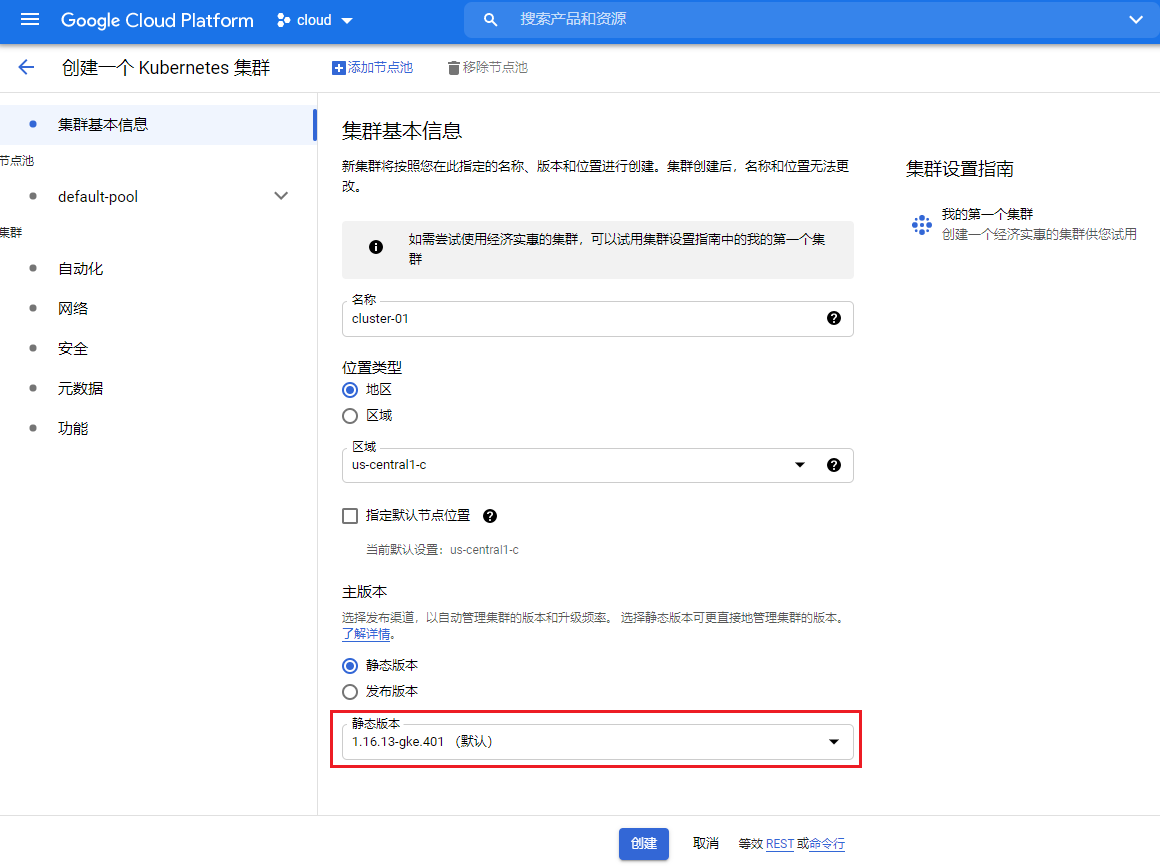
在集群基本信息中,选择一个主版本,指定 Kubernetes 静态版本。
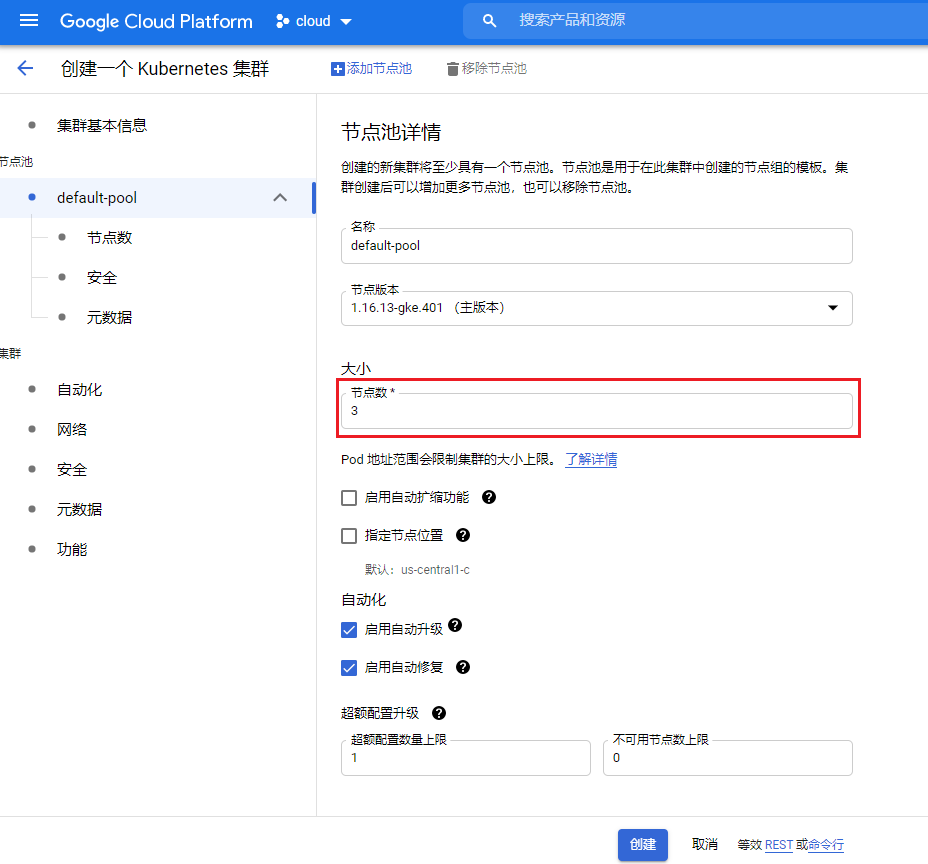
在 default-pool 下的节点池详情中,在此集群中定义 3 个节点。
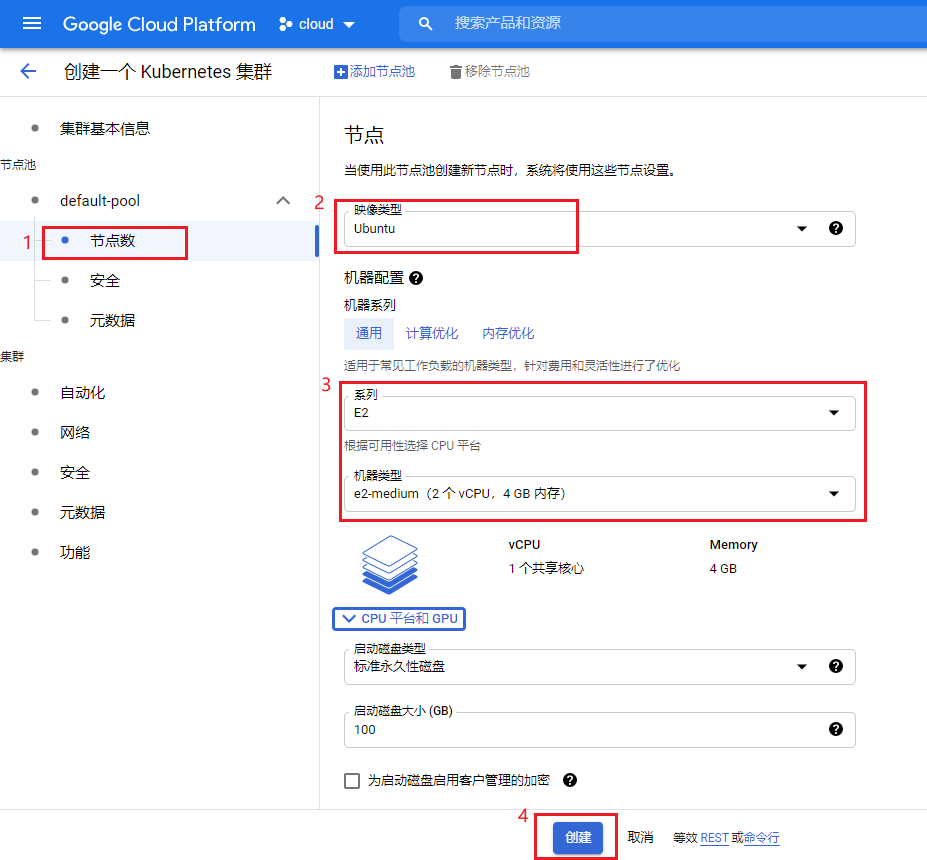
转到节点数,选择映像类型,然后设置如下机器配置。完成后,点击创建。
备注
- 如需在 Kubernetes 上安装 KubeSphere 3.4,您的 Kubernetes 版本必须为:v1.20.x、v1.21.x、* v1.22.x、* v1.23.x、* v1.24.x、* v1.25.x 和 * v1.26.x。带星号的版本可能出现边缘节点部分功能不可用的情况。因此,如需使用边缘节点,推荐安装 v1.21.x 版本。
- 此示例中包括3个节点,可以根据自己的需求添加更多节点,尤其是在生产环境中。
- 最小安装的机器类型为 e2-medium(2 个 vCPU,4GB 内存)。如果要启用可插拔组件或将集群用于生产,请选择具有更高配置的机器类型。
- 对于其他设置,可以根据自己的需要进行更改,也可以使用默认值。
当 GKE 集群准备就绪时,可以使用 Cloud Shell 连接到集群。
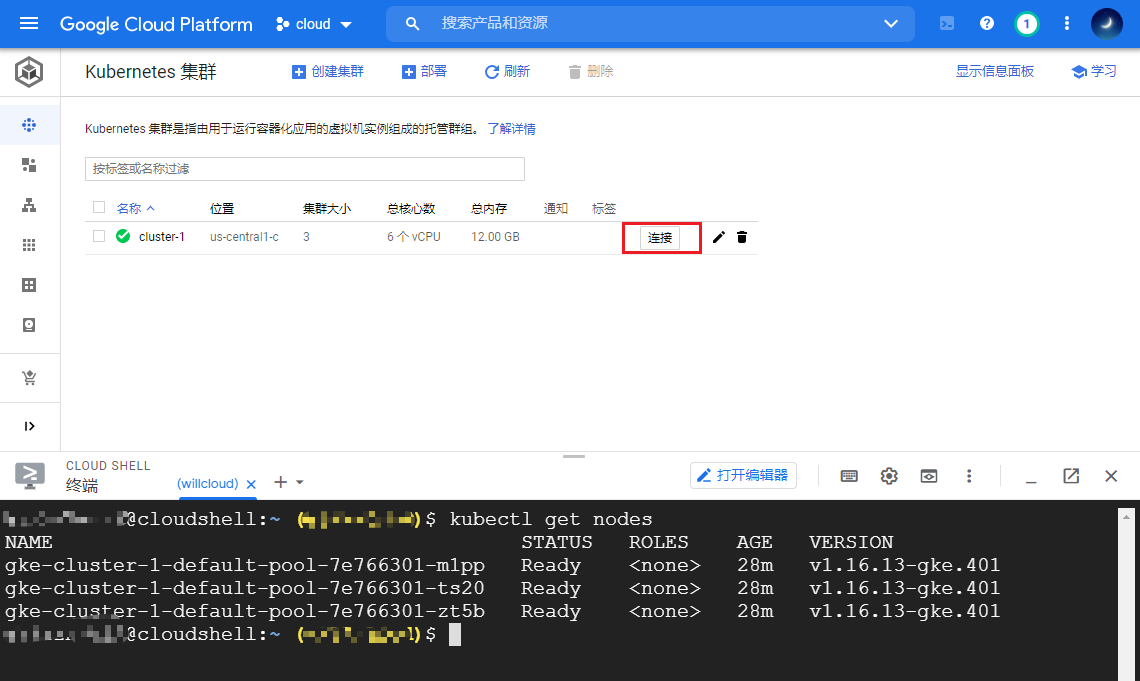
在 GKE上安装 KubeSphere
使用 kubectl 安装 KubeSphere,以下命令仅用于默认的最小安装。
kubectl apply -f https://github.com/kubesphere/ks-installer/releases/download/v3.4.1/kubesphere-installer.yaml

kubectl apply -f https://github.com/kubesphere/ks-installer/releases/download/v3.4.1/cluster-configuration.yaml
检查安装日志:
kubectl logs -n kubesphere-system $(kubectl get pod -n kubesphere-system -l 'app in (ks-install, ks-installer)' -o jsonpath='{.items[0].metadata.name}') -f安装完成后,会看到以下消息:
#####################################################
###              Welcome to KubeSphere!           ###
#####################################################
Console: http://10.128.0.44:30880
Account: admin
Password: P@88w0rd
NOTES:
  1. After logging into the console, please check the
    monitoring status of service components in
    the "Cluster Management". If any service is not
    ready, please wait patiently until all components
    are ready.
  2. Please modify the default password after login.
#####################################################
https://kubesphere.io             2020-xx-xx xx:xx:xx
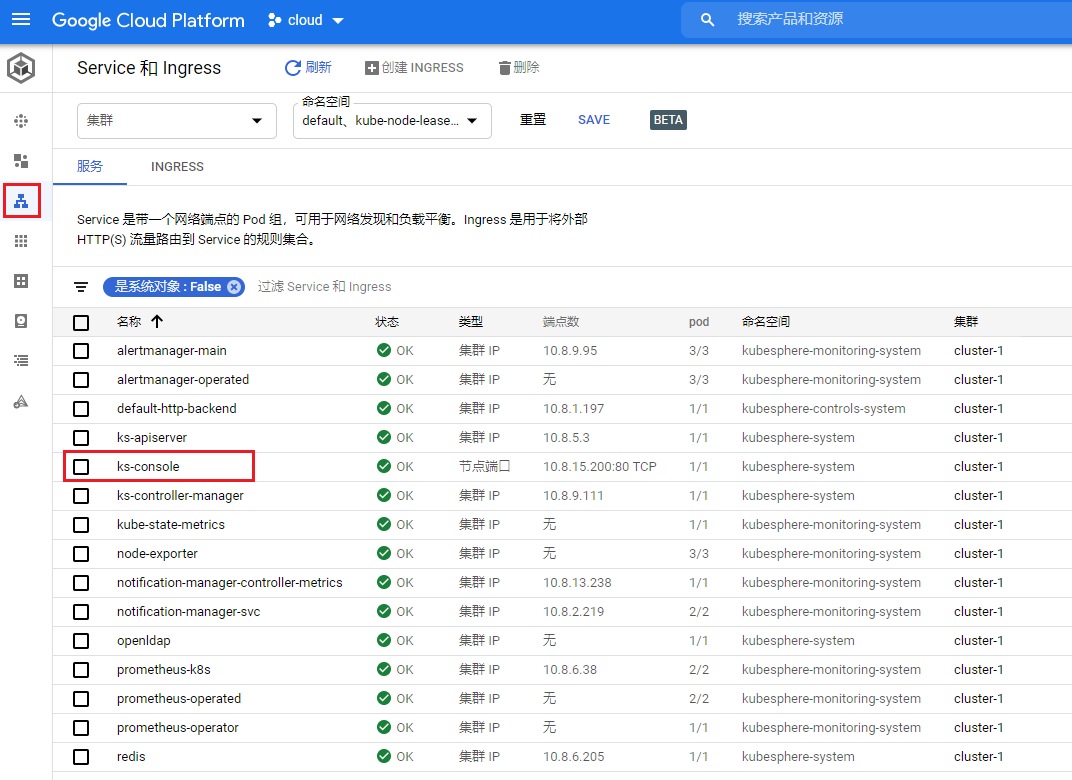
访问 KubeSphere 控制台
现在已经安装了 KubeSphere,您可以按照以下步骤访问 KubeSphere 的 Web 控制台。
在 Services 和 Ingress 选项中, 选择 ks-console 服务.
在服务详细信息中,单击修改,然后将服务类型从
NodePort更改为LoadBalancer,完成后保存文件。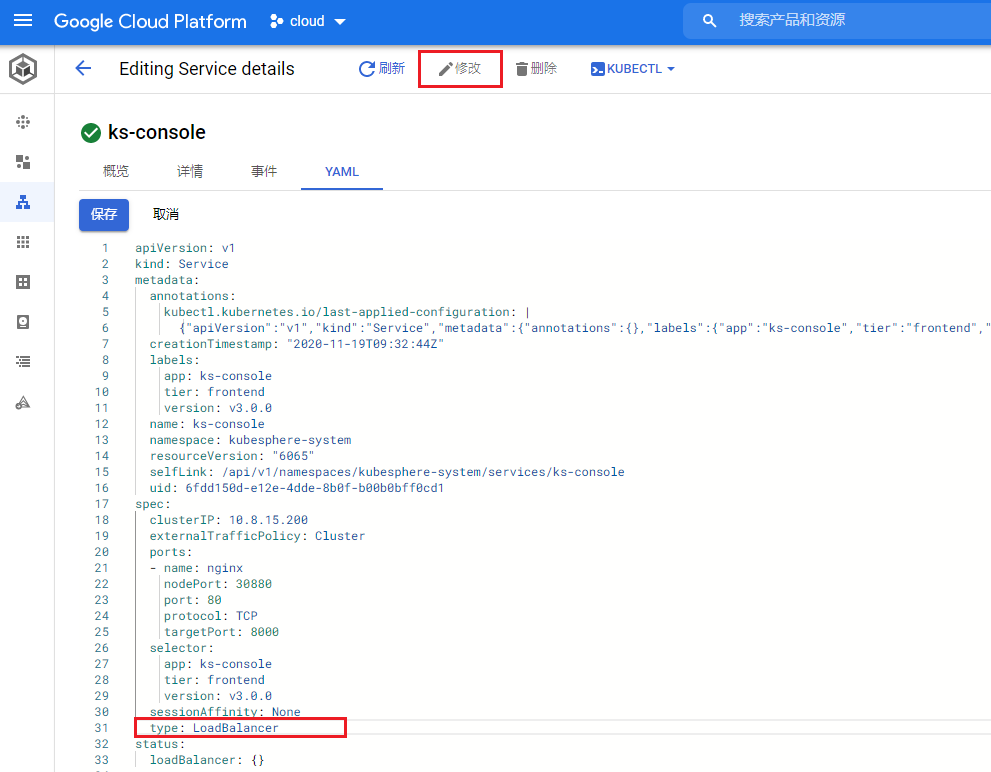
使用 GKE 生成的端点访问 KubeSphere 的 Web 控制台。
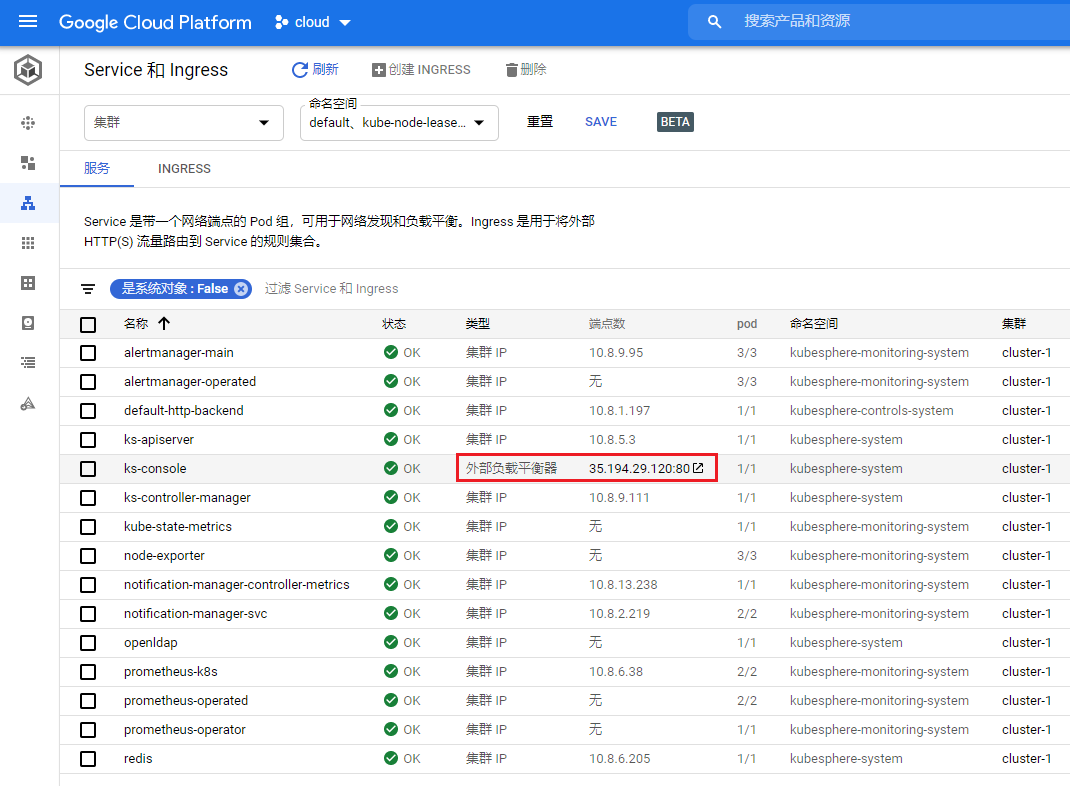
提示
除了将服务类型更改为LoadBalancer,还可以通过NodeIP:NodePort(服务类型设置为NodePort)访问 KubeSphere 控制台,注意需要在防火墙规则中打开 30880 端口。使用默认帐户和密码(
admin/P@88w0rd)登录控制台。
启用可插拔组件(可选)
上面的示例演示了默认的最小安装过程,要在KubeSphere中启用其他组件,请参阅启用可插拔组件。
反馈
这篇文章对您有帮助吗?
通过邮件接收 KubeSphere 最新的技术博客与产品更新的通知
感谢您的反馈。如果您有关于如何使用 KubeSphere 的具体问题,请在 Slack 上提问。如果您想报告问题或提出改进建议,请在 GitHub 存储库中打开问题。
 上一篇
上一篇

页面内容