使用流水线步骤模板
在 KubeSphere 3.4 版本中,DevOps 项目支持在流水线模板中使用步骤模板来优化使用流水线。
准备工作
您需要创建一个企业空间和一个用户 (project-admin),必须邀请该用户至该企业空间并赋予 workspace-self-provisioner 角色。有关更多信息,请参考创建企业空间、项目、用户和角色。
开启 DevOps 方式
以 admin 用户登录控制台,点击左上角的平台管理,选择集群管理。
点击定制资源定义,在搜索栏中输入 clusterconfiguration,点击搜索结果查看其详细页面。
在自定义资源中,点击 ks-installer 右侧的操作符号,选择编辑 YAML,将 DevOps 下的 enabled 配置更改为 true。
devops:
  enabled: true # 将“false”更改为“true”
- 使用 kubectl 命令检查安装过程。
kubectl logs -n kubesphere-system $(kubectl get pod -n kubesphere-system -l 'app in (ks-install, ks-installer)' -o jsonpath='{.items[0].metadata.name}') -f
- 使用 kubectl 命令验证是否安装完成。
kubectl get pod -n kubesphere-devops-system
对应的 pod 为 Running 状态即表示成功。
devops-apiserver-7576cfc79c-j9kdz    1/1     Running     0          23h
devops-controller-7bcbbfc546-lszkt   1/1     Running     0          23h
devops-jenkins-79b59bdd5-tjrj8       1/1     Running     0          23h
s2ioperator-0                        1/1     Running     0          23h
配置使用自定义步骤模板
创建自定义的步骤模板
目前自定义的步骤模板只能通过控制台去操作。
- 通过 kubectl 命令查看现有的步骤模板。
kubectl get clustersteptemplates
NAME                 AGE
archiveartifacts     6d7h
build                6d7h
cd                   6d7h
checkout             6d7h
container            6d7h
echo                 6d7h
error                6d7h
git                  6d7h
input                6d7h
junit                6d7h
mail                 6d7h
retry                6d7h
script               6d7h
shell                6d7h
sleep                6d7h
timeout              6d7h
waitforqualitygate   6d7h
withcredentials      6d7h
withsonarqubeenv     6d7h
- 创建自定义步骤模板,先创建一个 YAML 文件,简单实现写文件。
apiVersion: devops.kubesphere.io/v1alpha3
kind: ClusterStepTemplate
metadata:
  annotations:
    devops.kubesphere.io/descriptionEN: Write message to file in the build
    devops.kubesphere.io/descriptionZH: 在构建过程中写入文件
    devops.kubesphere.io/displayNameEN: writeFile
    devops.kubesphere.io/displayNameZH: 写文件
    meta.helm.sh/release-name: devops
    meta.helm.sh/release-namespace: kubesphere-devops-system
    step.devops.kubesphere.io/icon: loudspeaker
  generation: 1
  labels:
    app.kubernetes.io/managed-by: Helm
    step.devops.kubesphere.io/category: General
  name: writefile
spec:
  parameters:
  - display: file
    name: file
    required: true
    type: string
  - display: text
    name: text
    required: true
    type: string
  runtime: dsl
  template: |
    {
      "arguments": [
        {
          "key": "file",
          "value": {
            "isLiteral": true,
            "value": "{{.param.file}}"
          }
        },
        {
          "key": "text",
          "value": {
            "isLiteral": true,
            "value": "{{.param.text}}"
          }
        }
      ],
      "name": "writeFile"
    }
信息
步骤模板是通过 CRD 实现的,详细可参考步骤模板的 CRD。
yaml 文件中的 metadata.name 字段和 spec.template.name 字段需要保持一致,同时 name 字段依赖 Jenkins 中的函数来实现对应功能,如上的 YAML 文件中使用了 writeFile 函数来实现输出功能,详细可参考 pipeline steps。
- 使用 kubectl 命令创建自定义的步骤。
kubectl apply -f test-writefile.yaml
- 再次查看自定义步骤模板 writefile 已创建。
kubectl get clustersteptemplates
NAME                 AGE
archiveartifacts     37d
build                37d
cd                   37d
checkout             37d
container            37d
echo                 37d
error                37d
git                  37d
input                37d
junit                37d
mail                 37d
pwd                  28d
retry                37d
script               37d
shell                37d
sleep                37d
timeout              37d
waitforqualitygate   37d
withcredentials      37d
withsonarqubeenv     37d
writefile            28s
使用自定义步骤模板
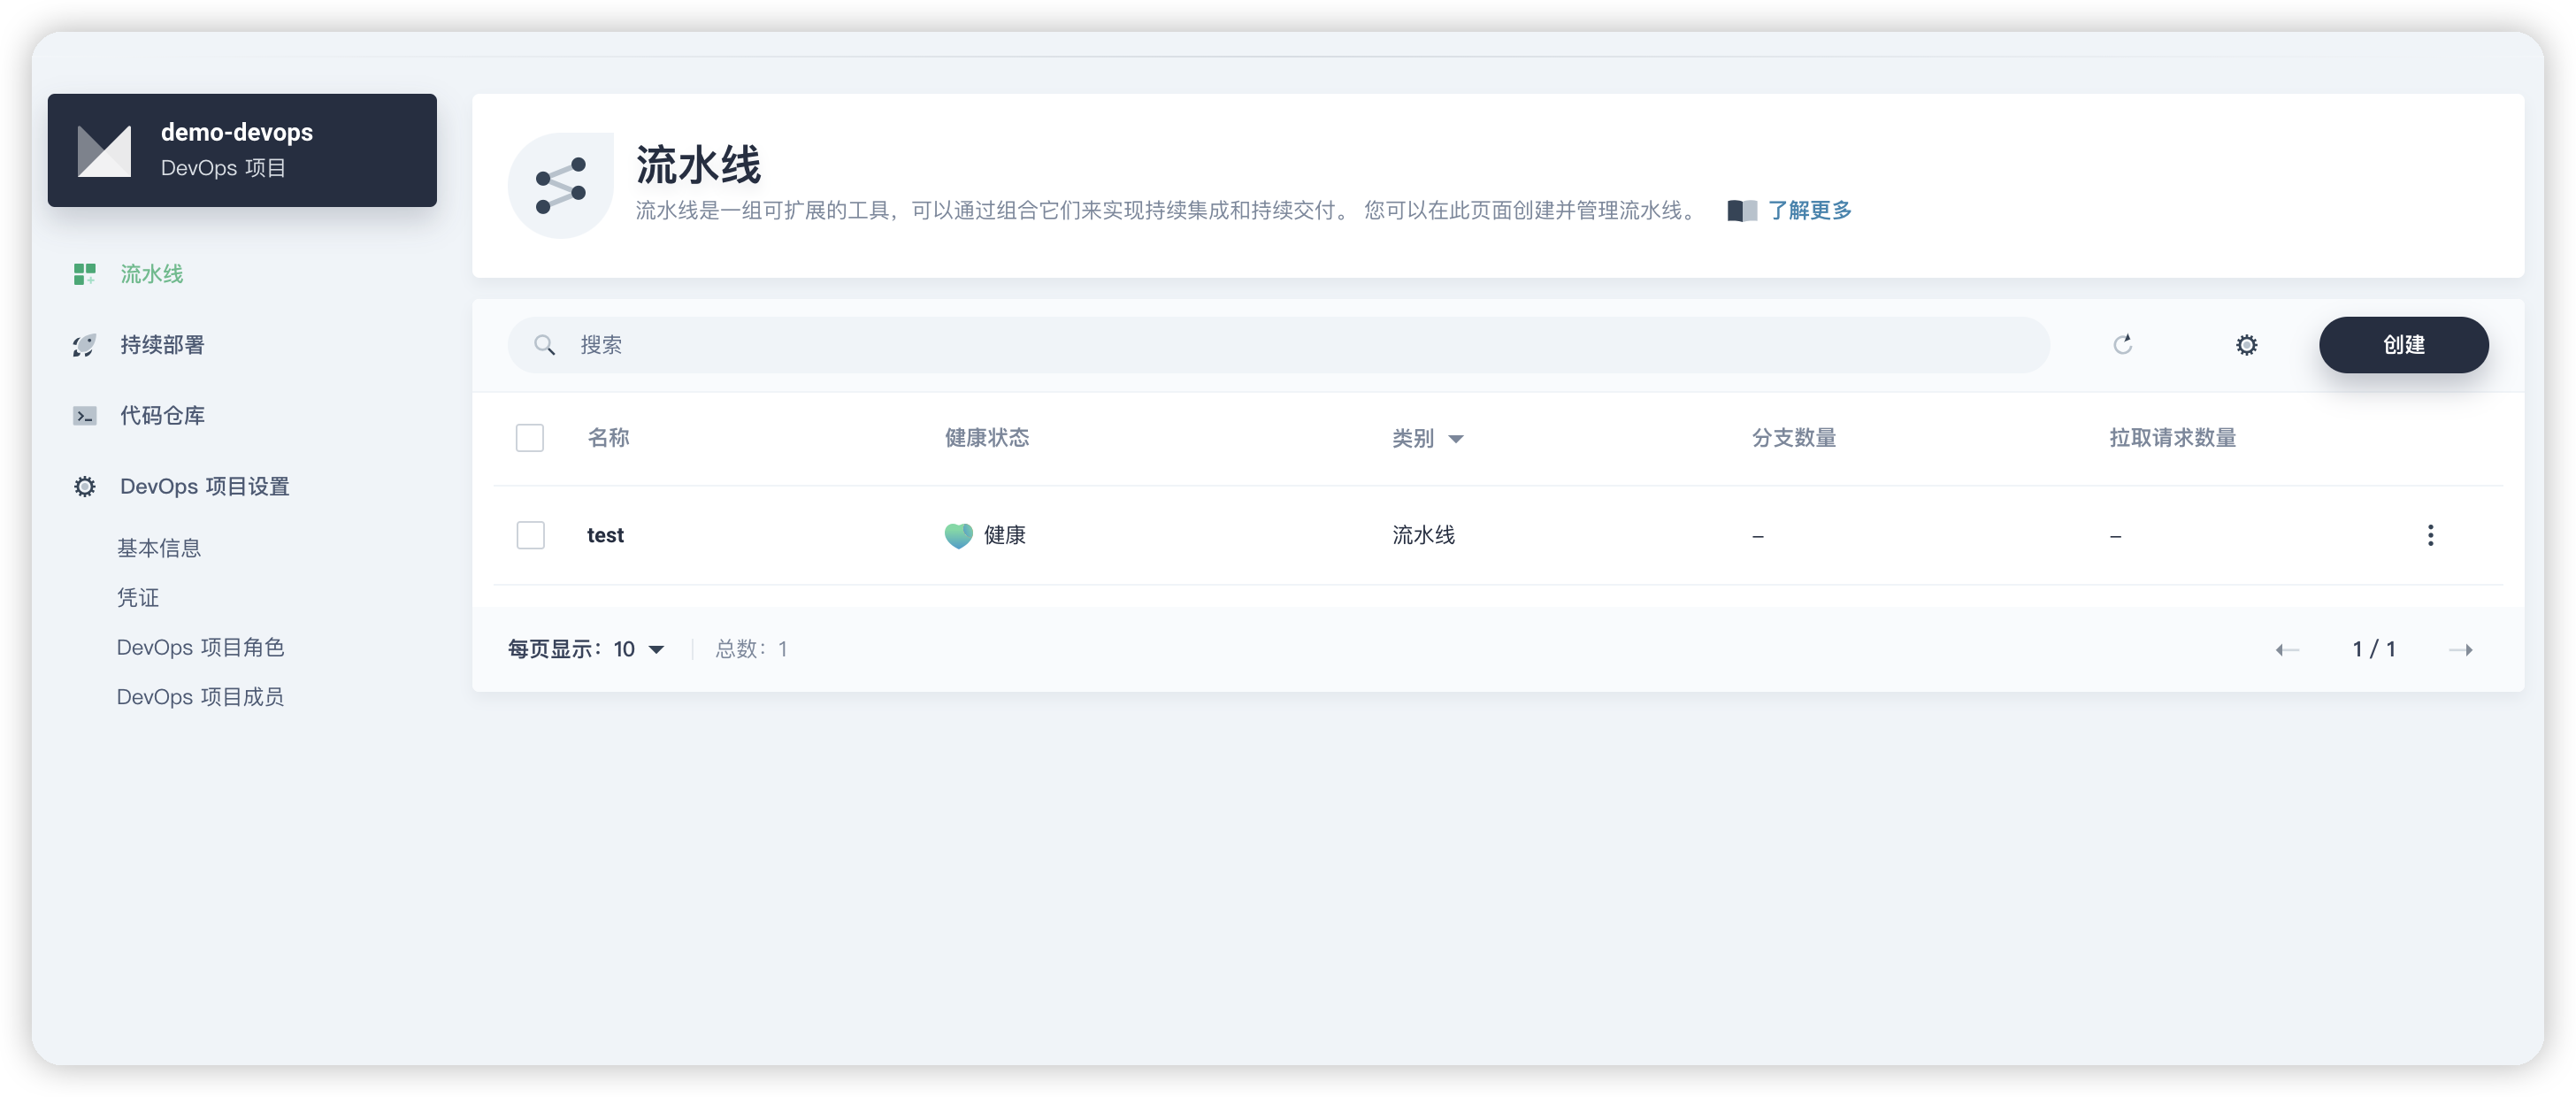
- 选择进入 DevOps 项目后,建立新的 pipeline 流水线。

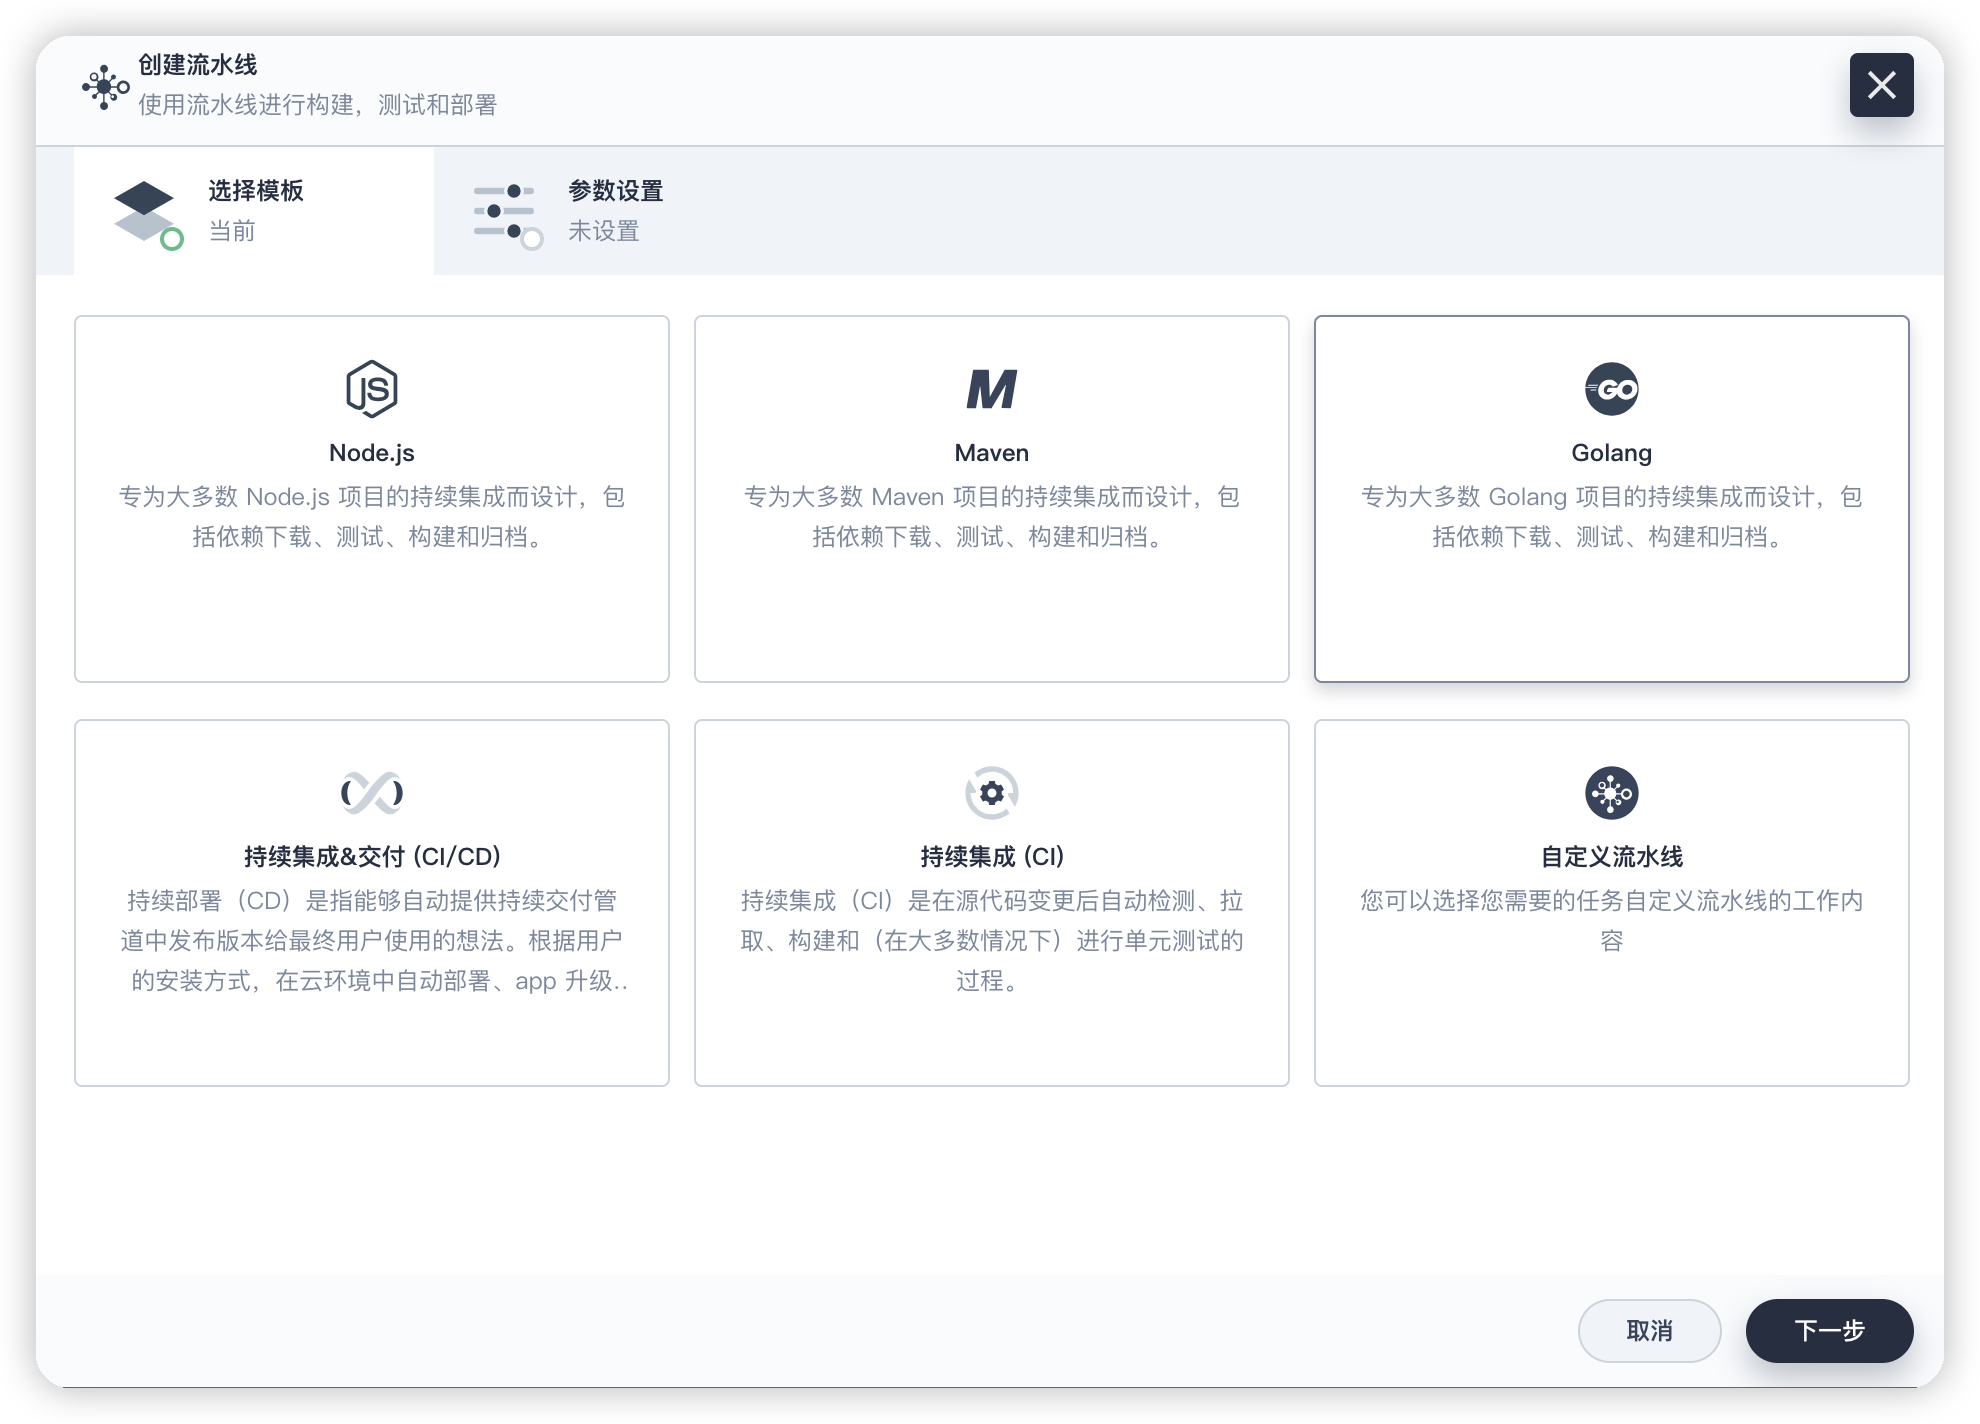
- 进入编辑流水线中,可以按需选择固定模板(比如 Node.js/Maven/Golang 等),也可以选择创建自定义流水线。

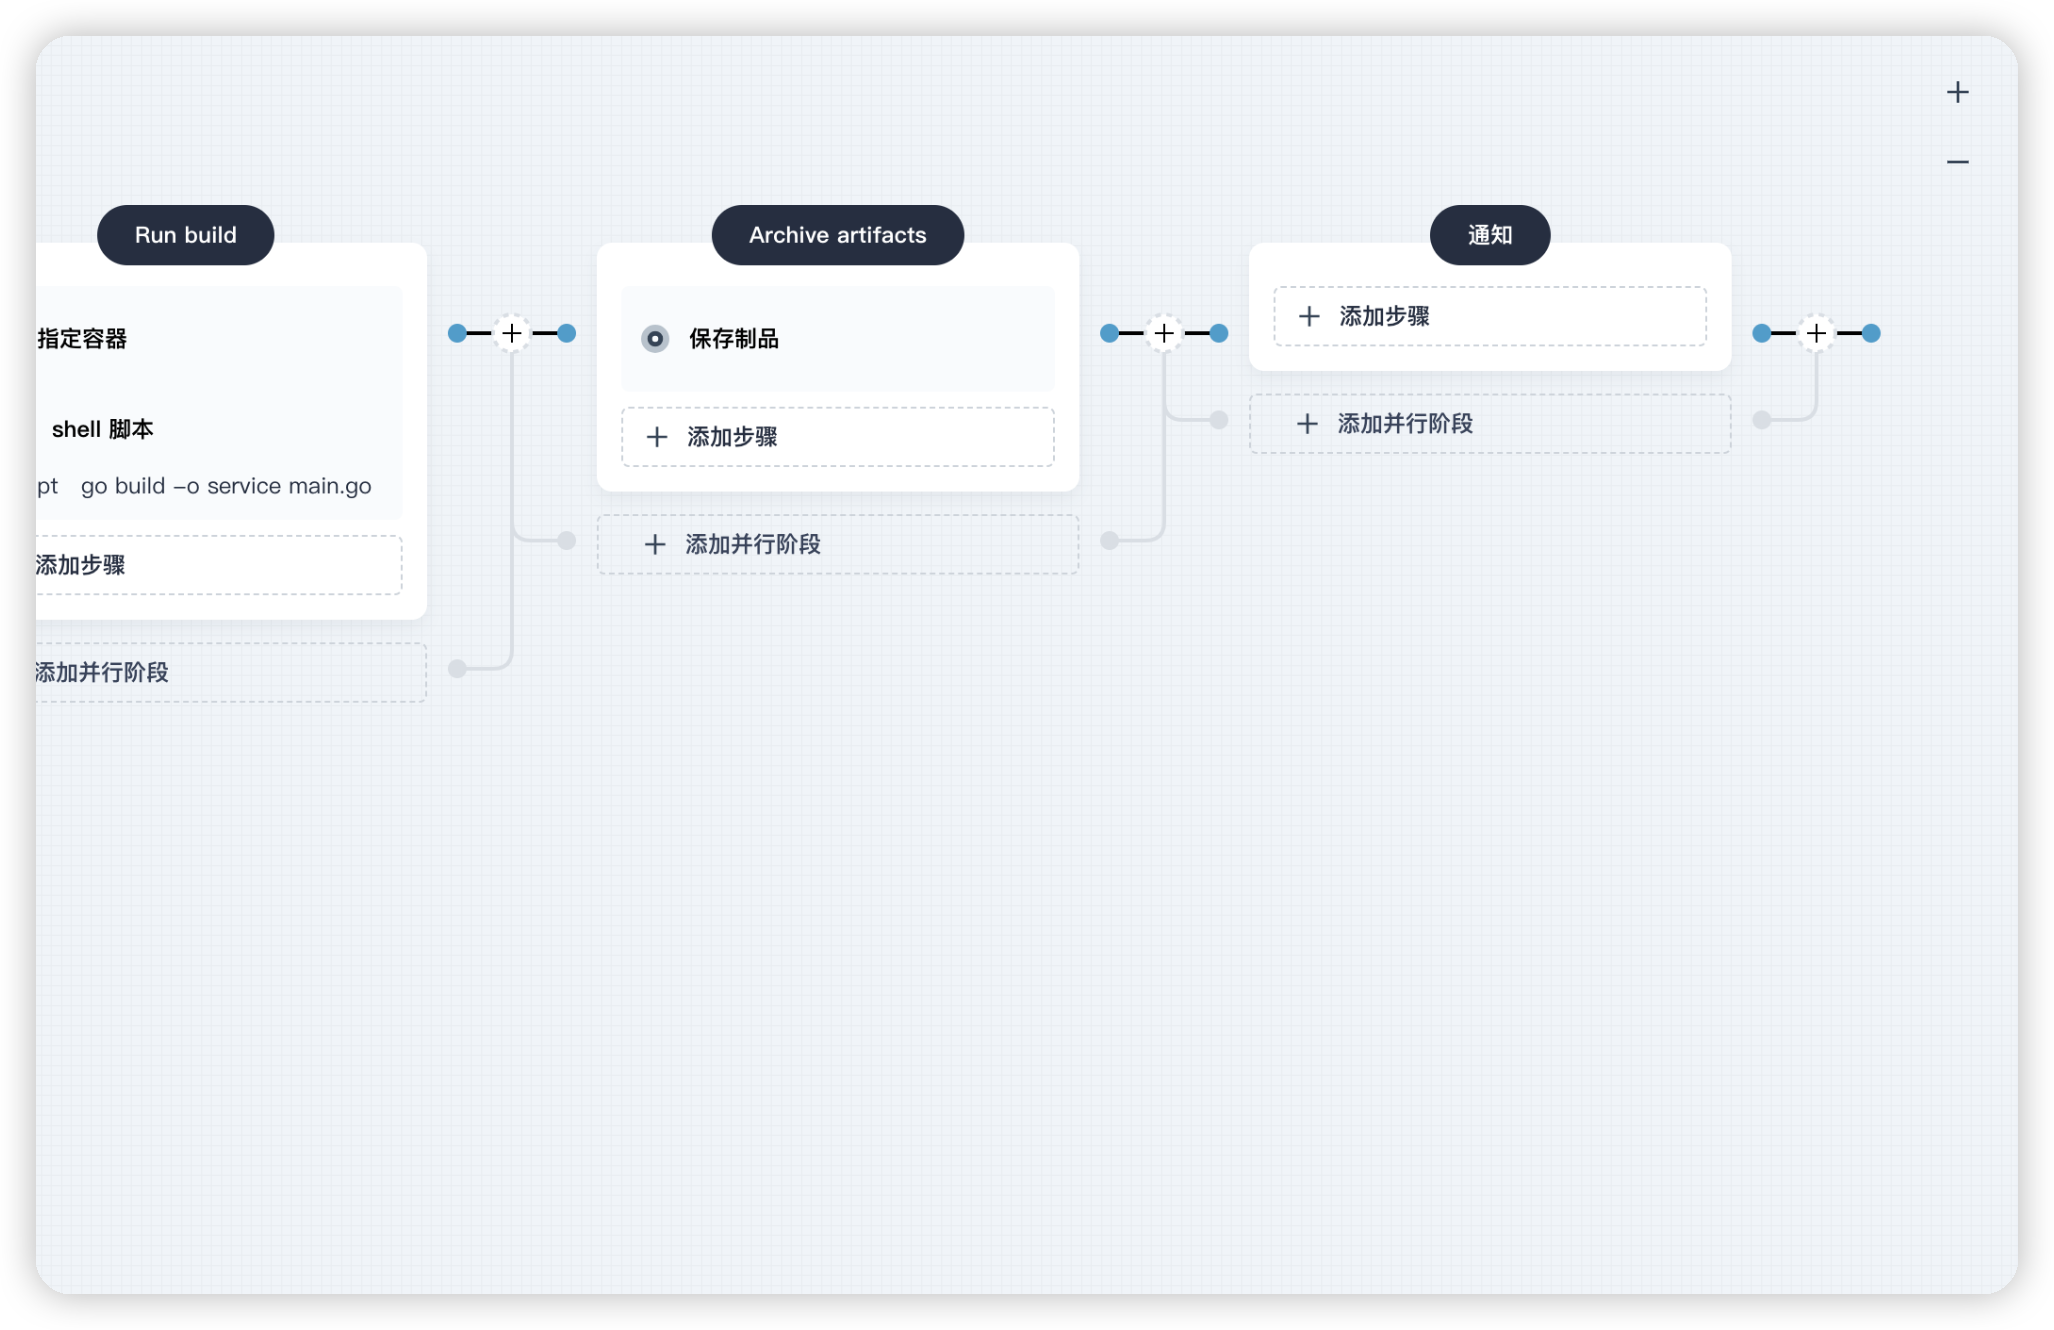
- 本示例选择固定模板 Golang 创建流水线,进入流水线后,可以按需增加一个阶段。选择在流水线最后创建一个通知的阶段。

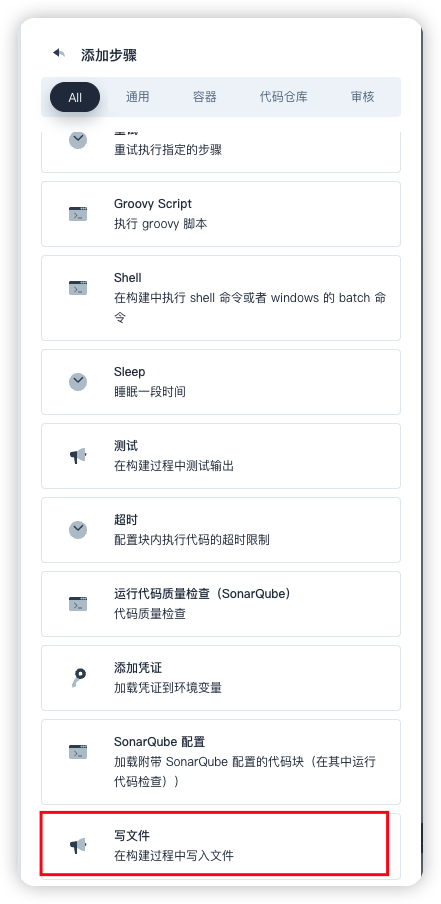
- 继续添加执行步骤,这里有很多的步骤模板,选择“写文件”这个自定义步骤。

至此,就完成了一个自定义步骤模板的配置。
反馈
这篇文章对您有帮助吗?
通过邮件接收 KubeSphere 最新的技术博客与产品更新的通知
感谢您的反馈。如果您有关于如何使用 KubeSphere 的具体问题,请在 Slack 上提问。如果您想报告问题或提出改进建议,请在 GitHub 存储库中打开问题。
页面内容


 上一篇
上一篇
